thin pan pizzas baked in 10" round pans, crispy yet somehow soft. It’s not focaccia, it’s not thin-crust, it’s its own thing - it’s South Shore Bar Pizza

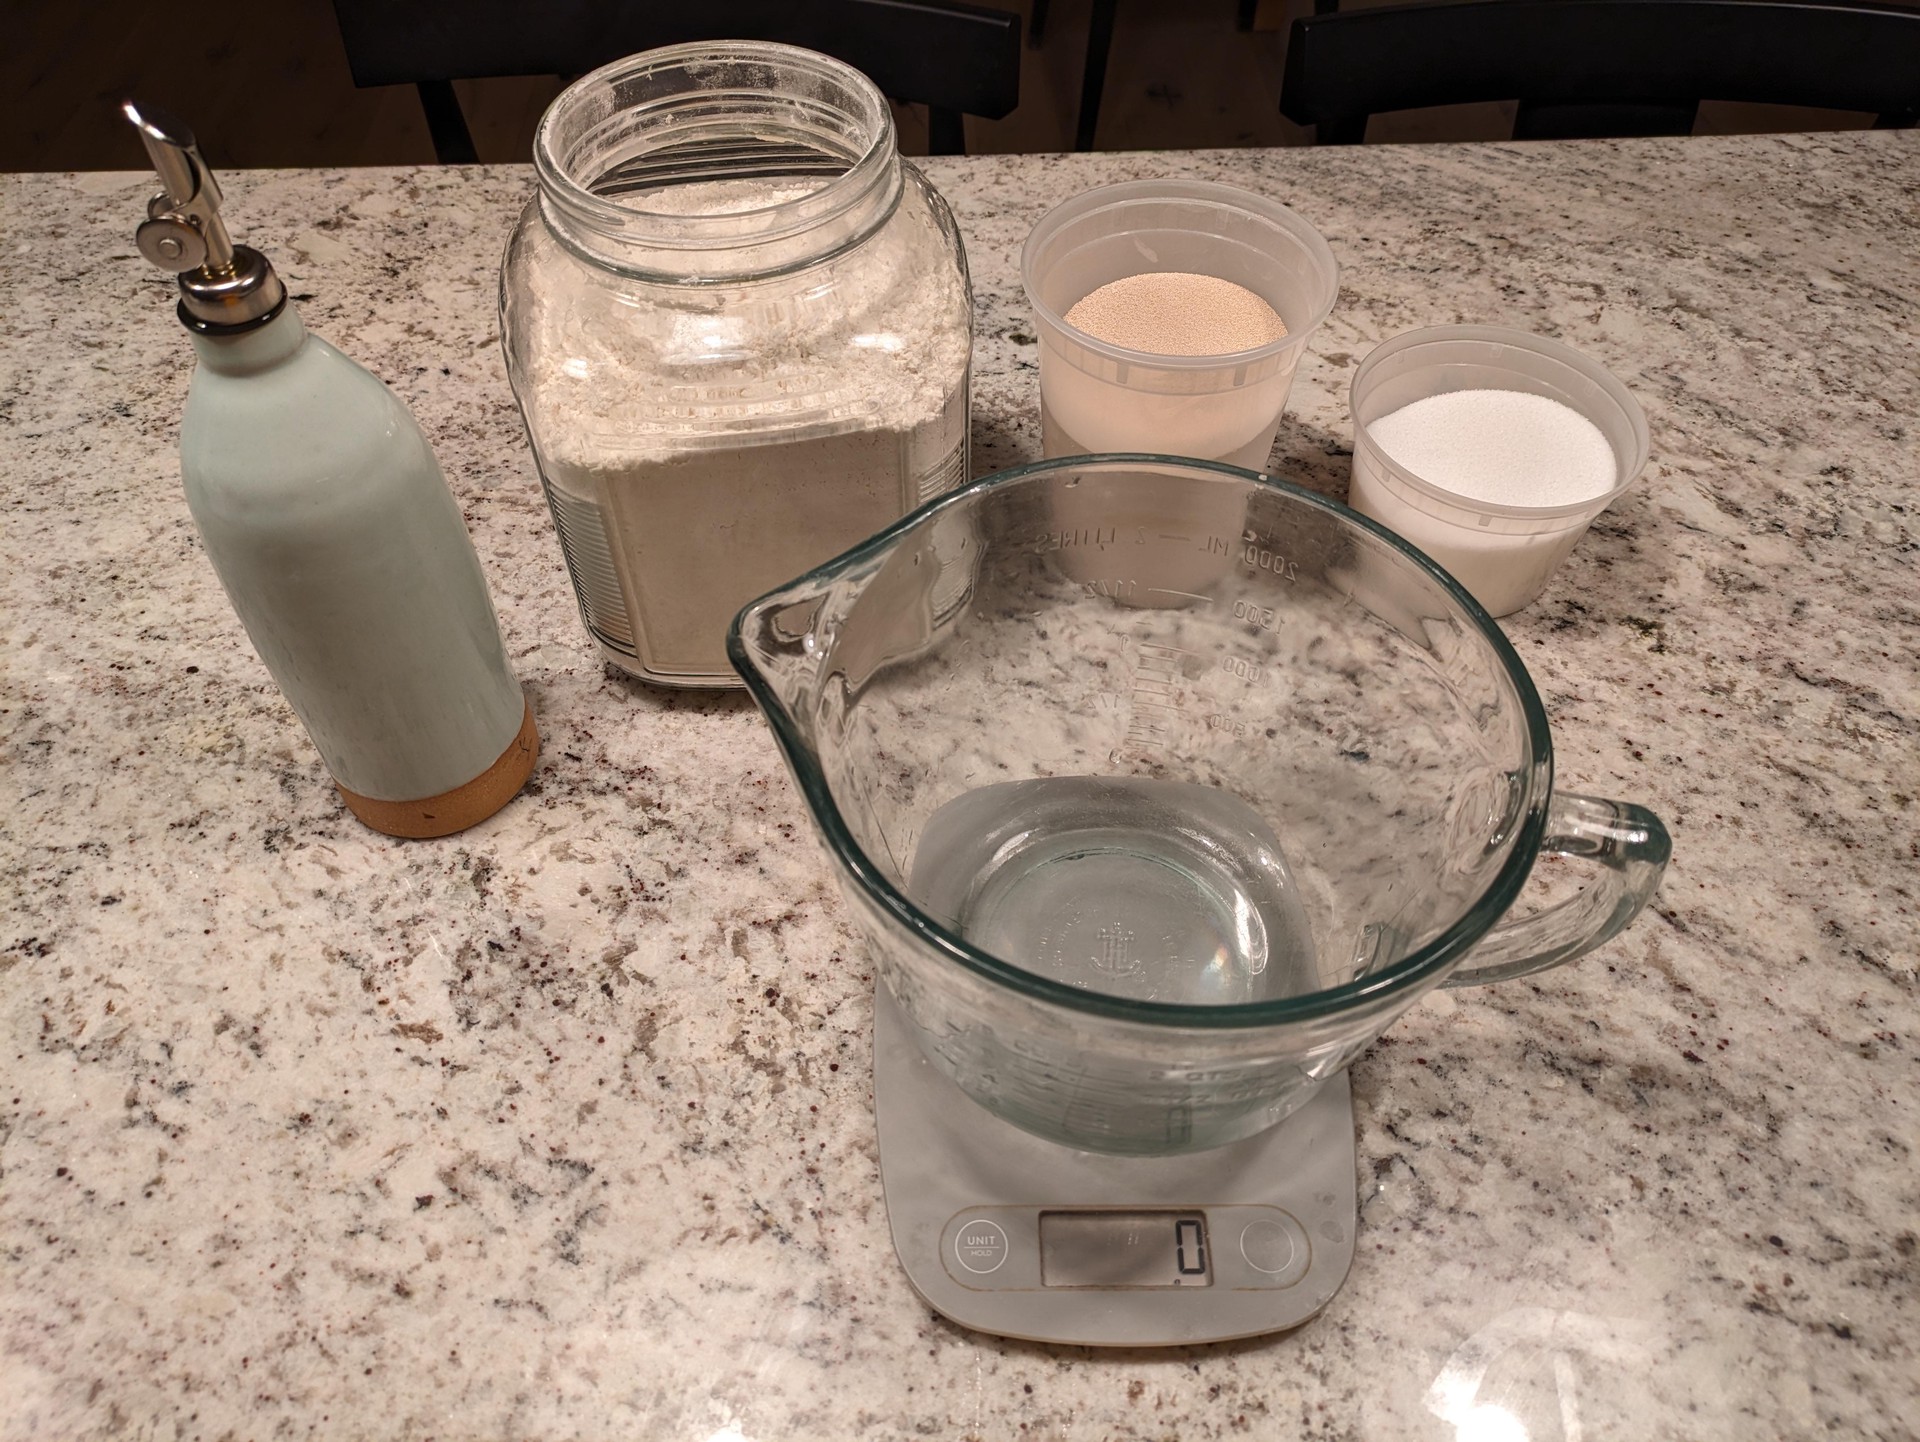
Ingredients
Dough
- 420 g all-purpose flour
- 272 g water
- 8 g salt
- 35 g olive oil
- 1/2 tsp instant yeast
- butter-flavored Crisco (for panning)
Sauce
Cheese
- cheddar and low-moisture, whole-milk mozzarella
- parmesan reggiano or pecorino romano
Day 1 - Dough
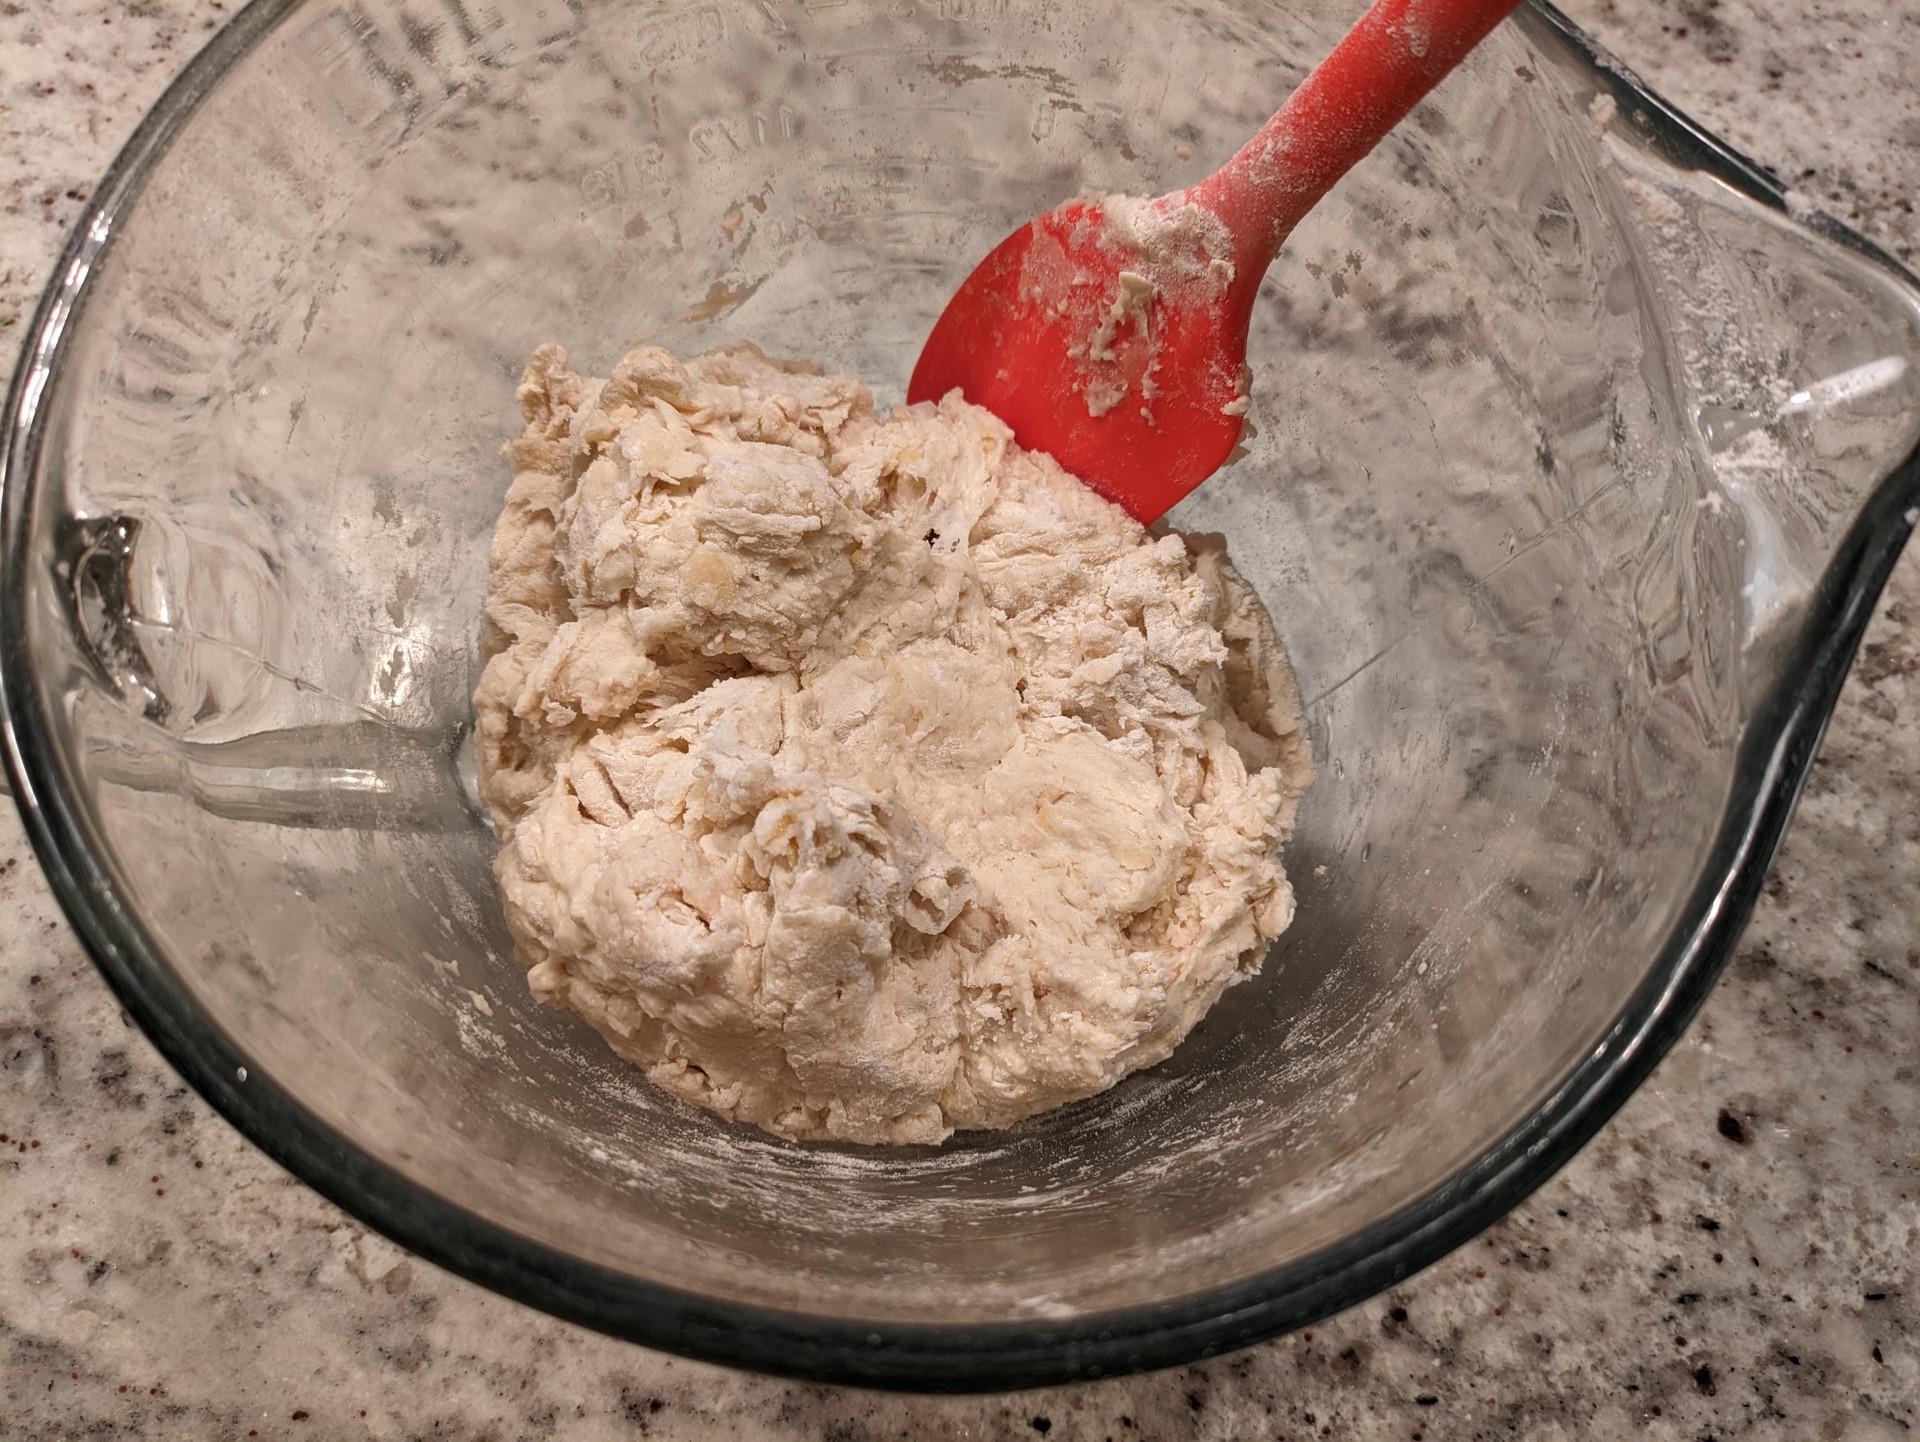
- In medium bowl, use a spatula to mix water with salt, yeast (let it sit a minute first), and oil. The oil won’t mix well, don’t worry about it. Add flour and use spatula to combine. Switch between moving wet to dry and scraping the sides, until it’s starting to come together
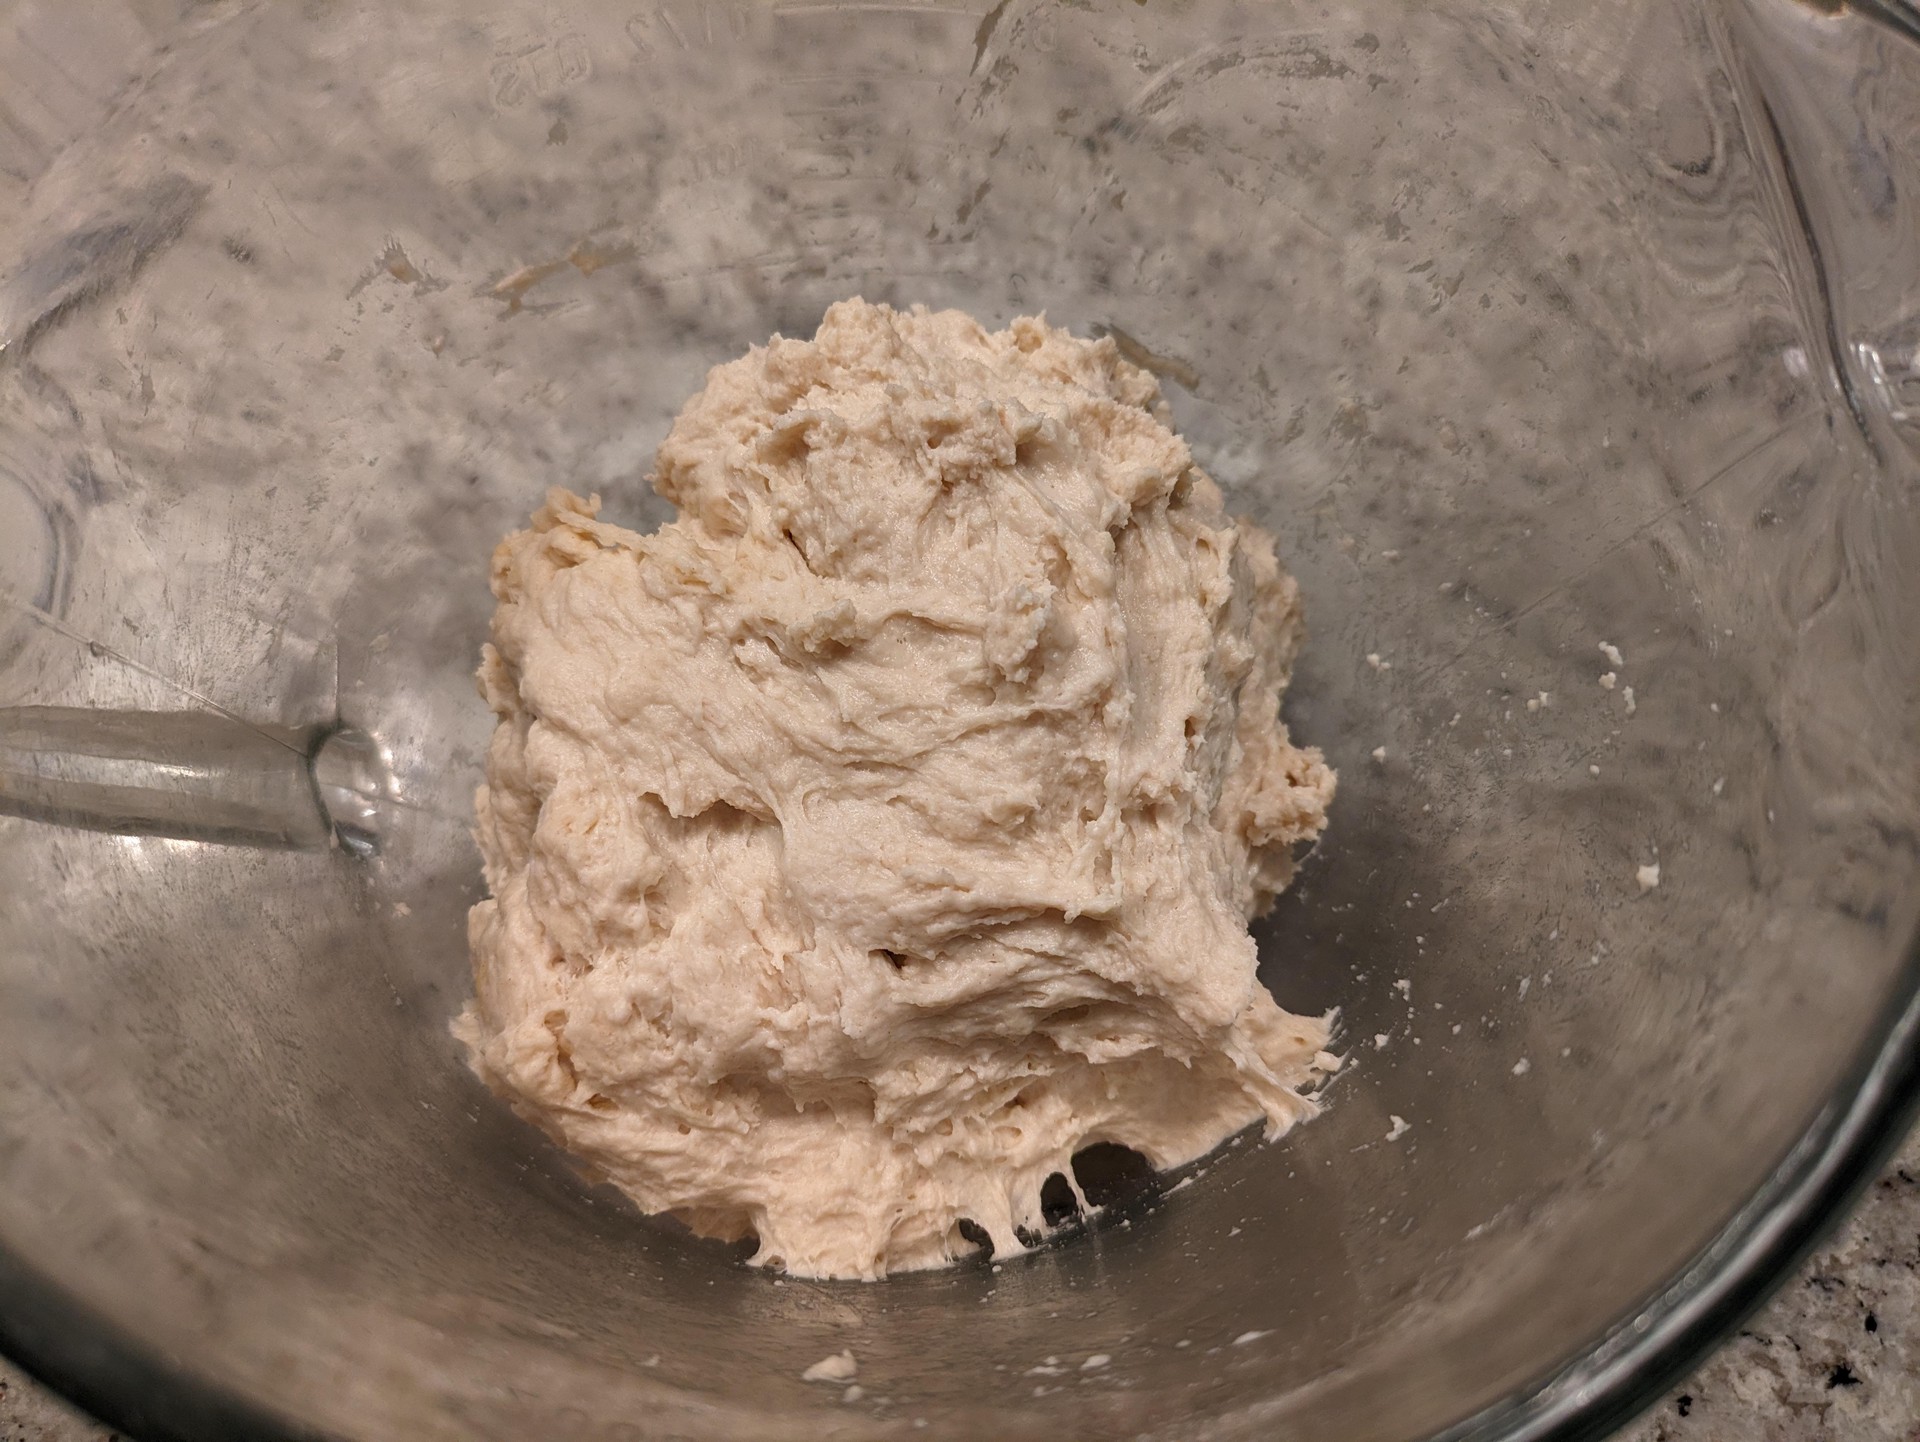
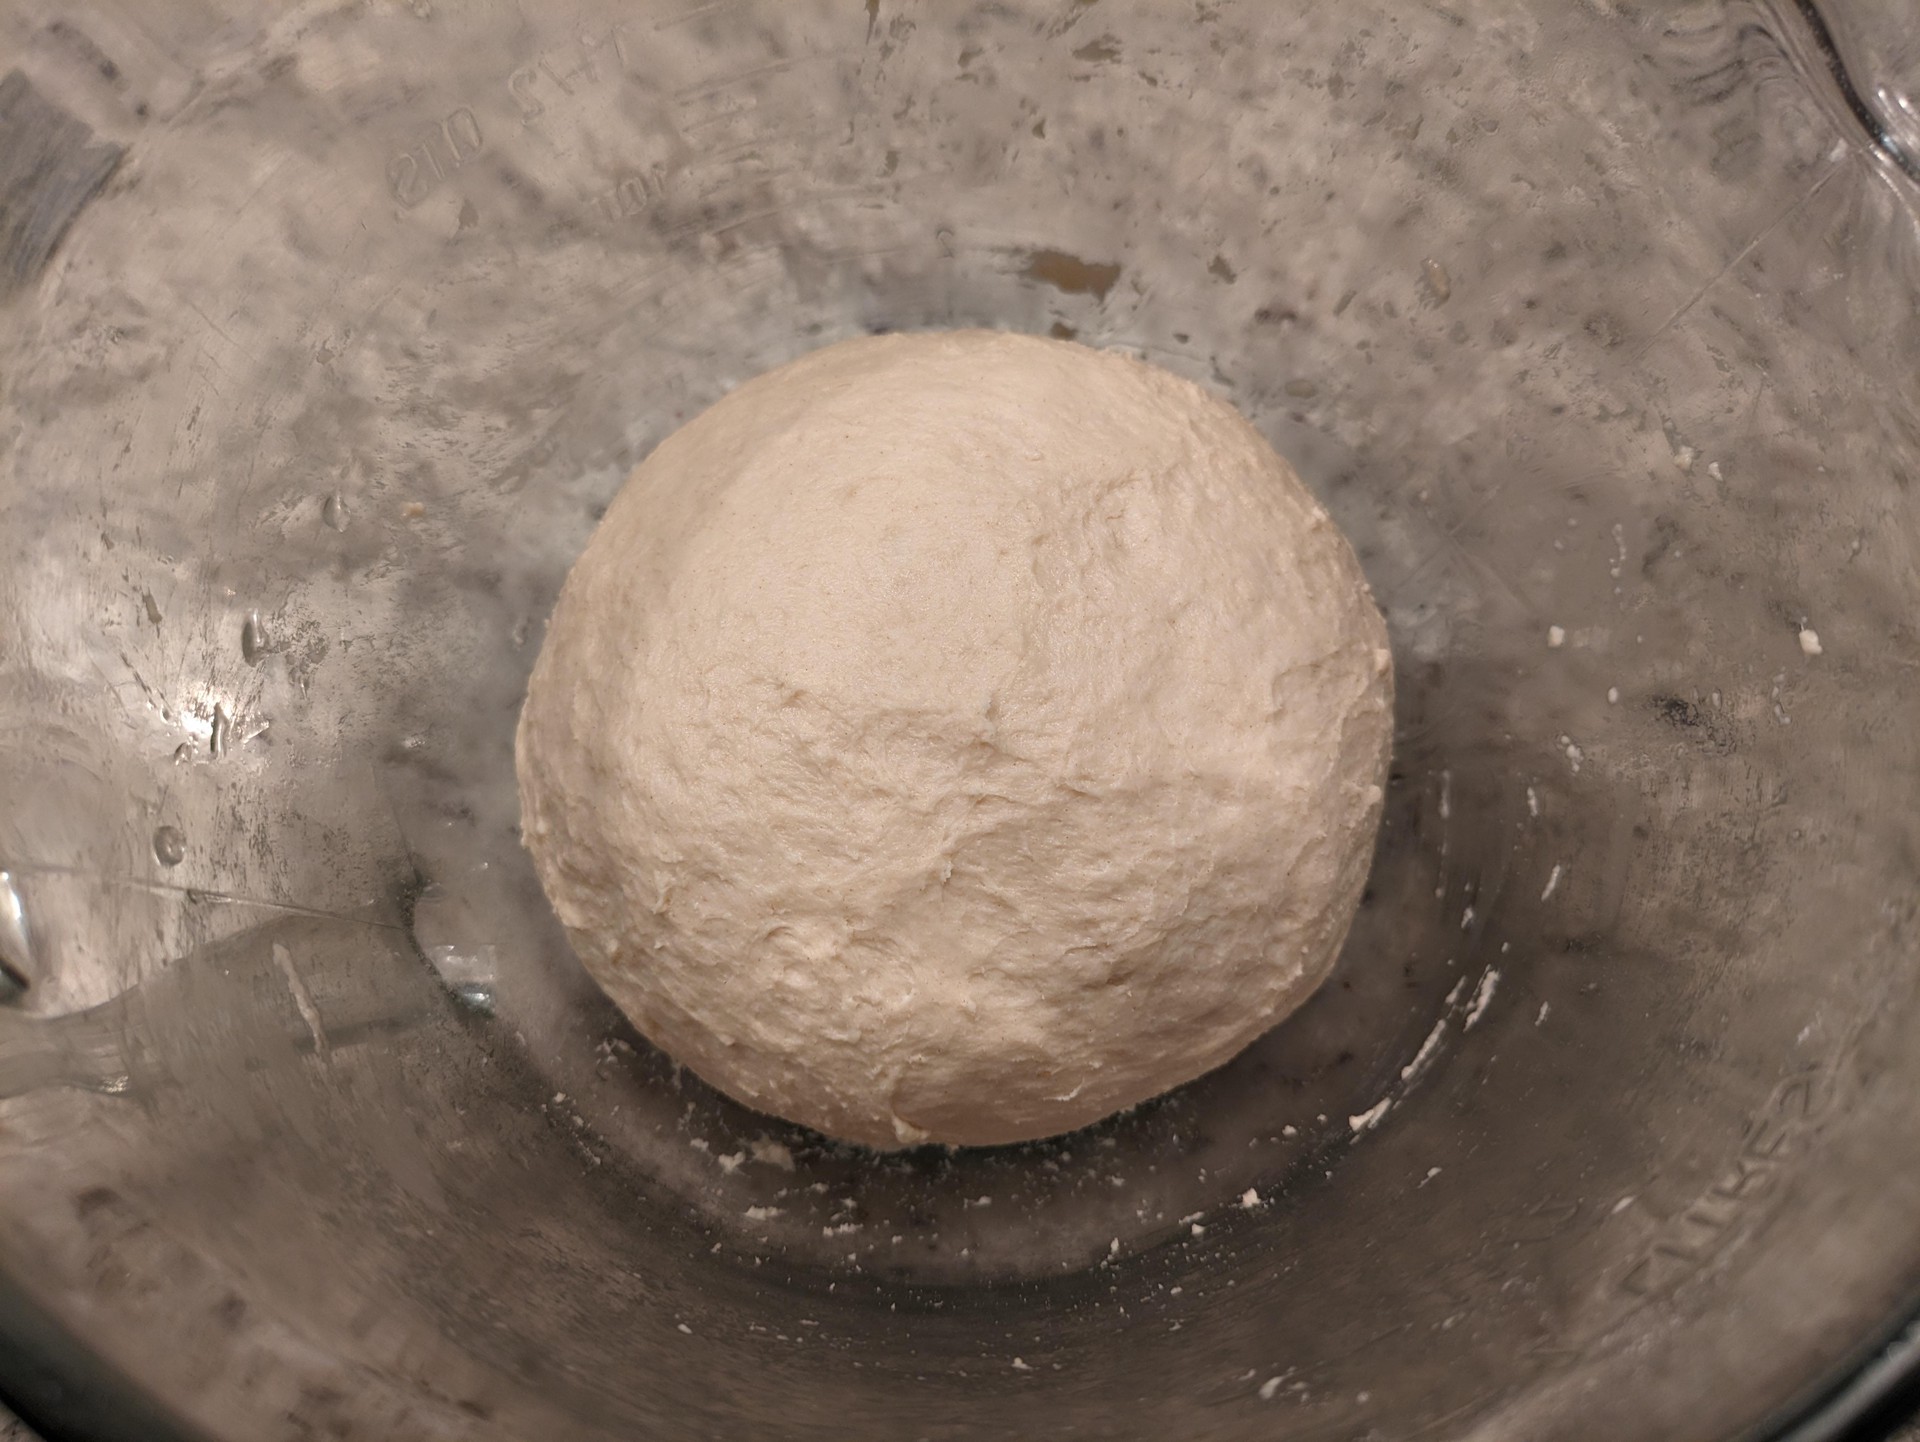
- Switch to your hands and knead for 1-2 minutes, ensuring any oil pockets get smoothed out and all the flour gets hydrated. Form into a shaggy ball. It won’t look good, don’t worry about it.
- Cover bowl and put in fridge for 24-48 hours
Day 2 or 3 - Pizza Day
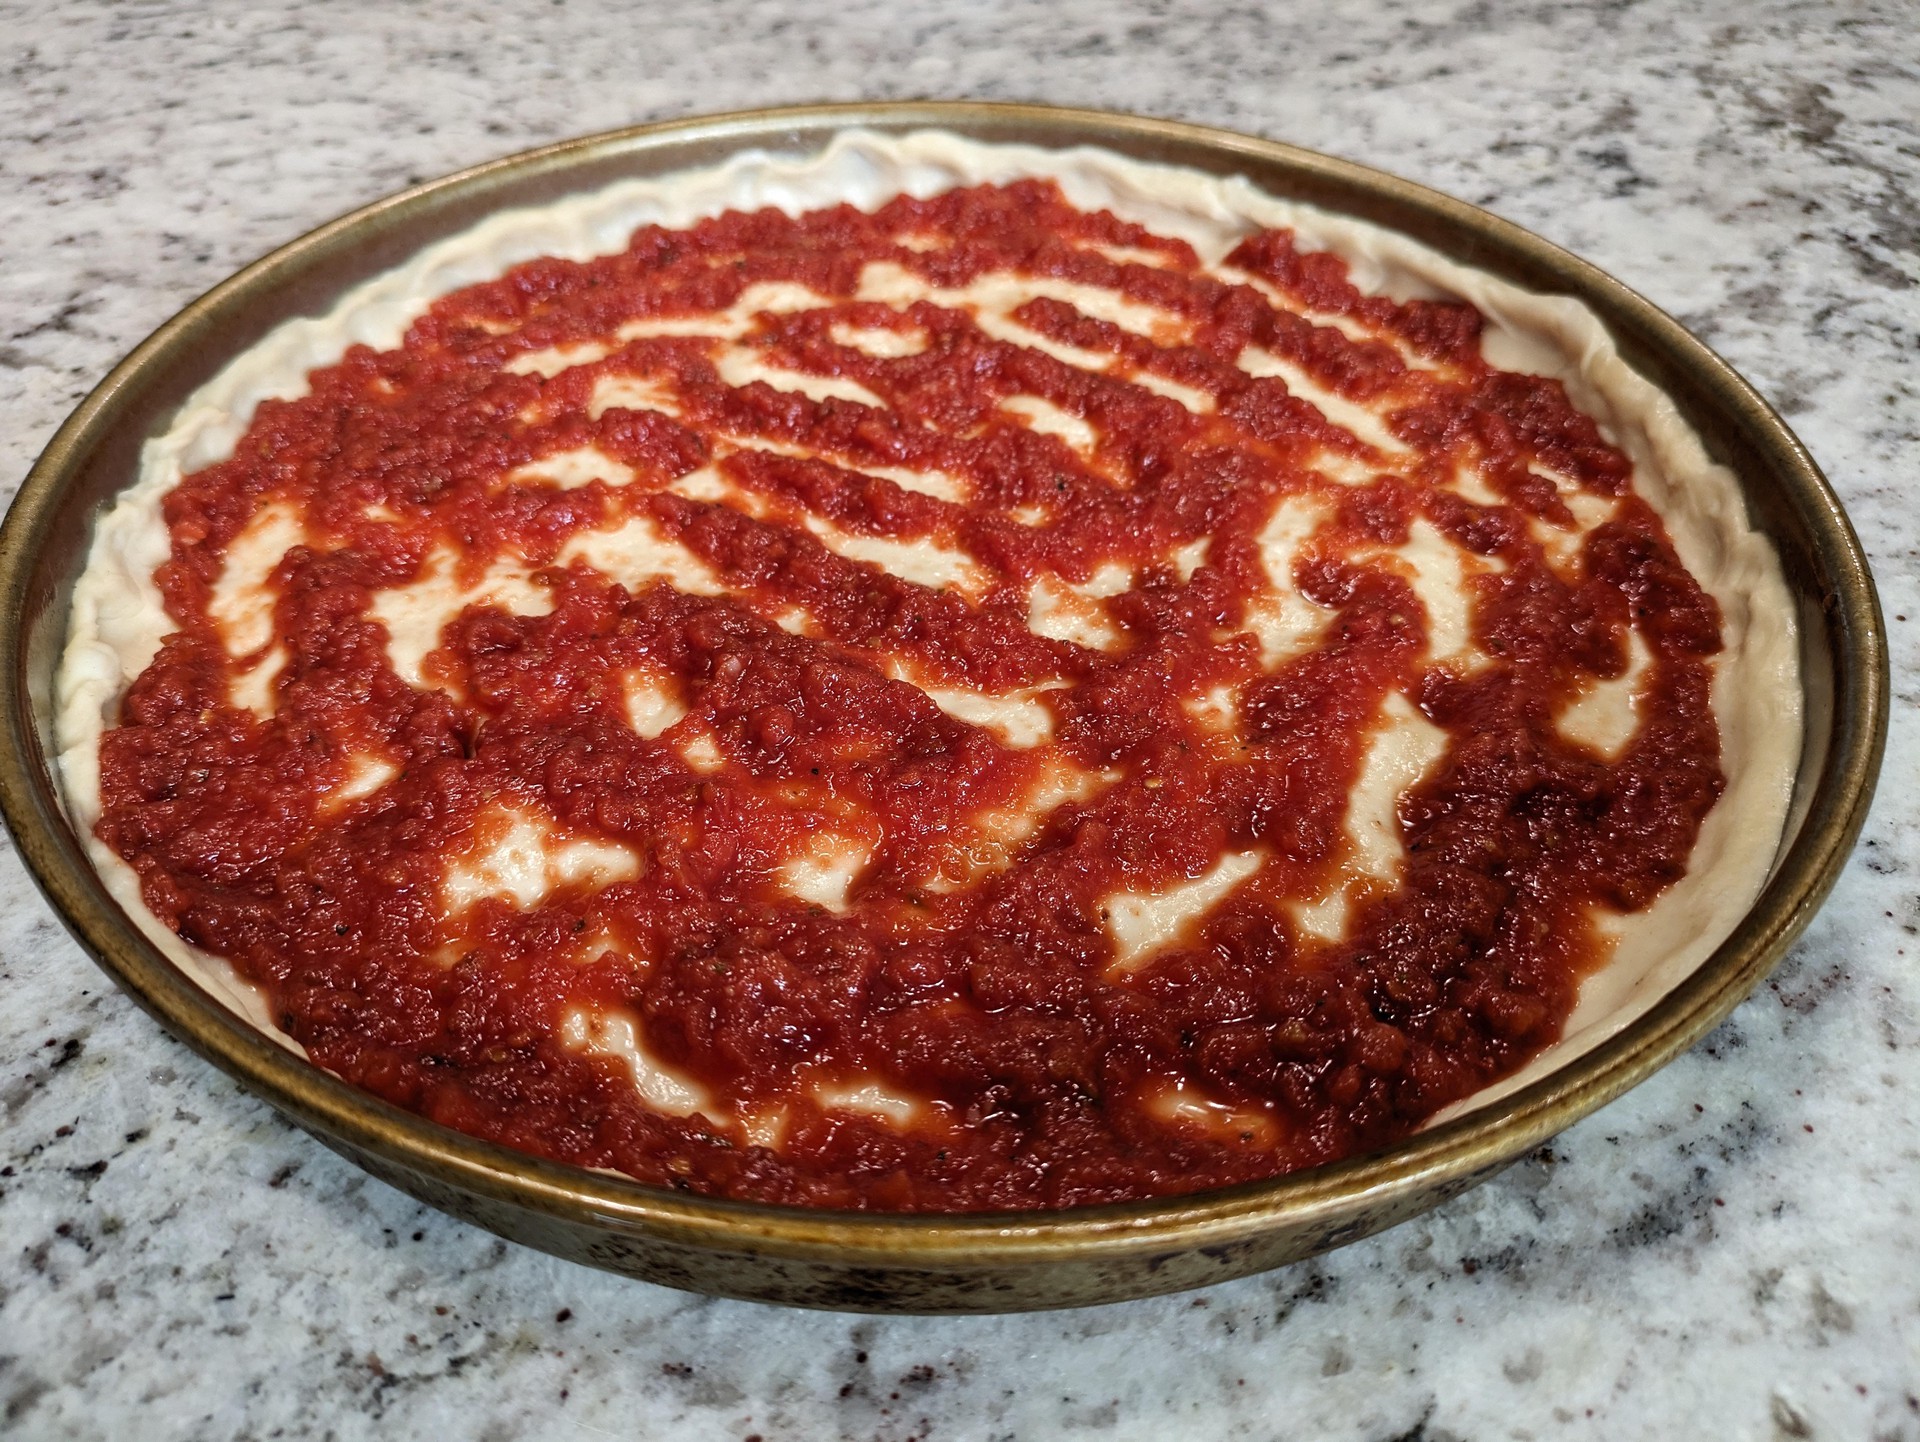
- Sauce (anytime) => scrape tomatoes into bowl or measuring cup and taste. Salt comes first. Add a pinch and taste, until it doesn’t taste bland but also doesn’t taste salty. Crush the oregano leaves in your palm before adding. Press or finely mince garlic clove before adding. Mix and taste. If it tastes too savory or sharp, add a pinch of sugar to balance it out. Leave uncovered at room temp
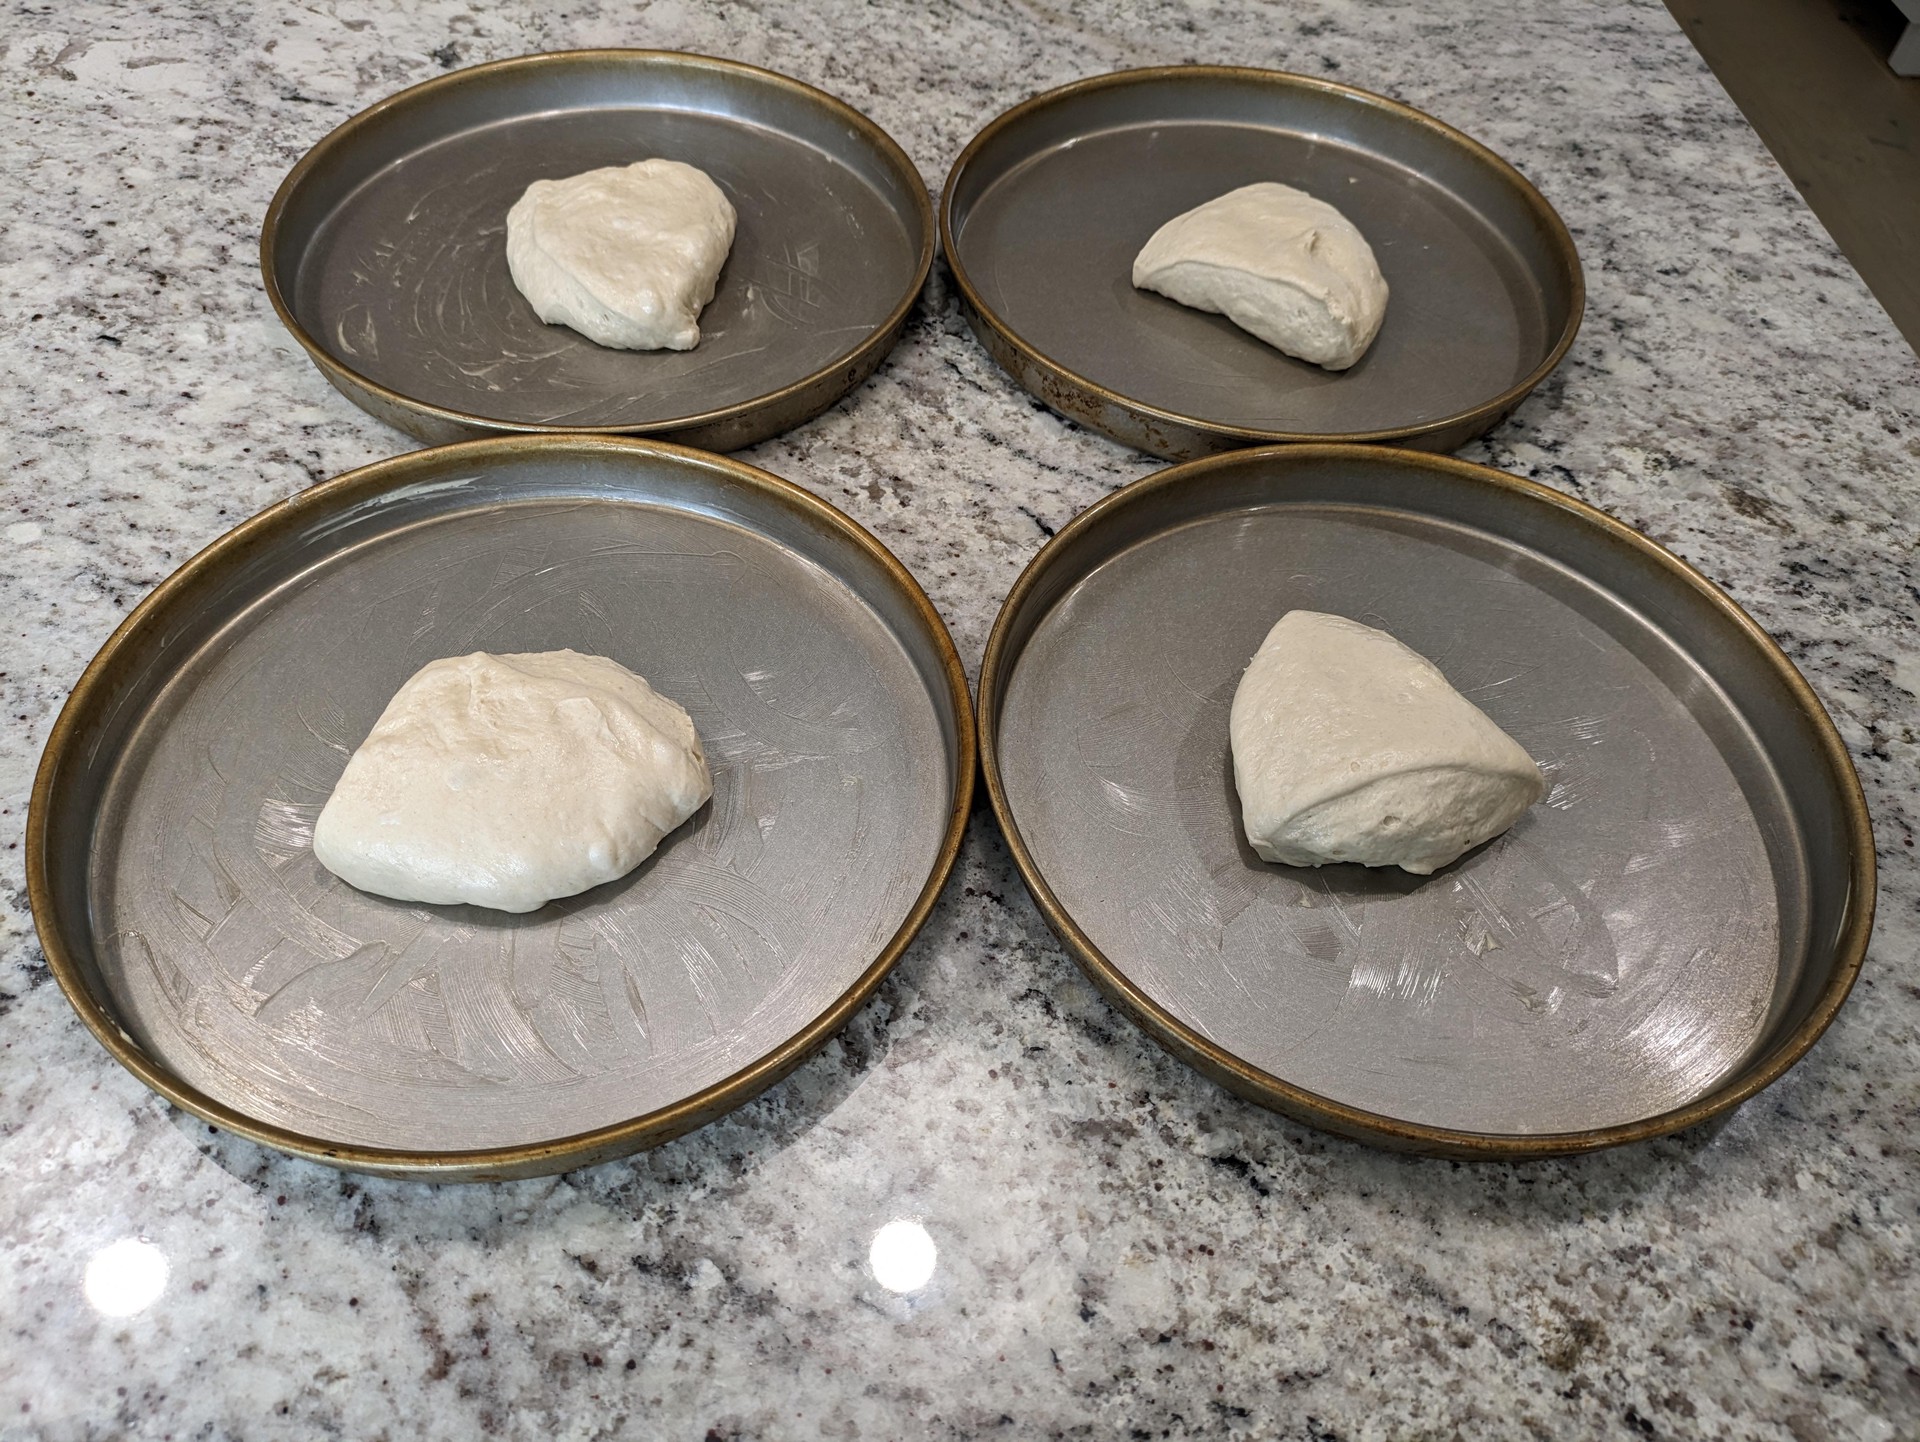
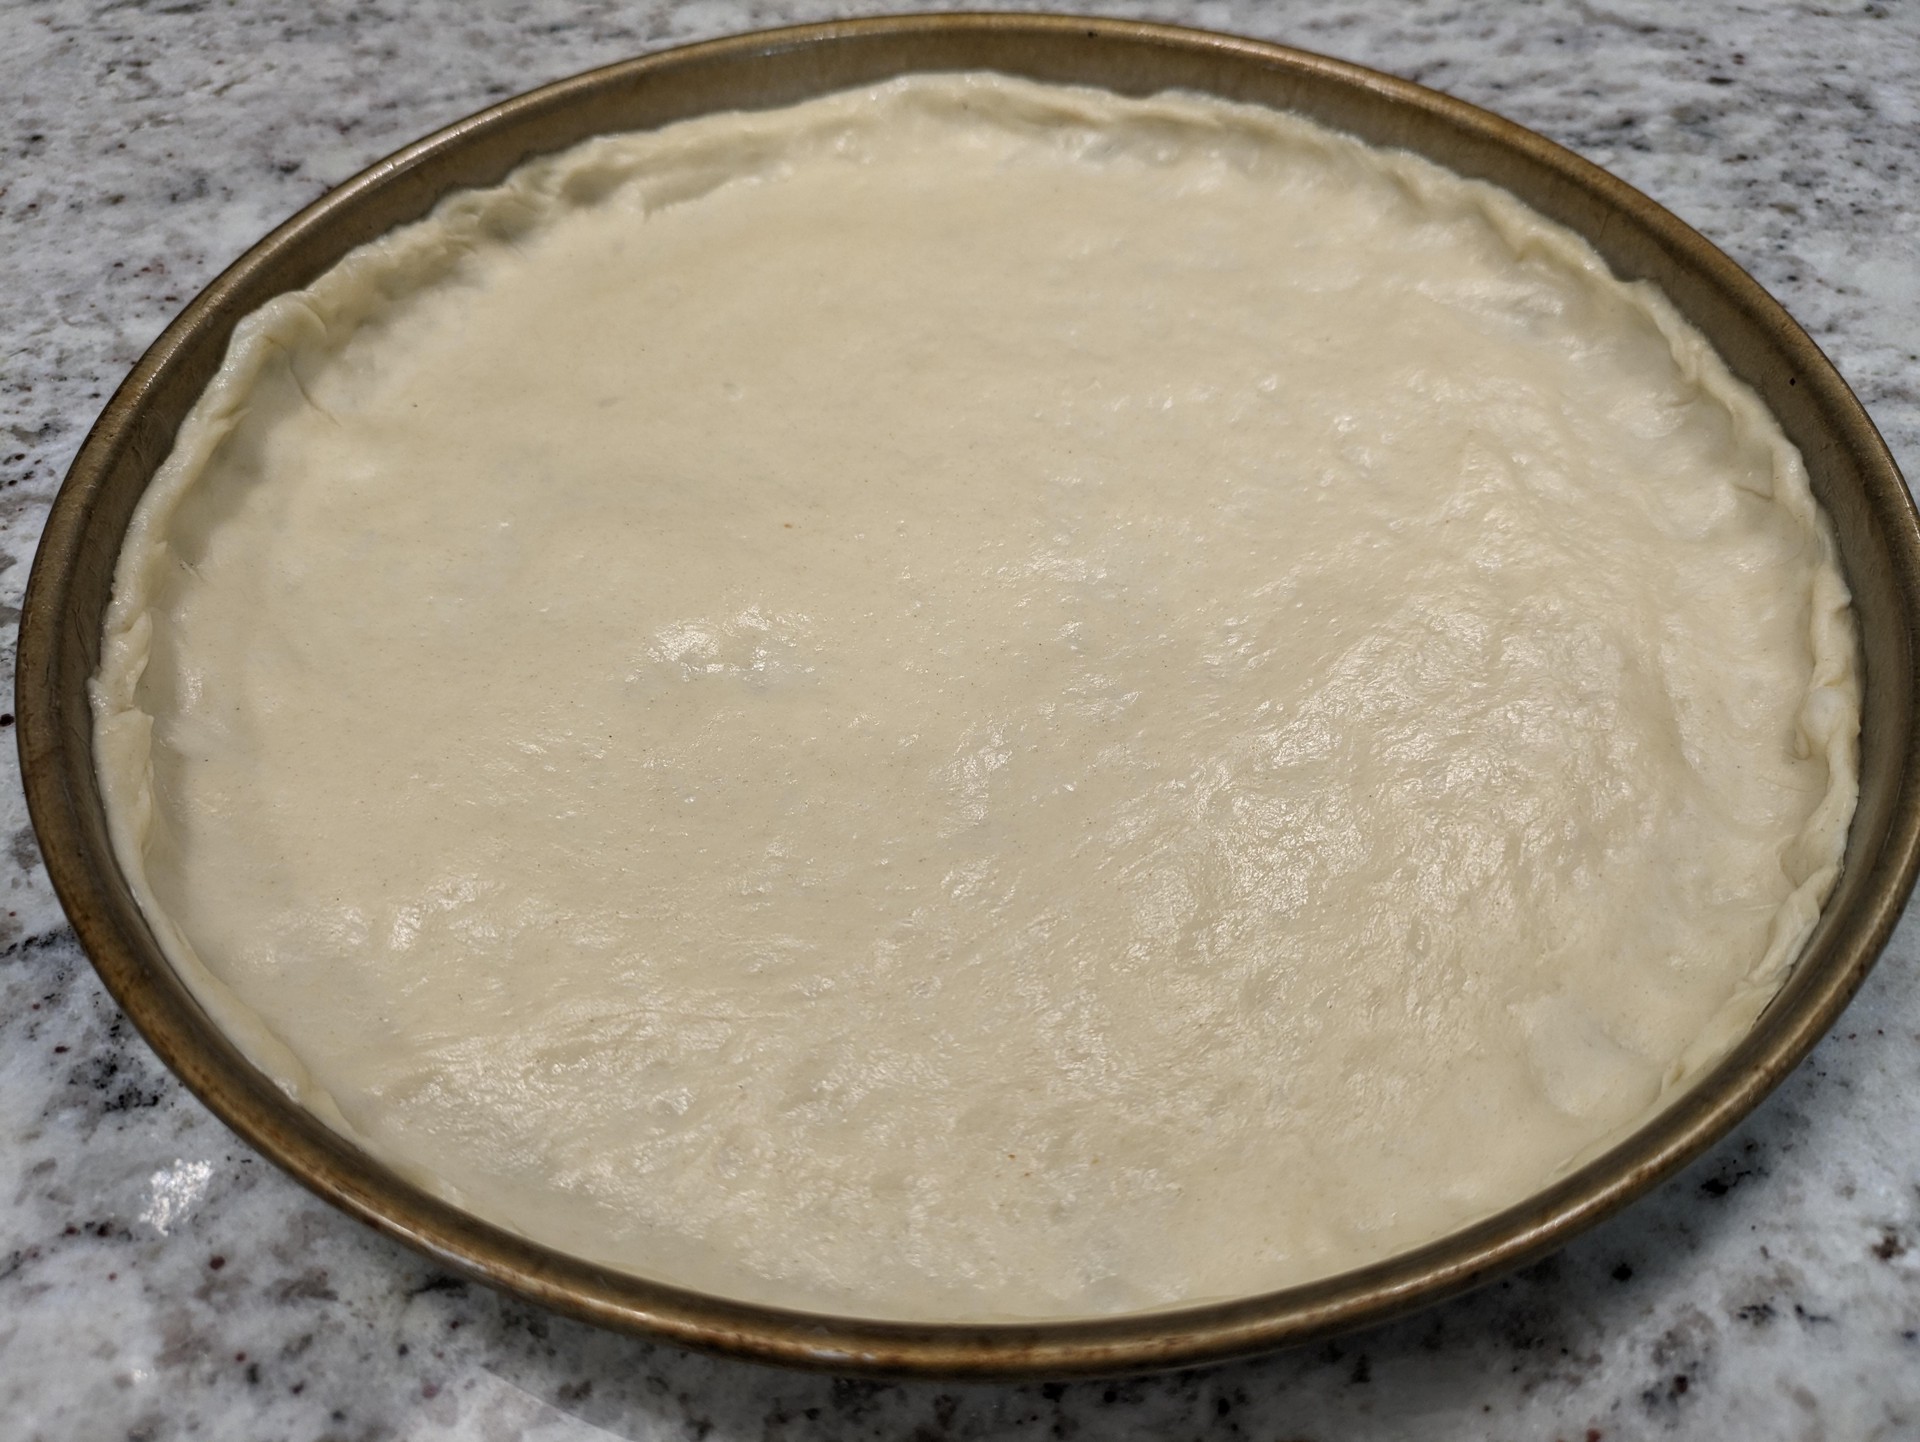
- Early Afternoon => remove dough from fridge, to rise at room temperature for a few hours (more in winter, less in summer). The dough ball should inflate a noticable amount; it’s OK if it doubles / balloons. This part is forgiving since the air gets knocked out when panning
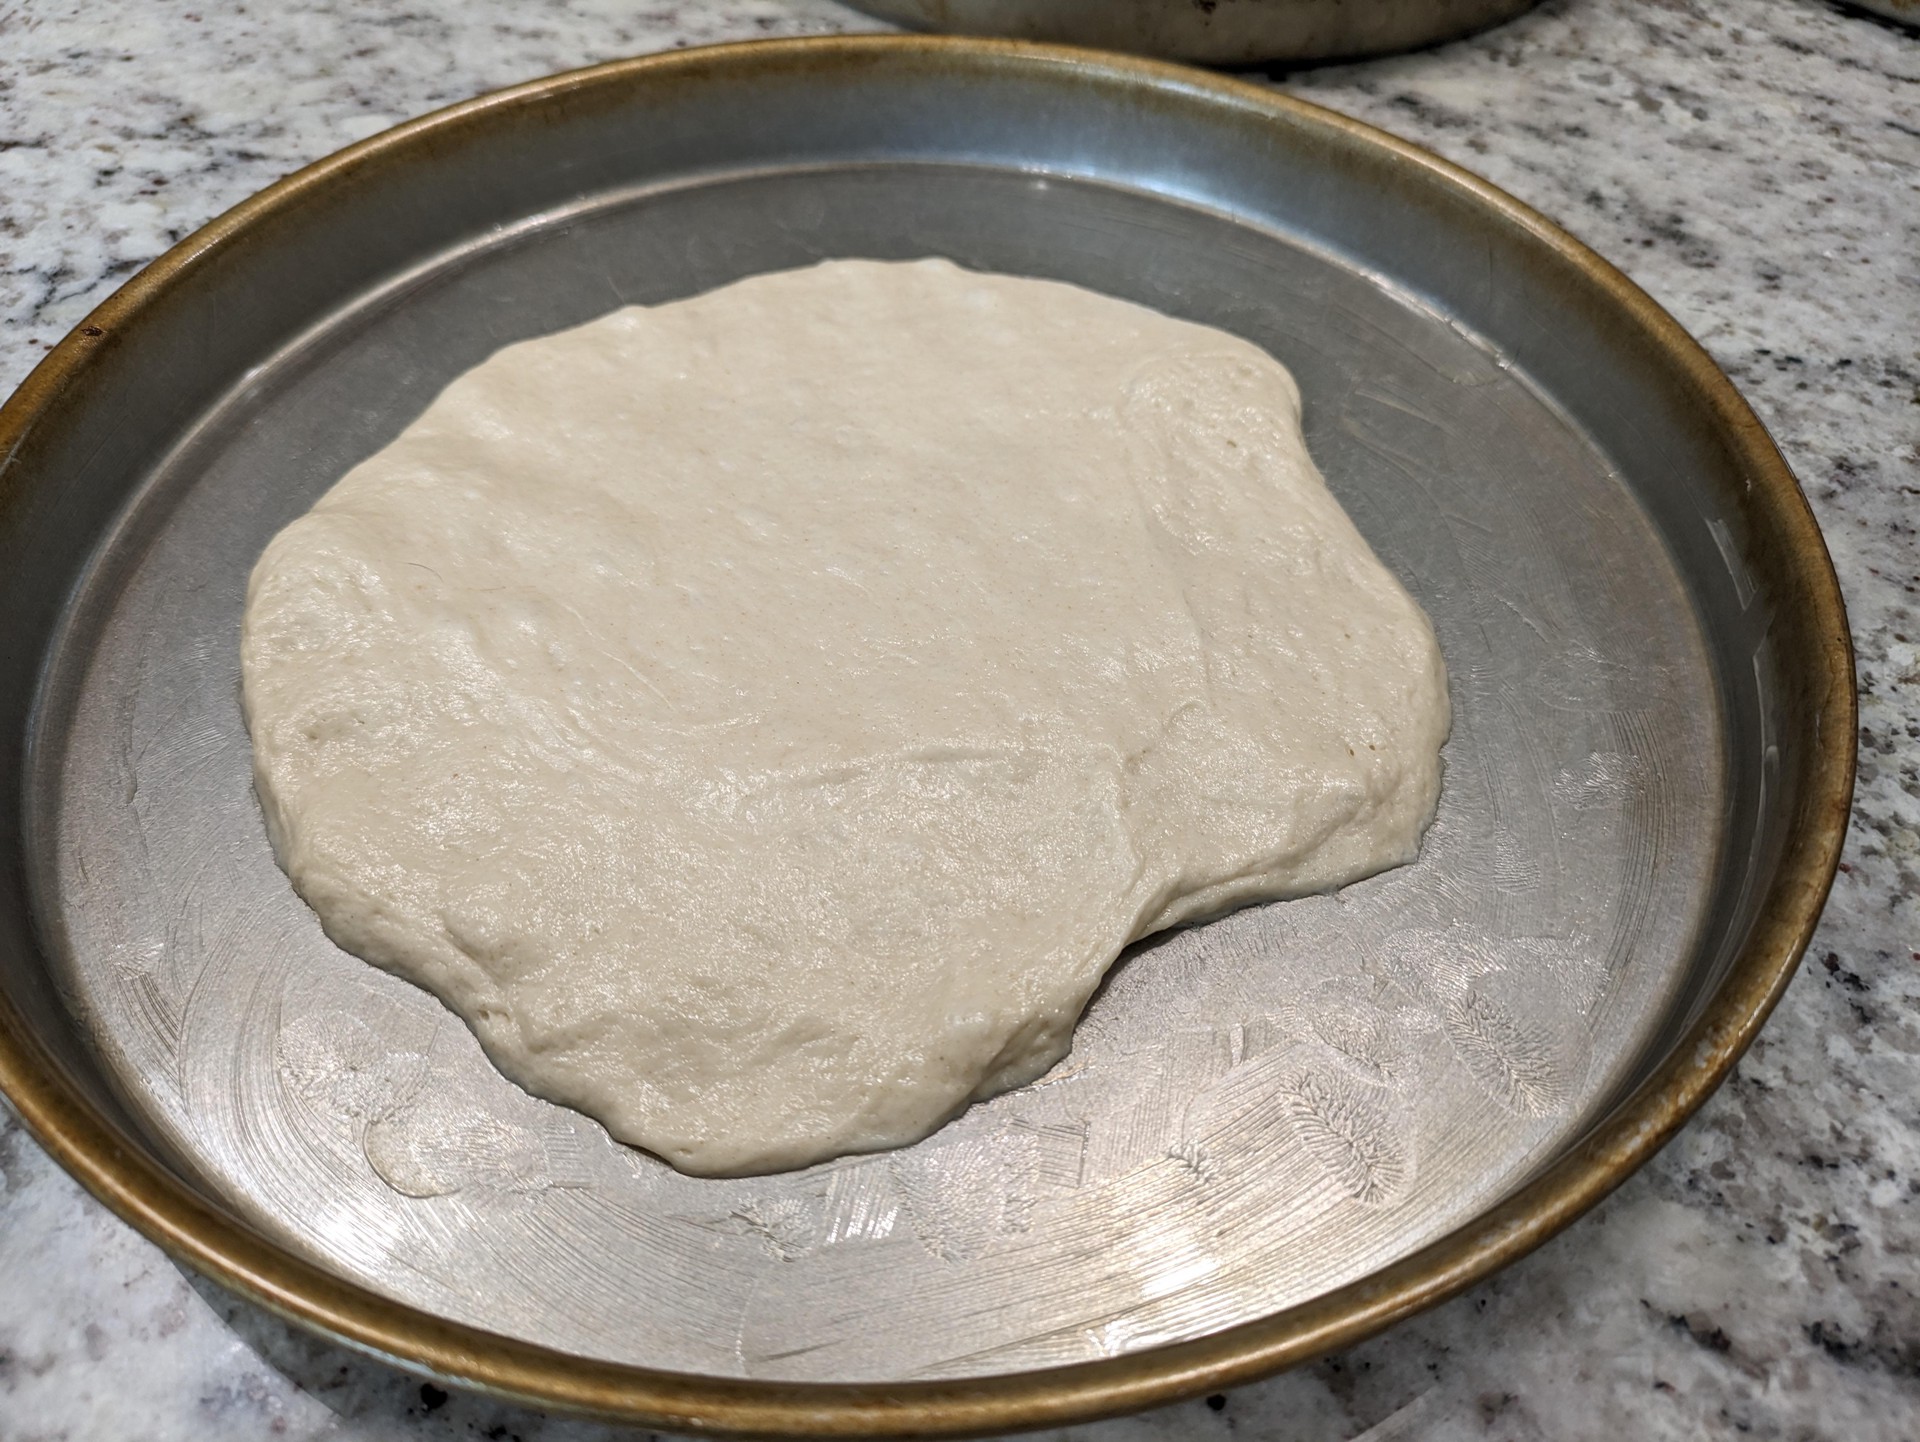
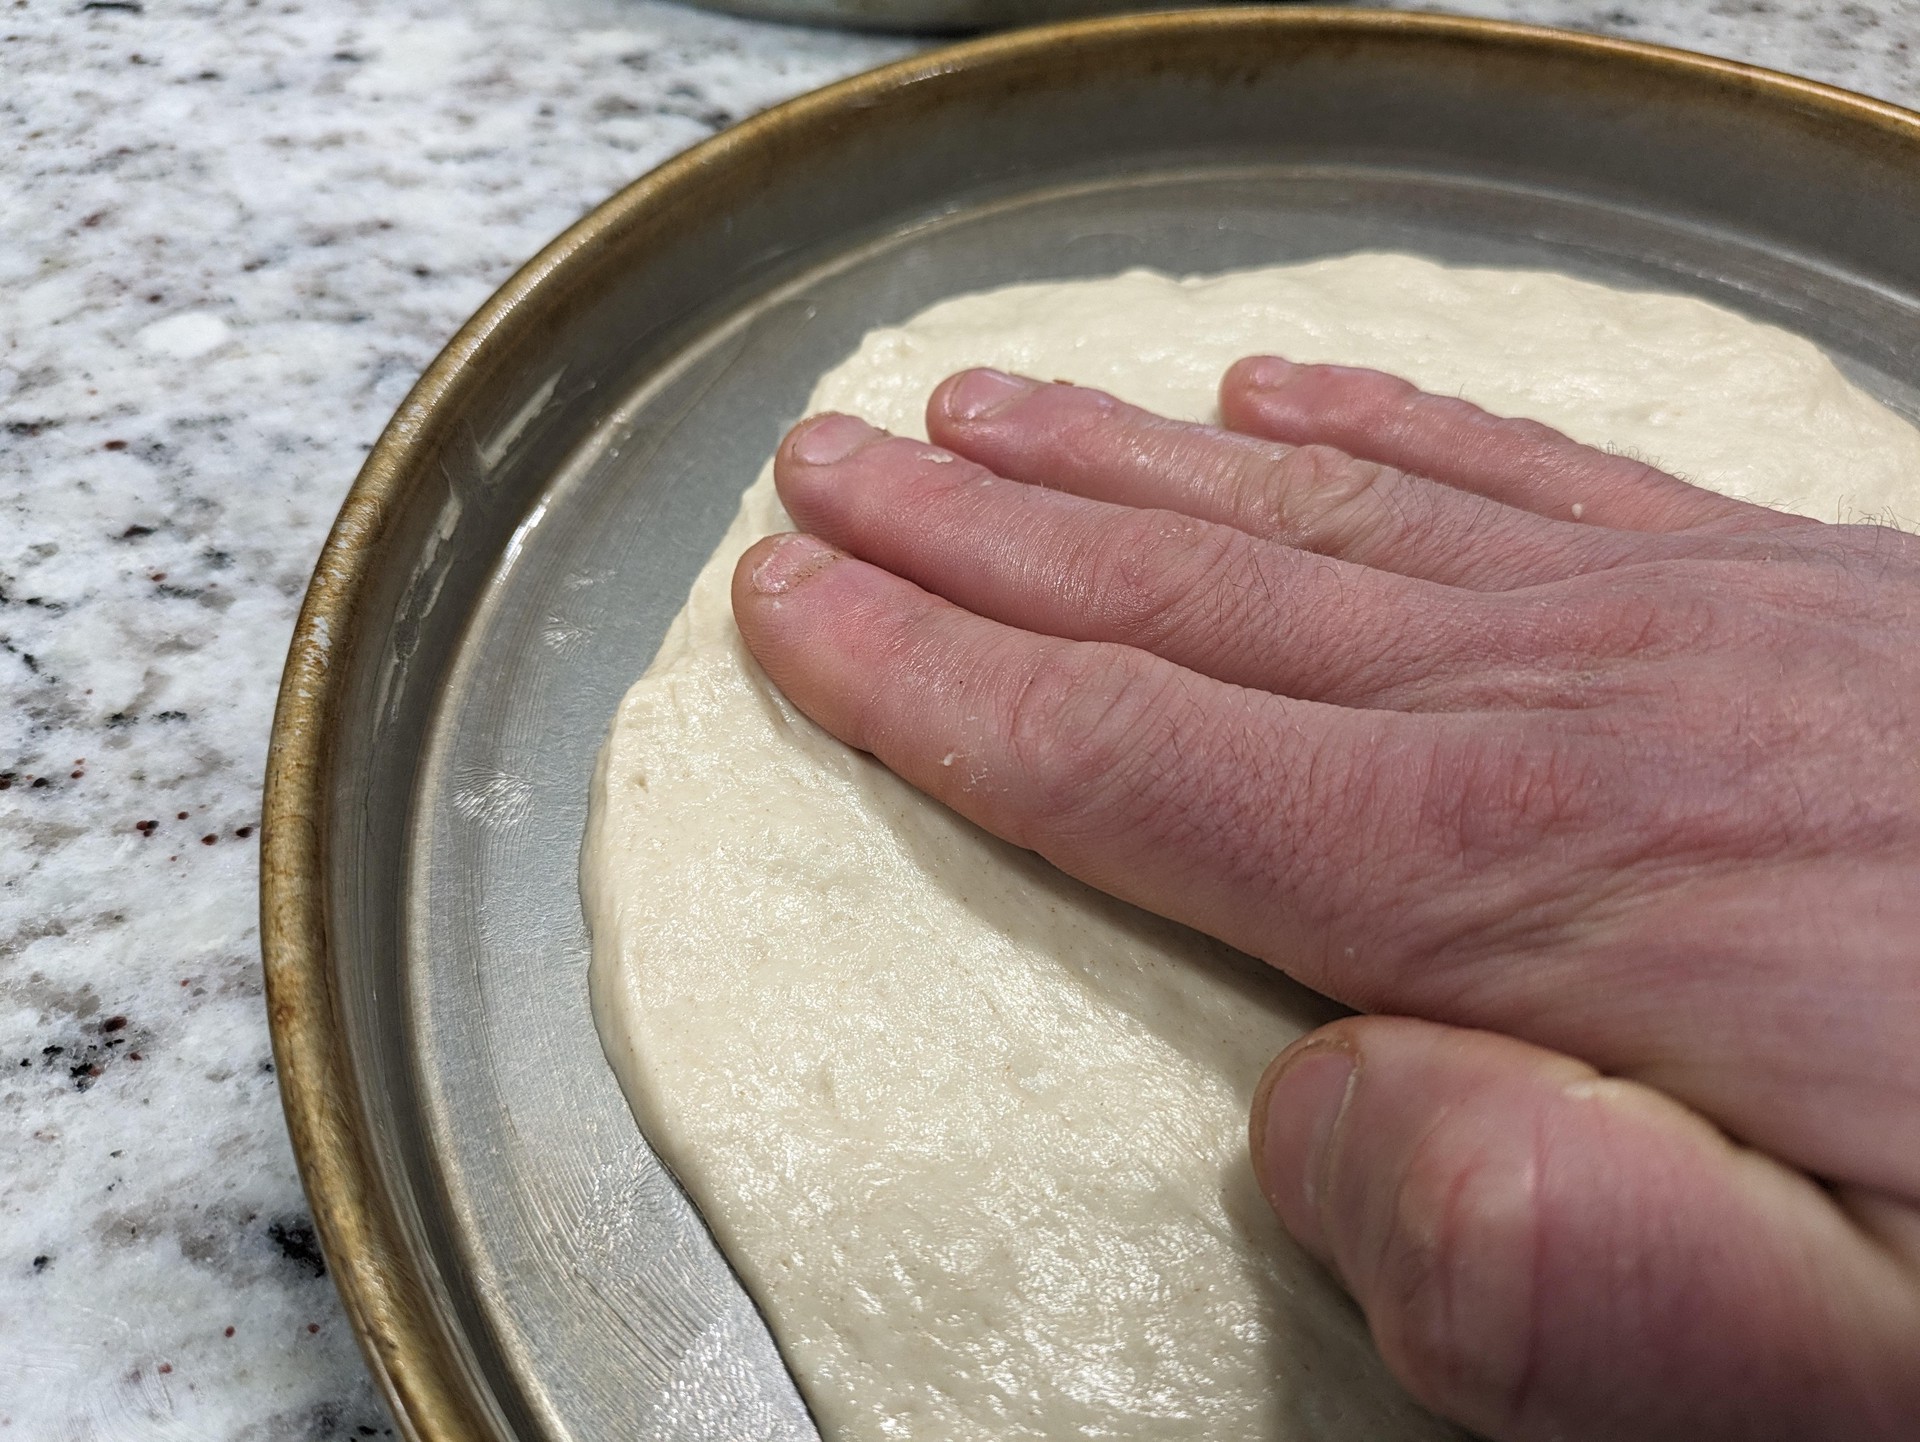
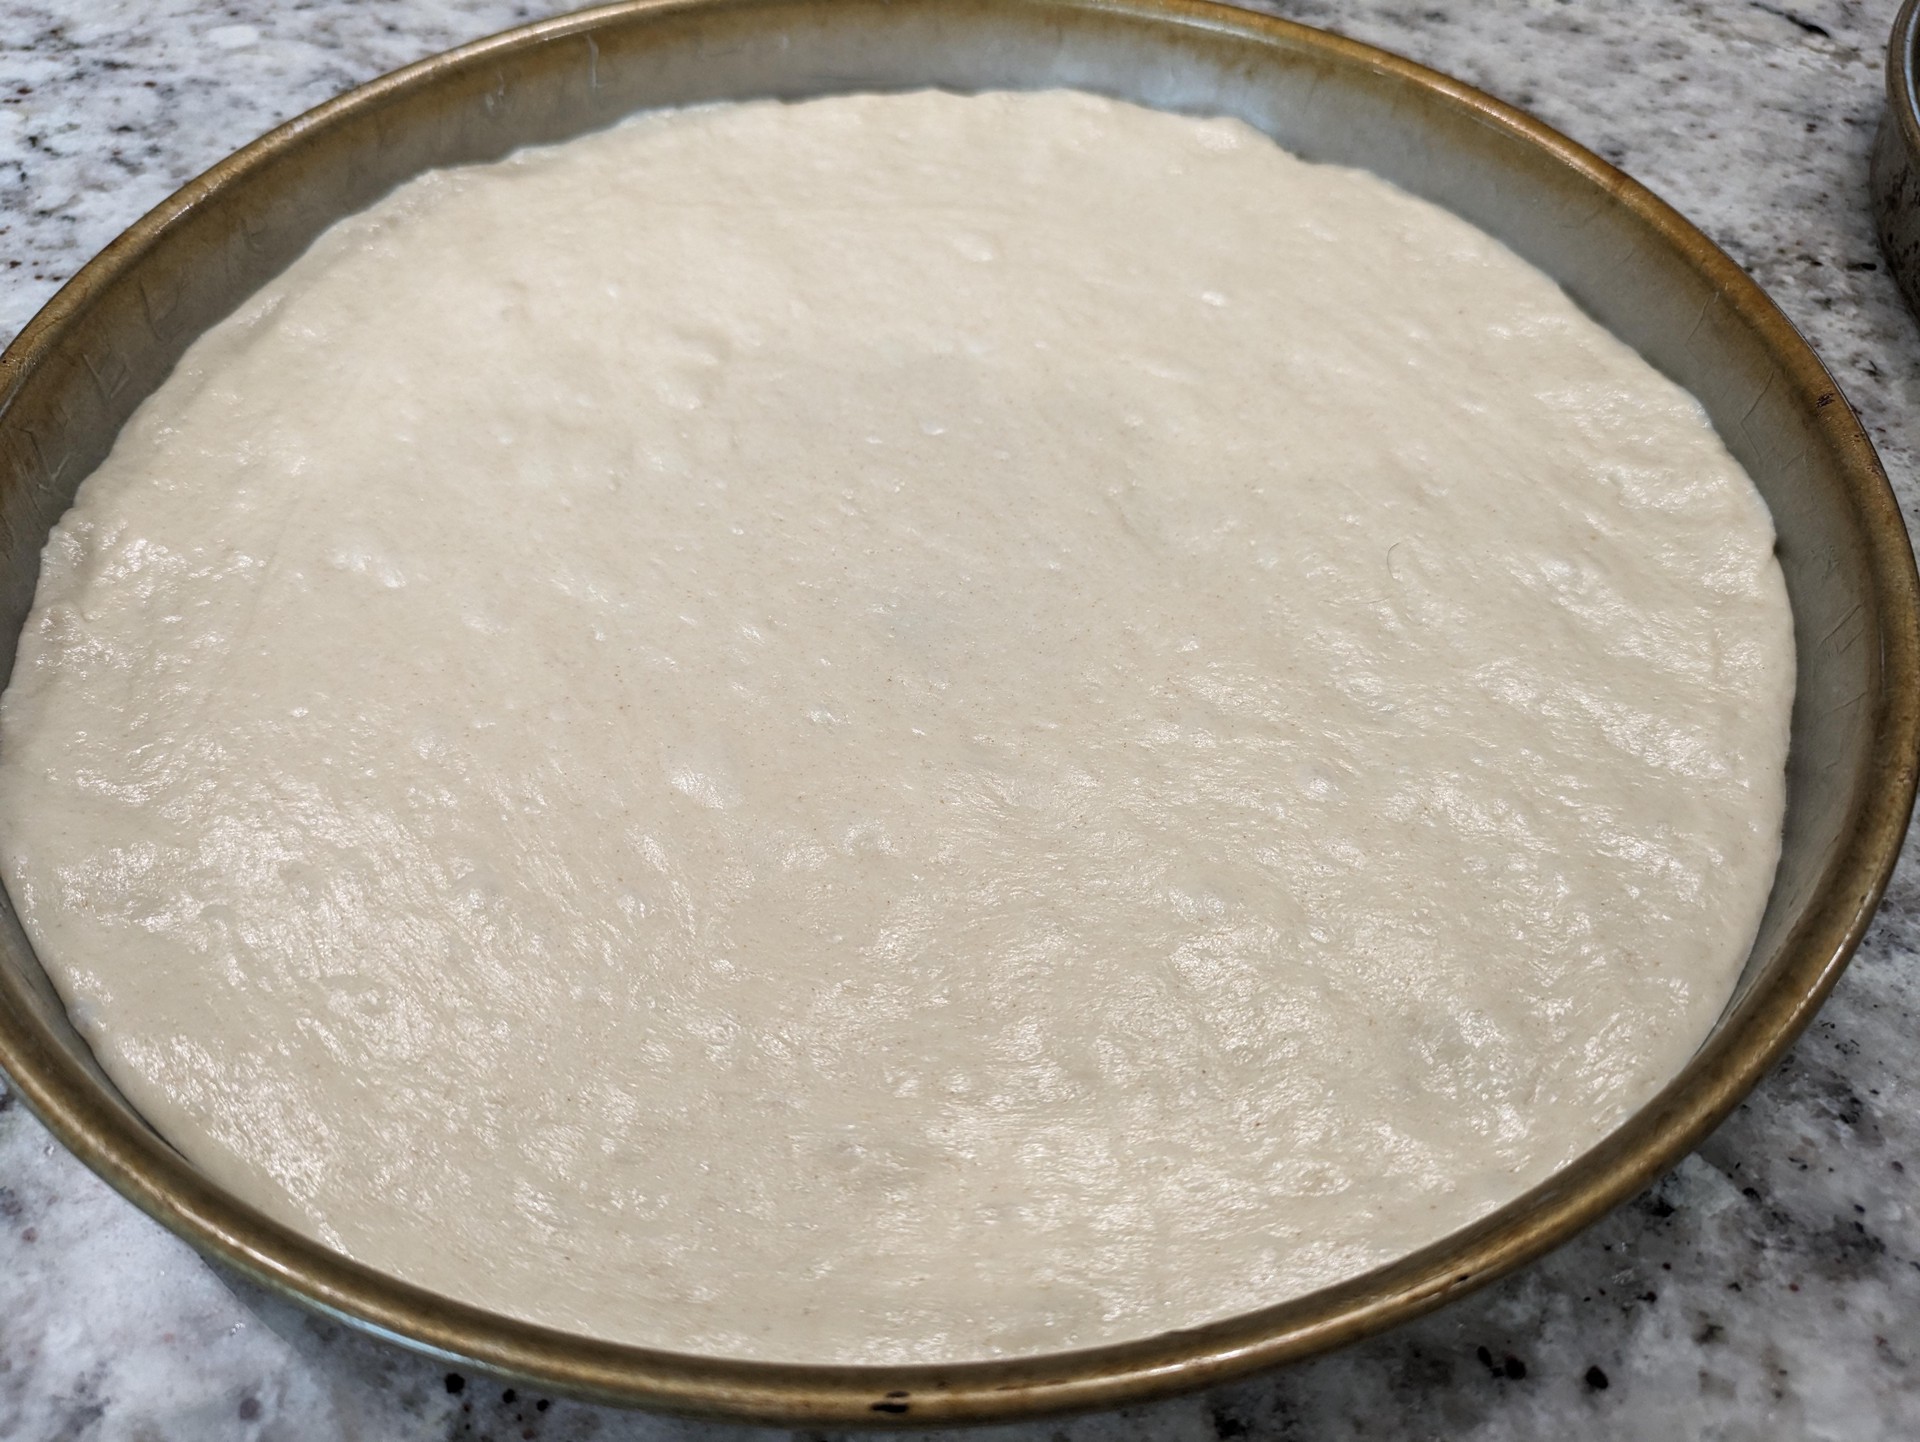
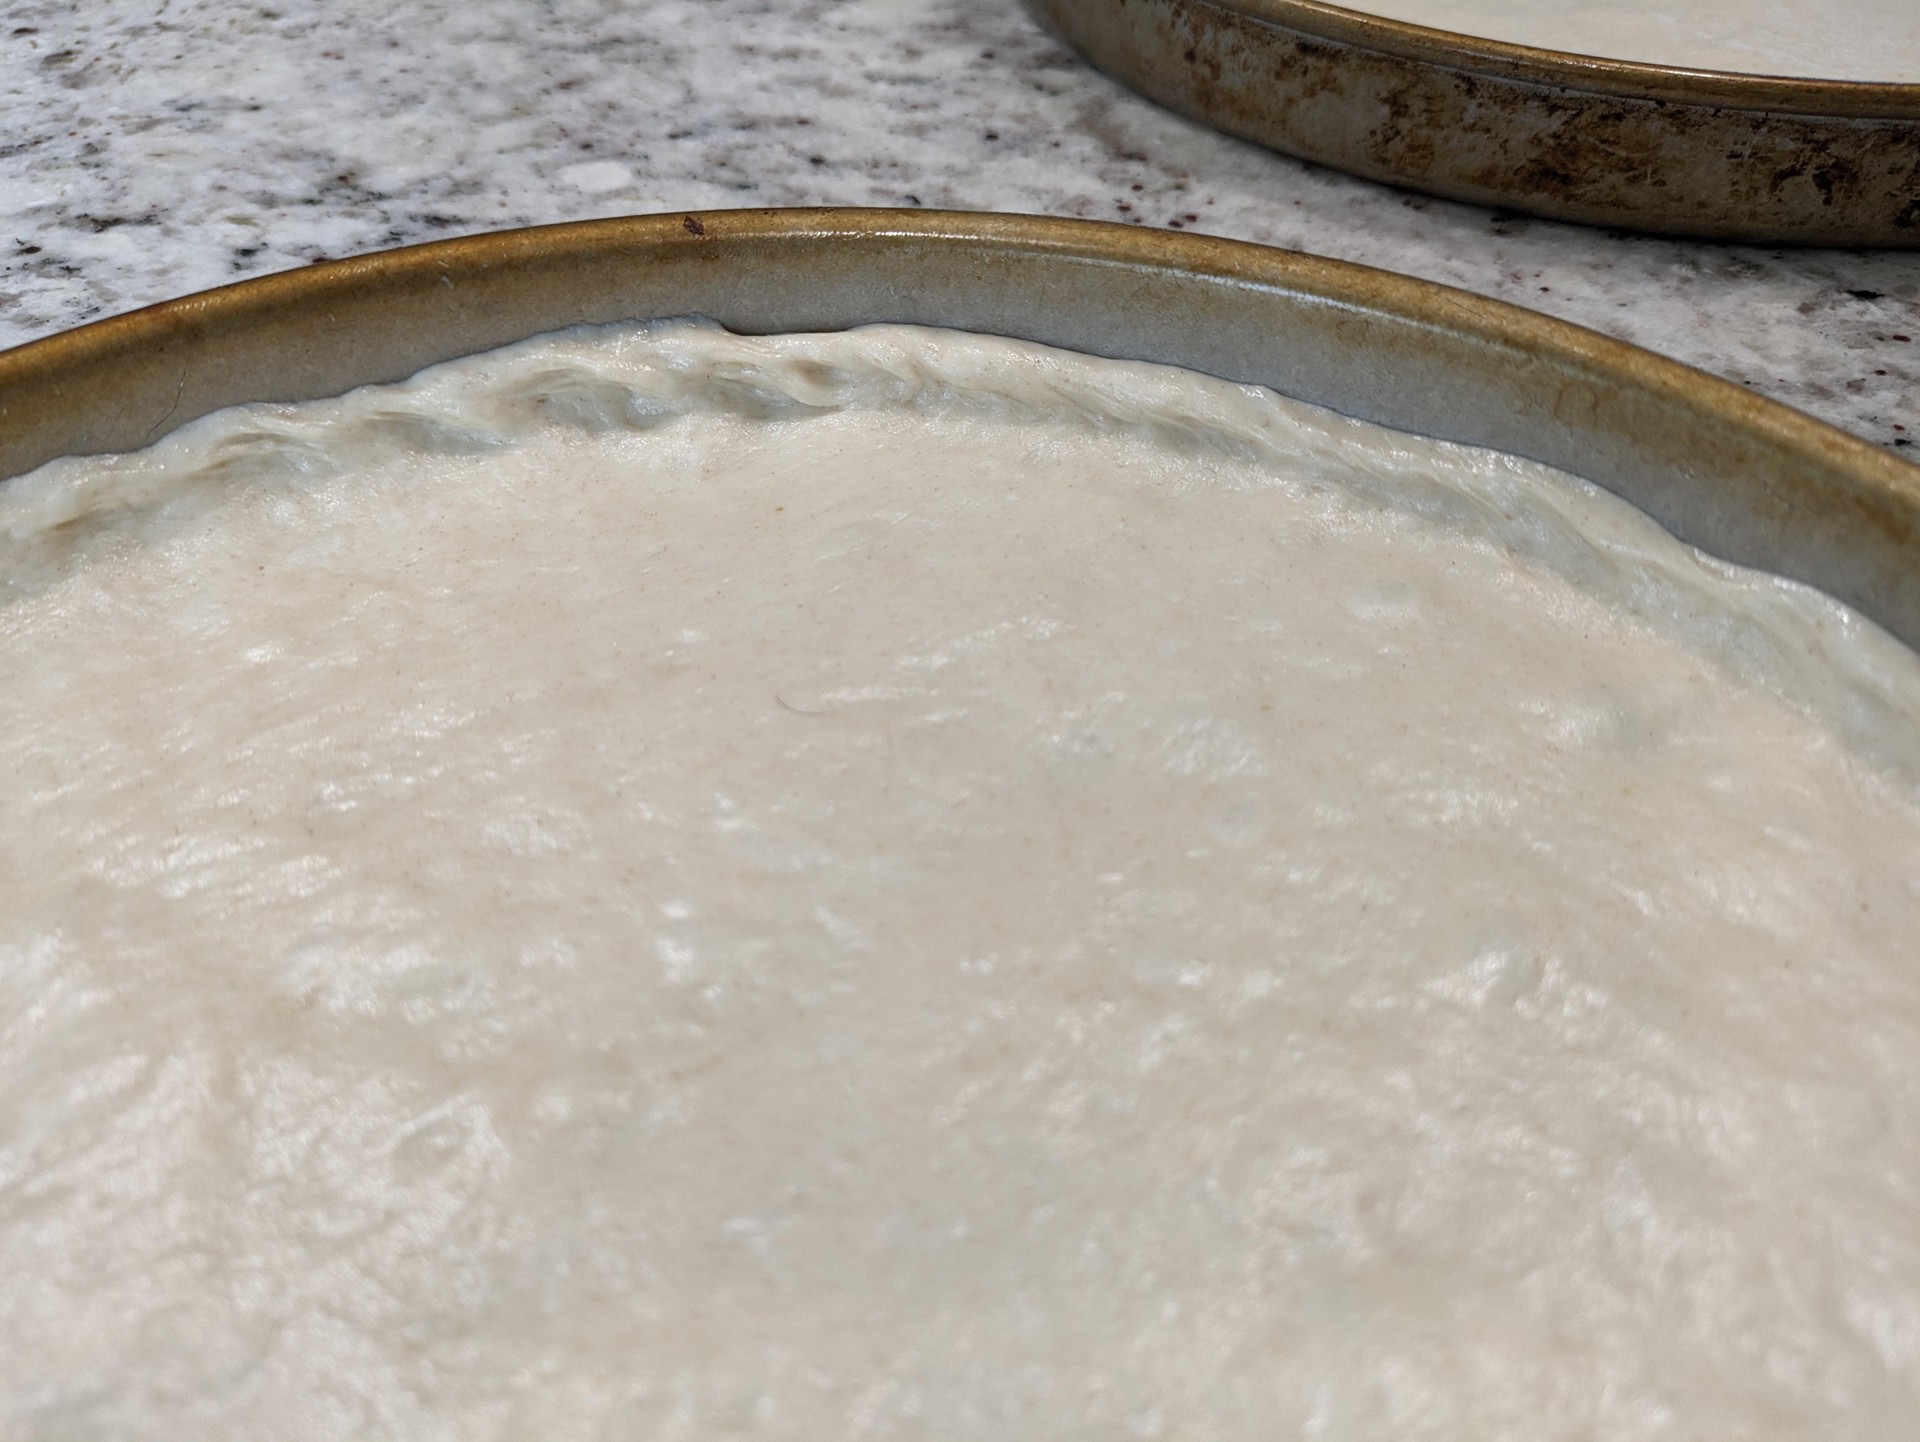
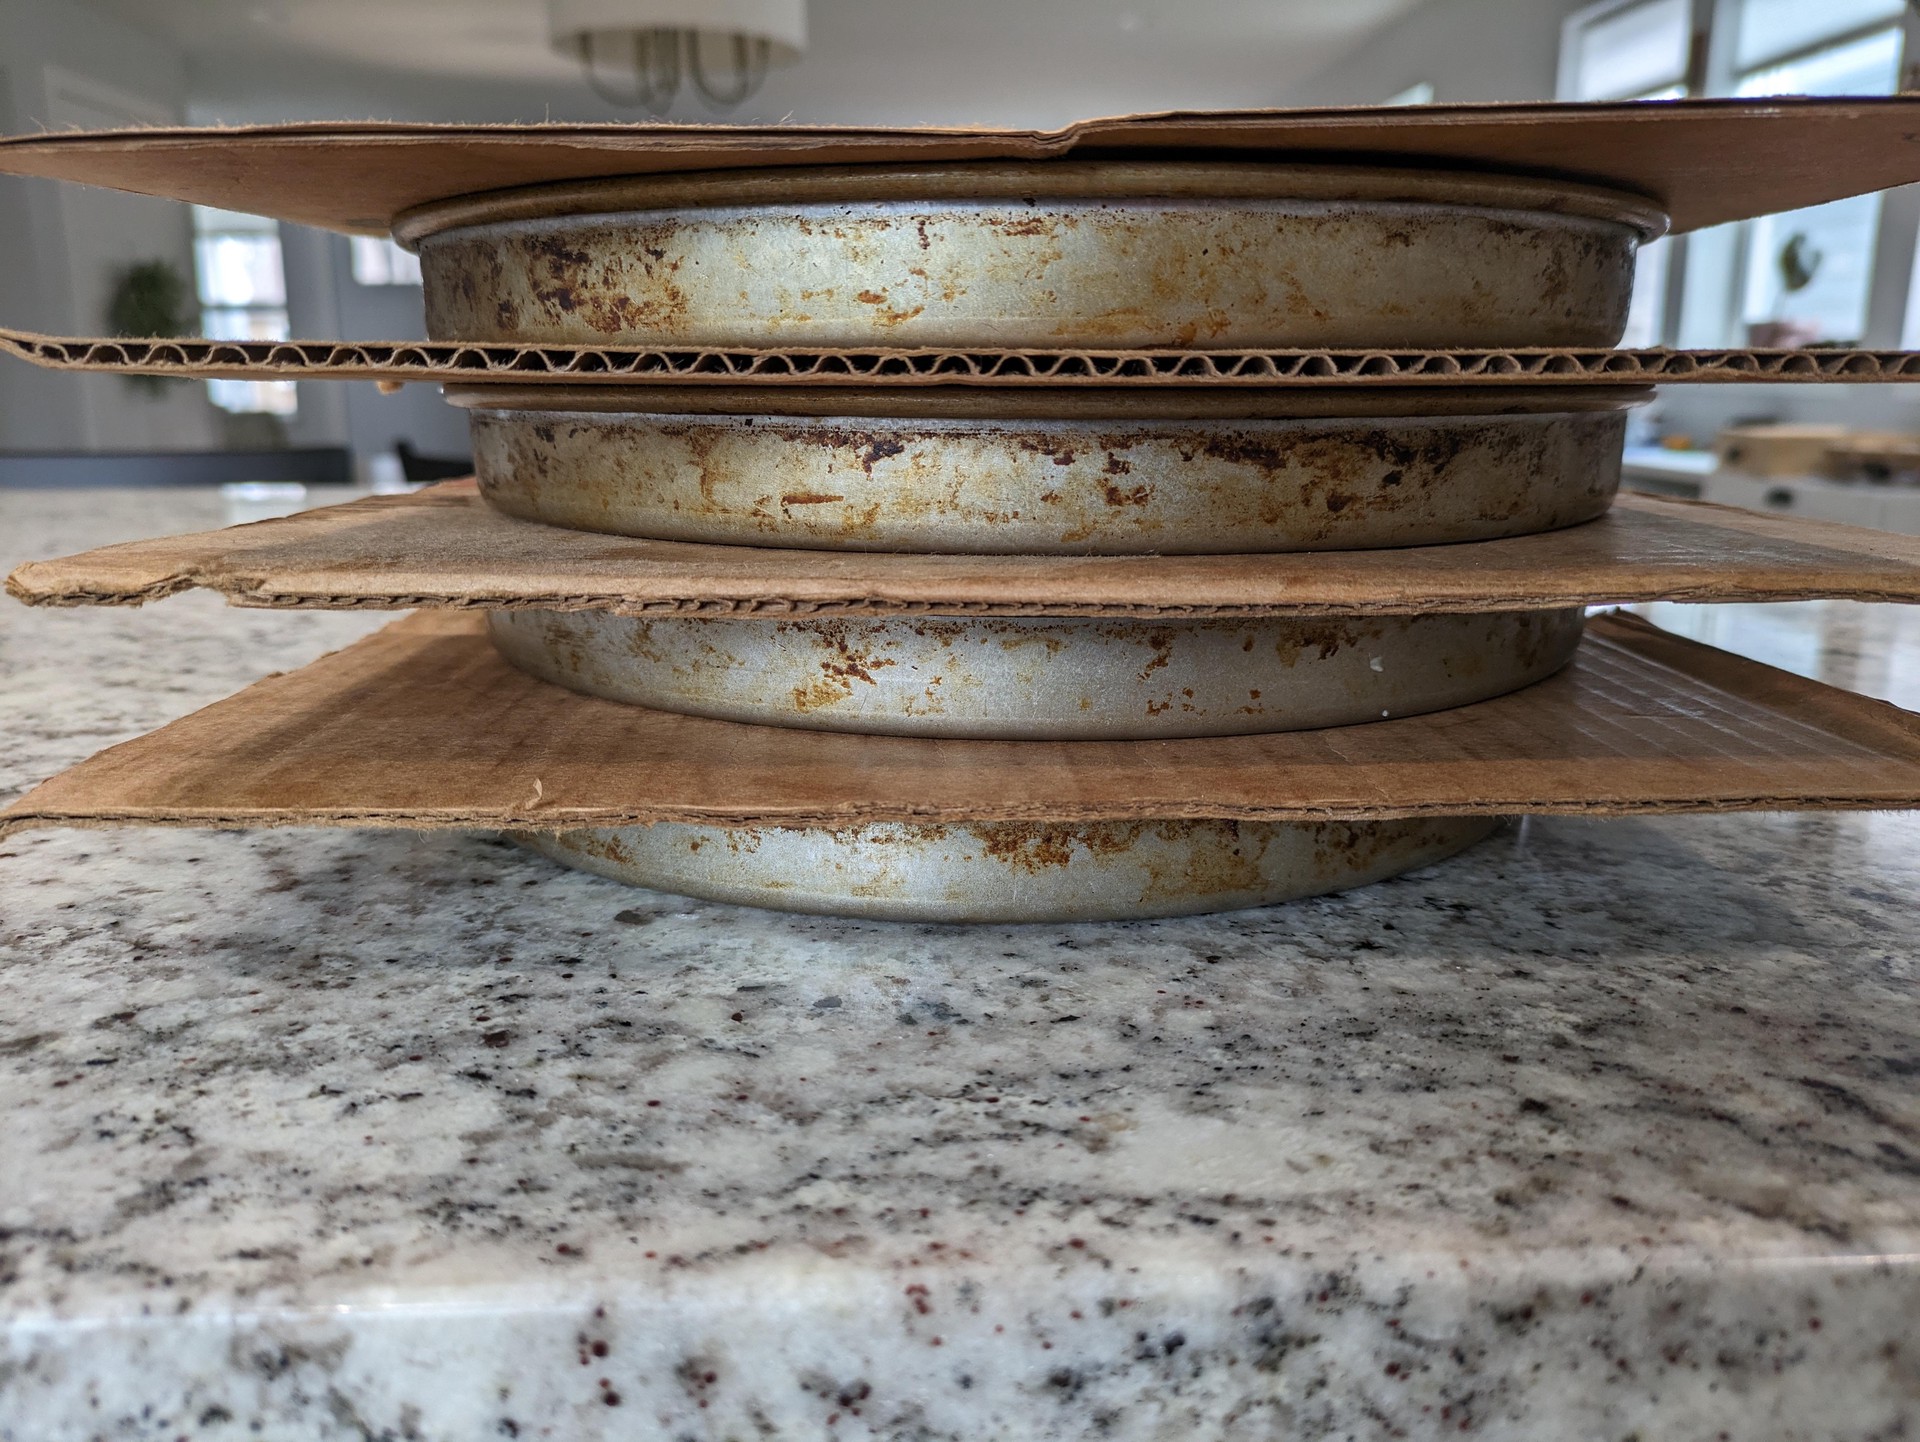
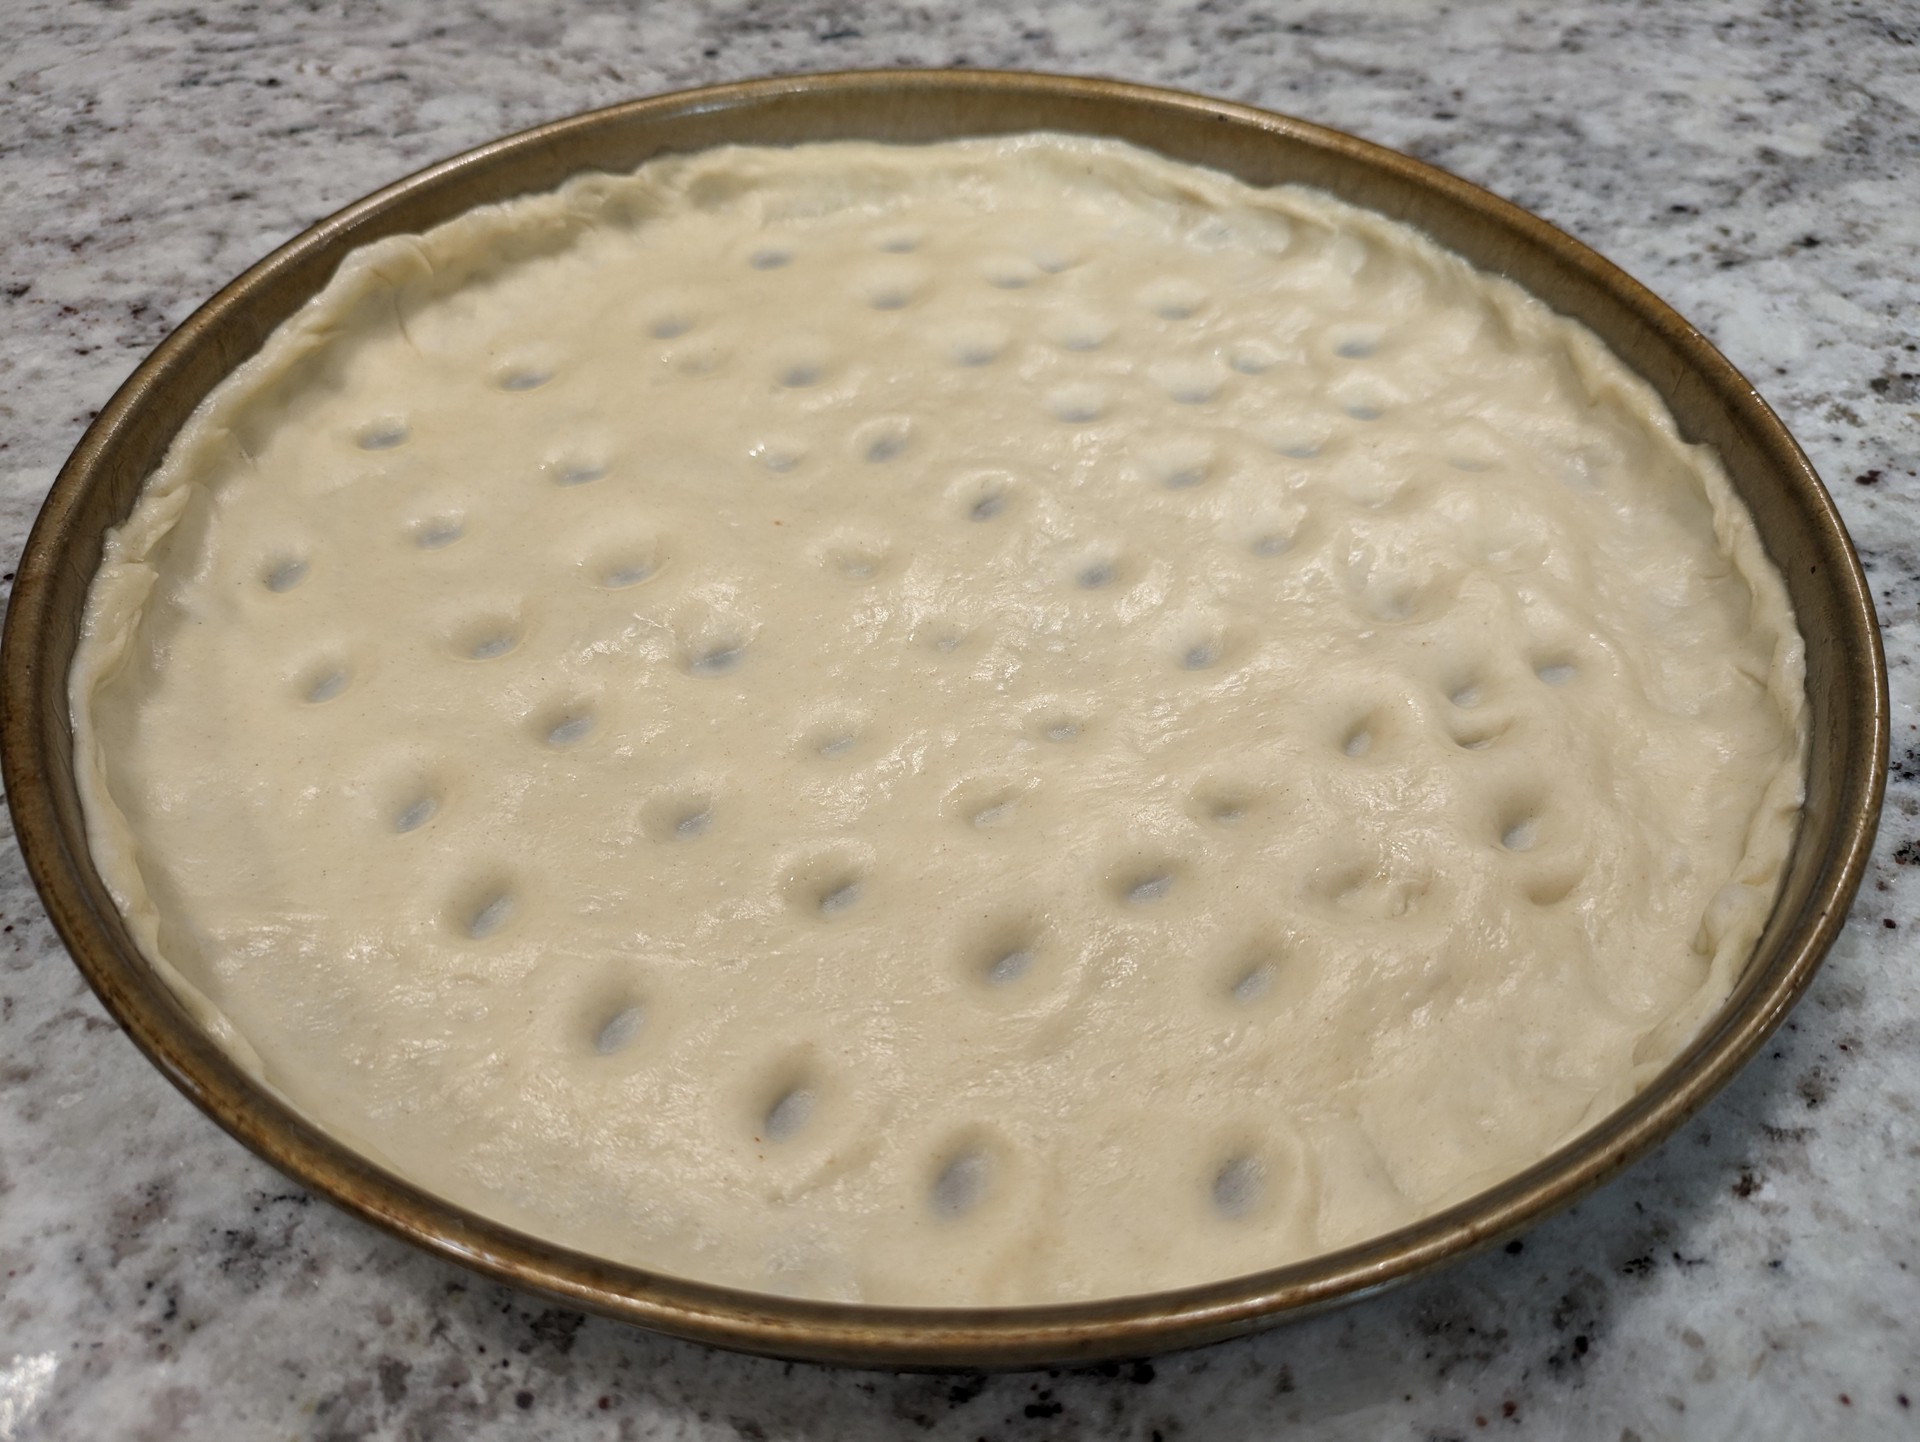
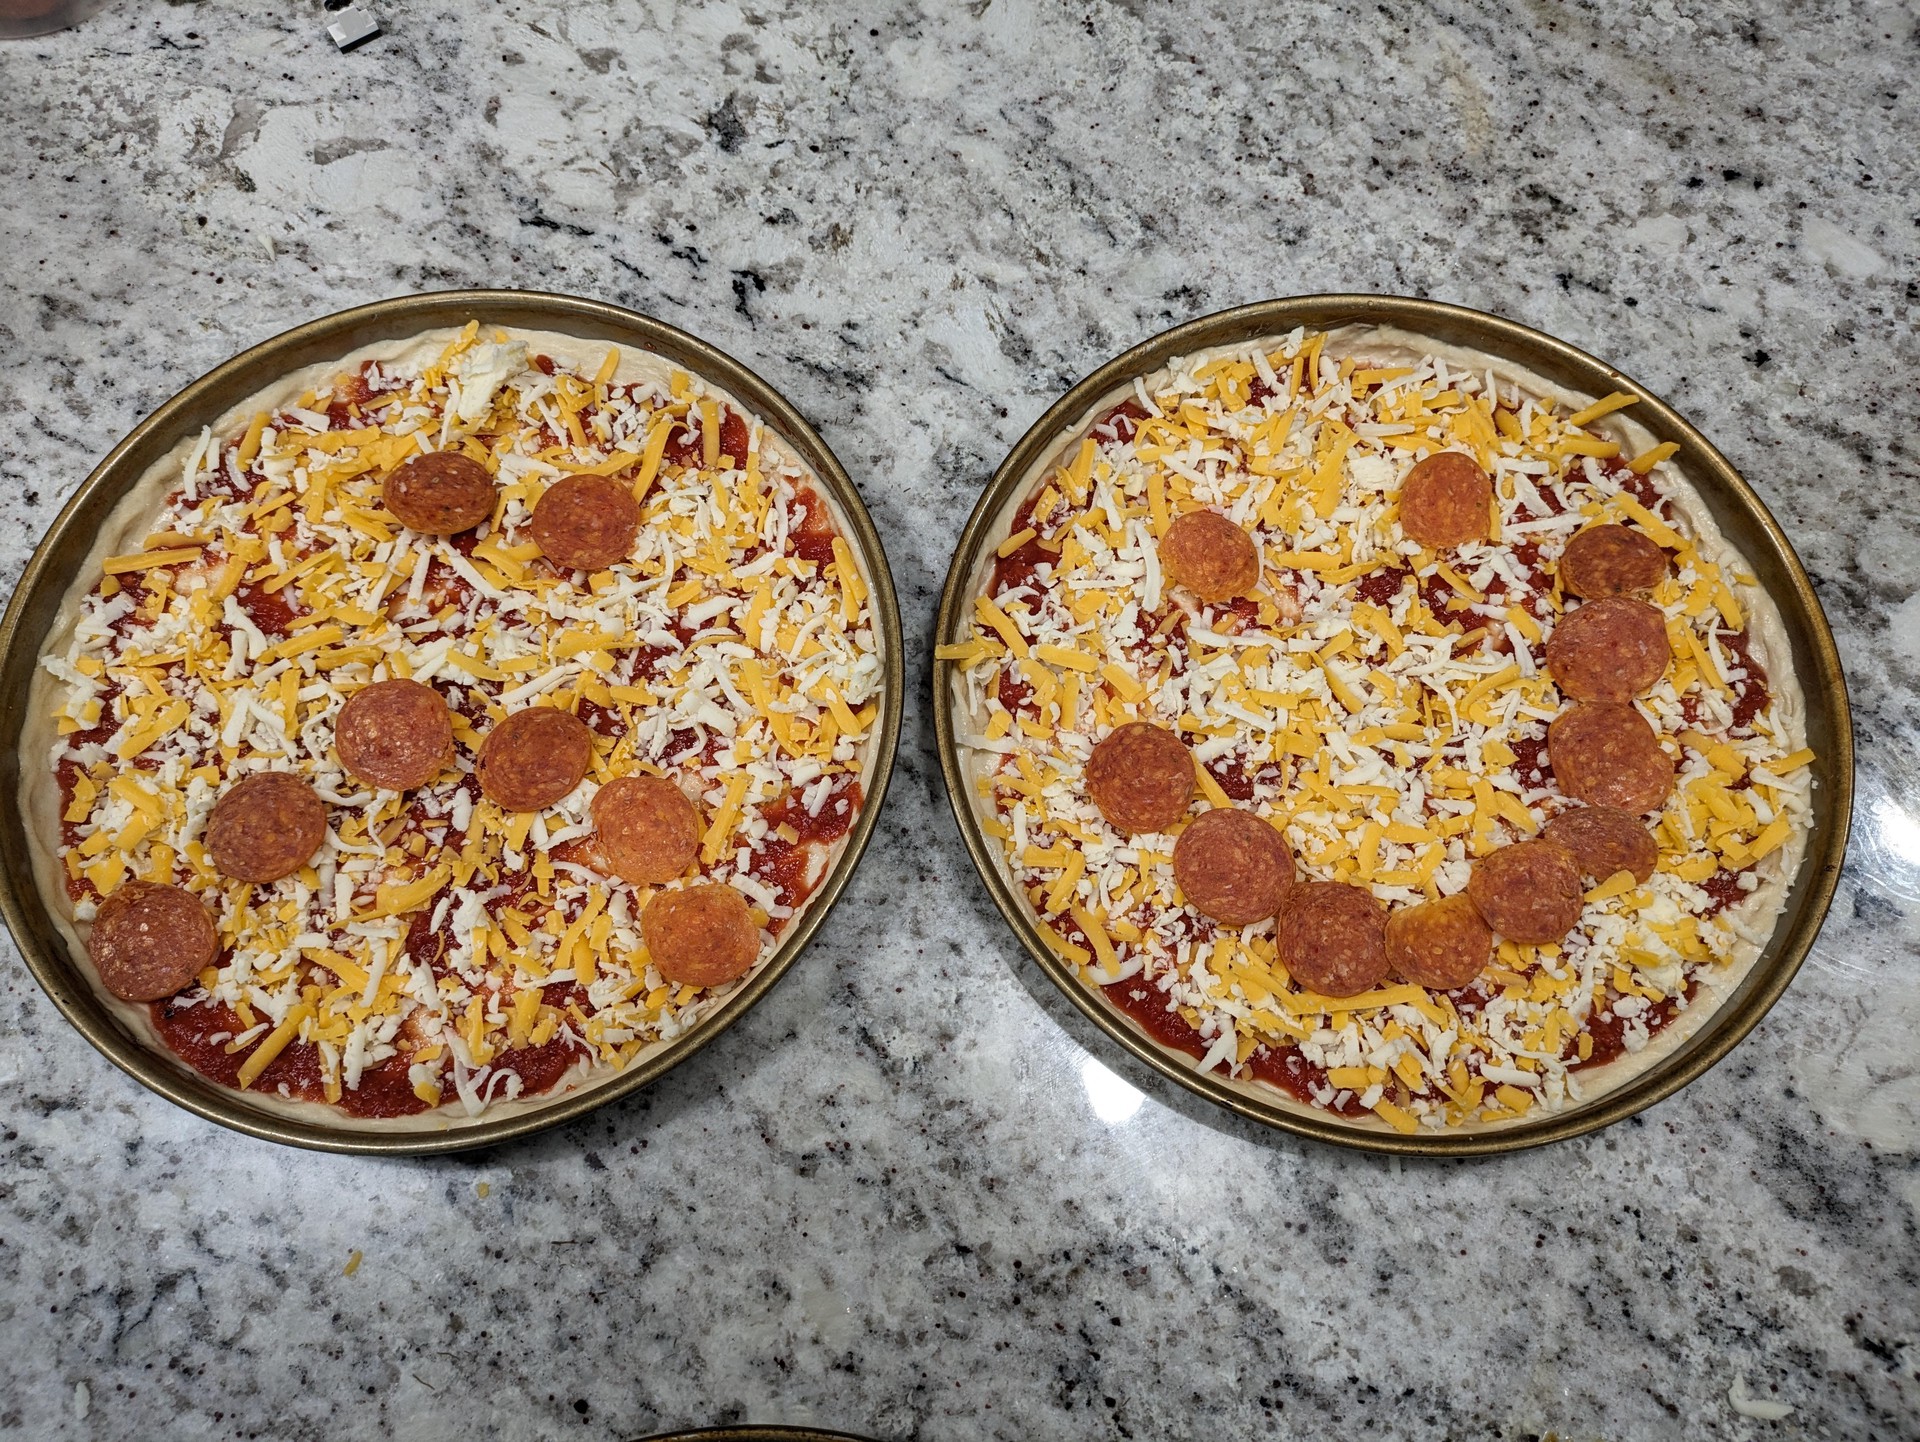
- Late Afternoon => grease pans with butter-flavored Crisco; you don’t need much. Grease counter too. Punch down dough and divide into 4 ~180g pieces, with help from a scale and bench knife. Panning out - the goal is to pan out the dough evenly, and the Crisco acts like a tack. Put dough in center and use the flat of your hand to press and slap the dough mostly downward but slightly outward. No need to be gentle. Start from the center and work your way out, using the other hand to slowly rotate the pan. Laced edges2 or no - if you don’t want laced edges, use your middle 3 fingers to form a small crust up the pan, all the way around. Cover pans with lids that don’t touch the dough; cardboard pieces work well. Leave to rise for another hour or two, until puffy but not bubbly.
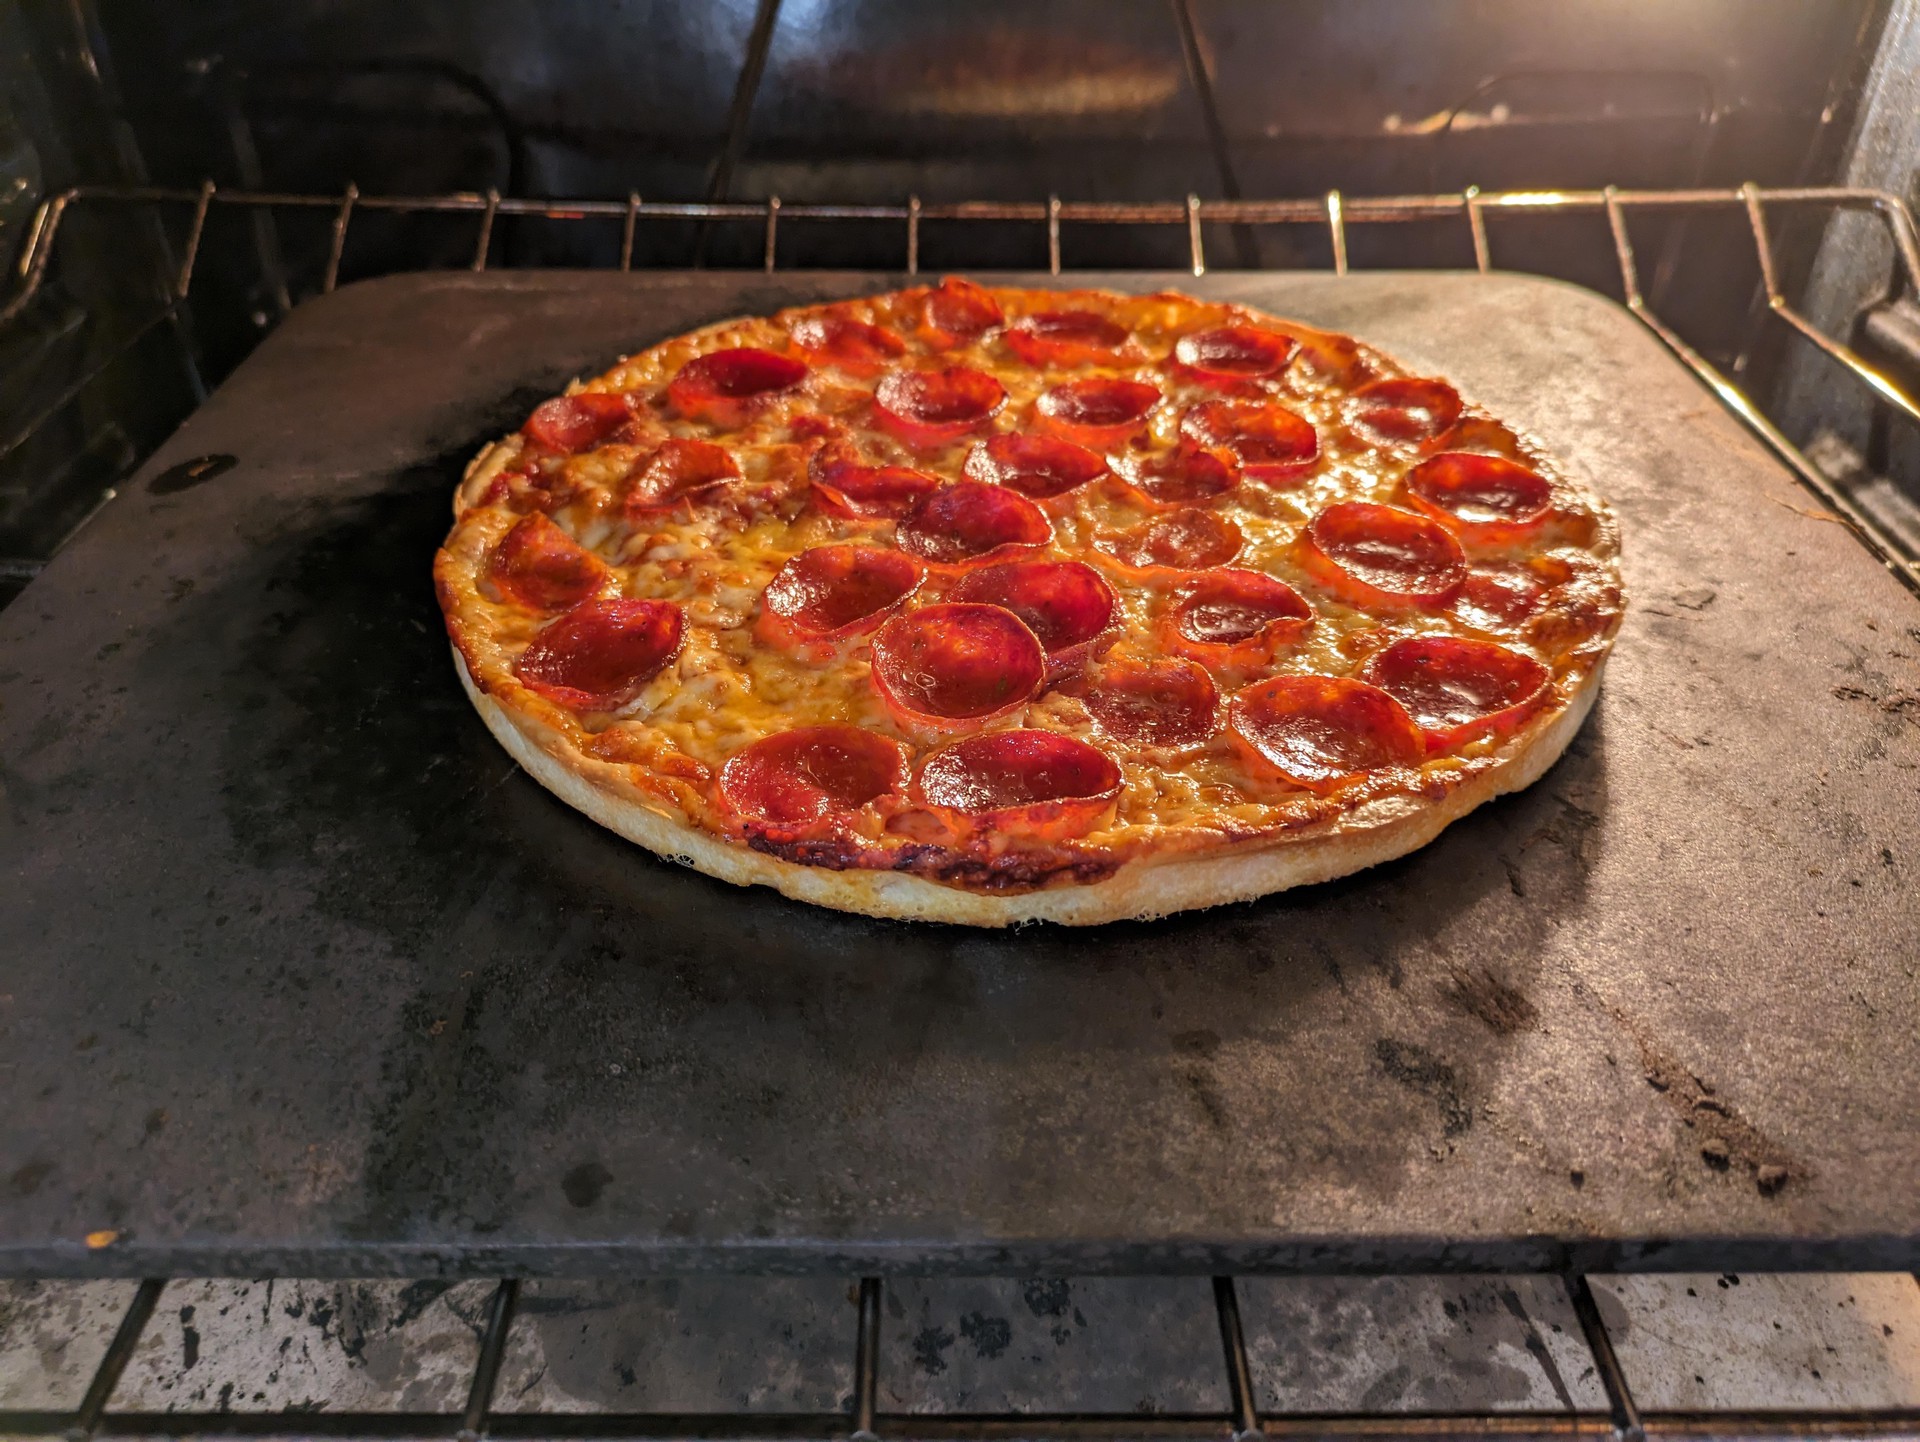
- Oven => Load pizza stones or steels if you have them, and set to 550°F. Do this 60-90 minutes before you want to start baking.
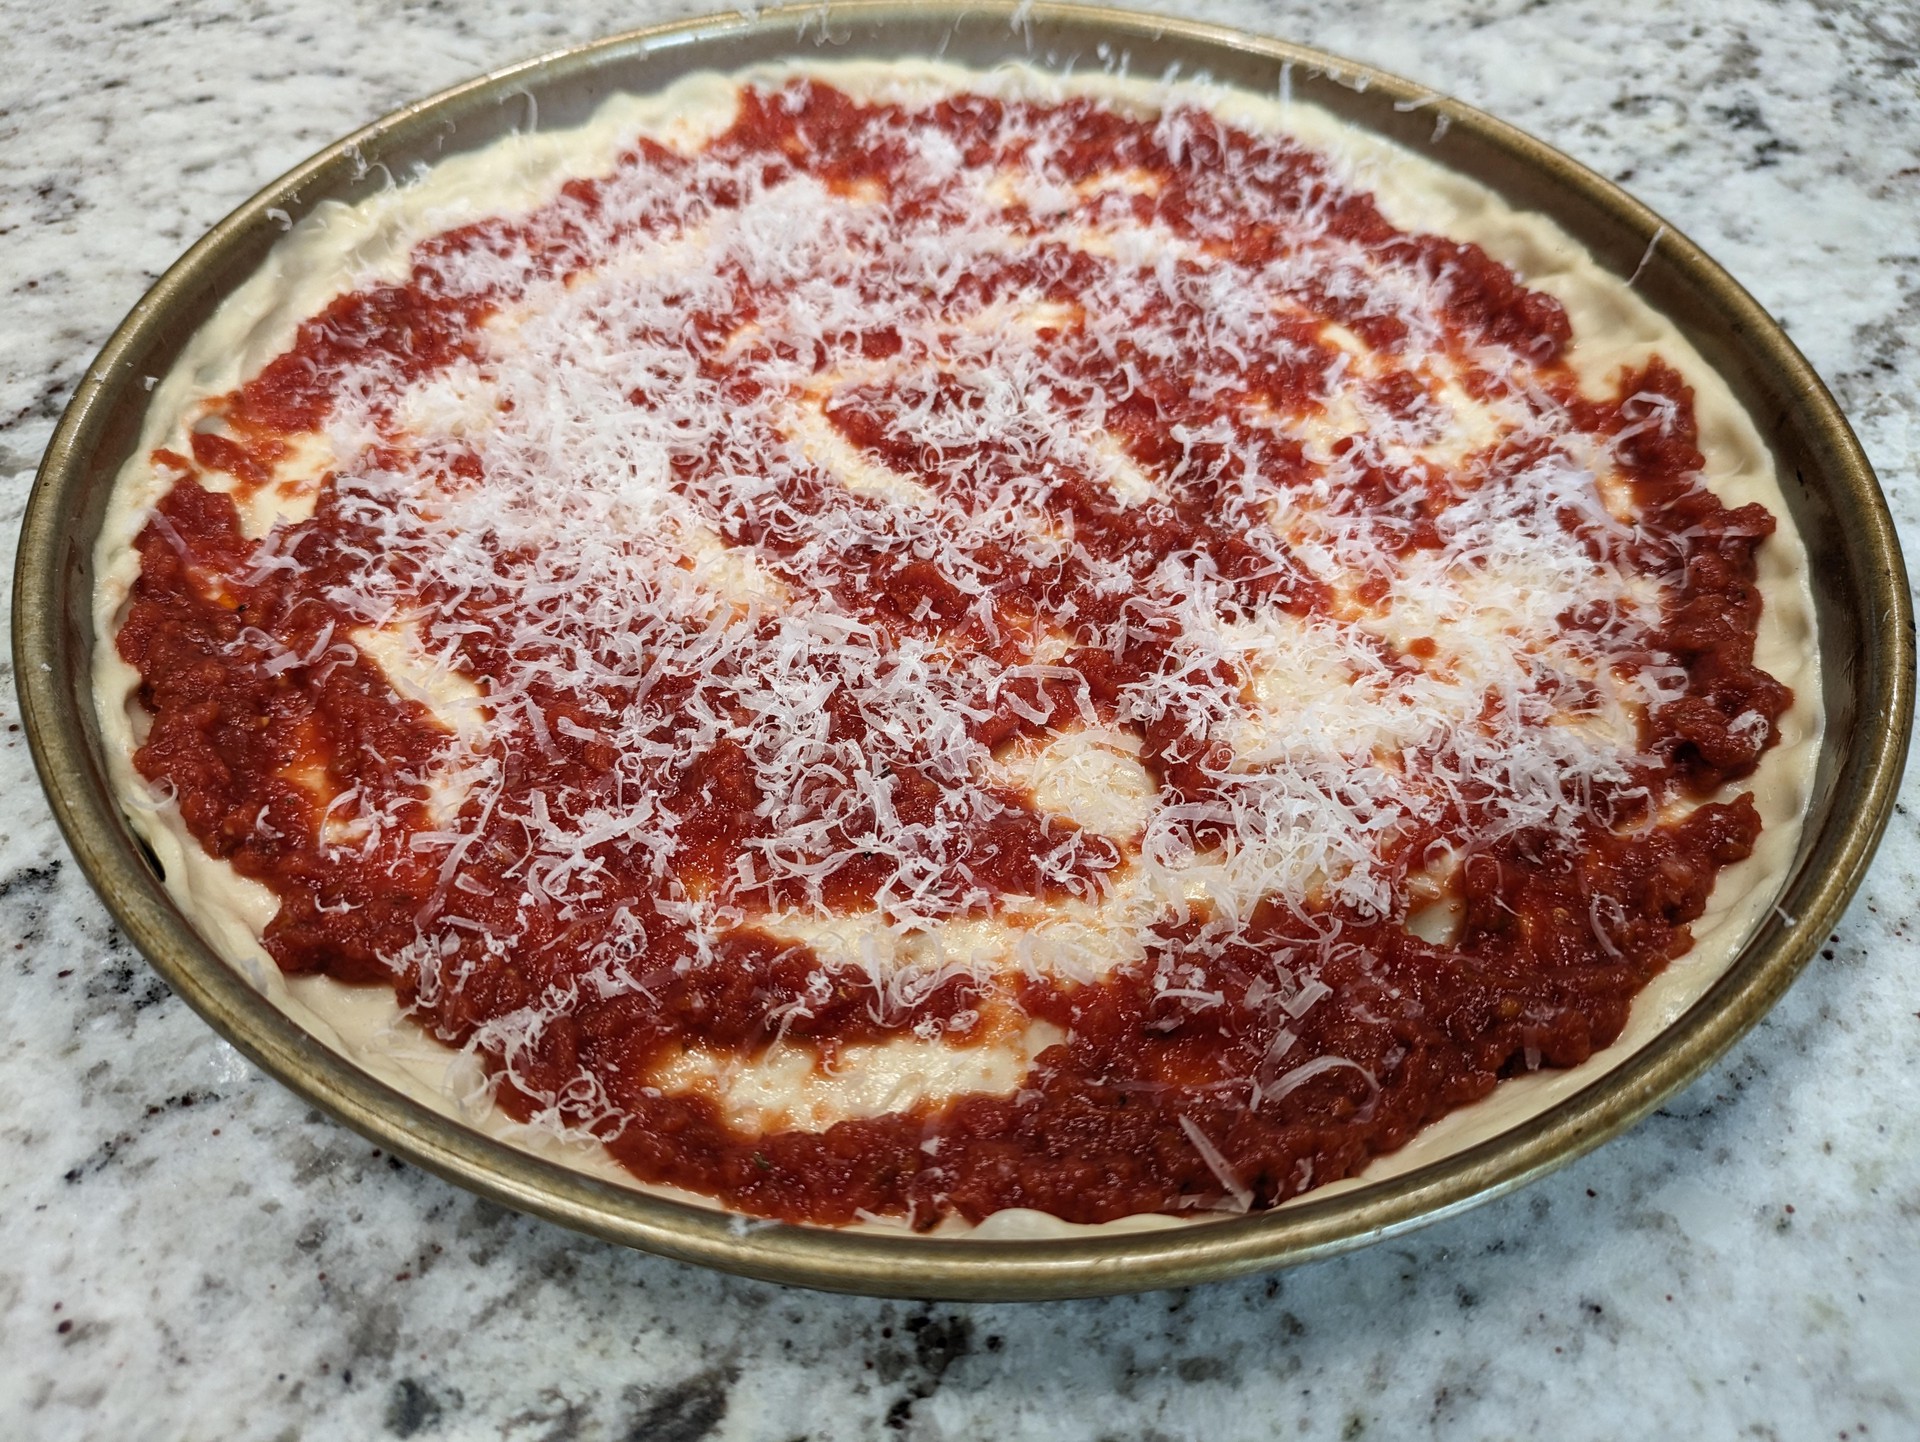
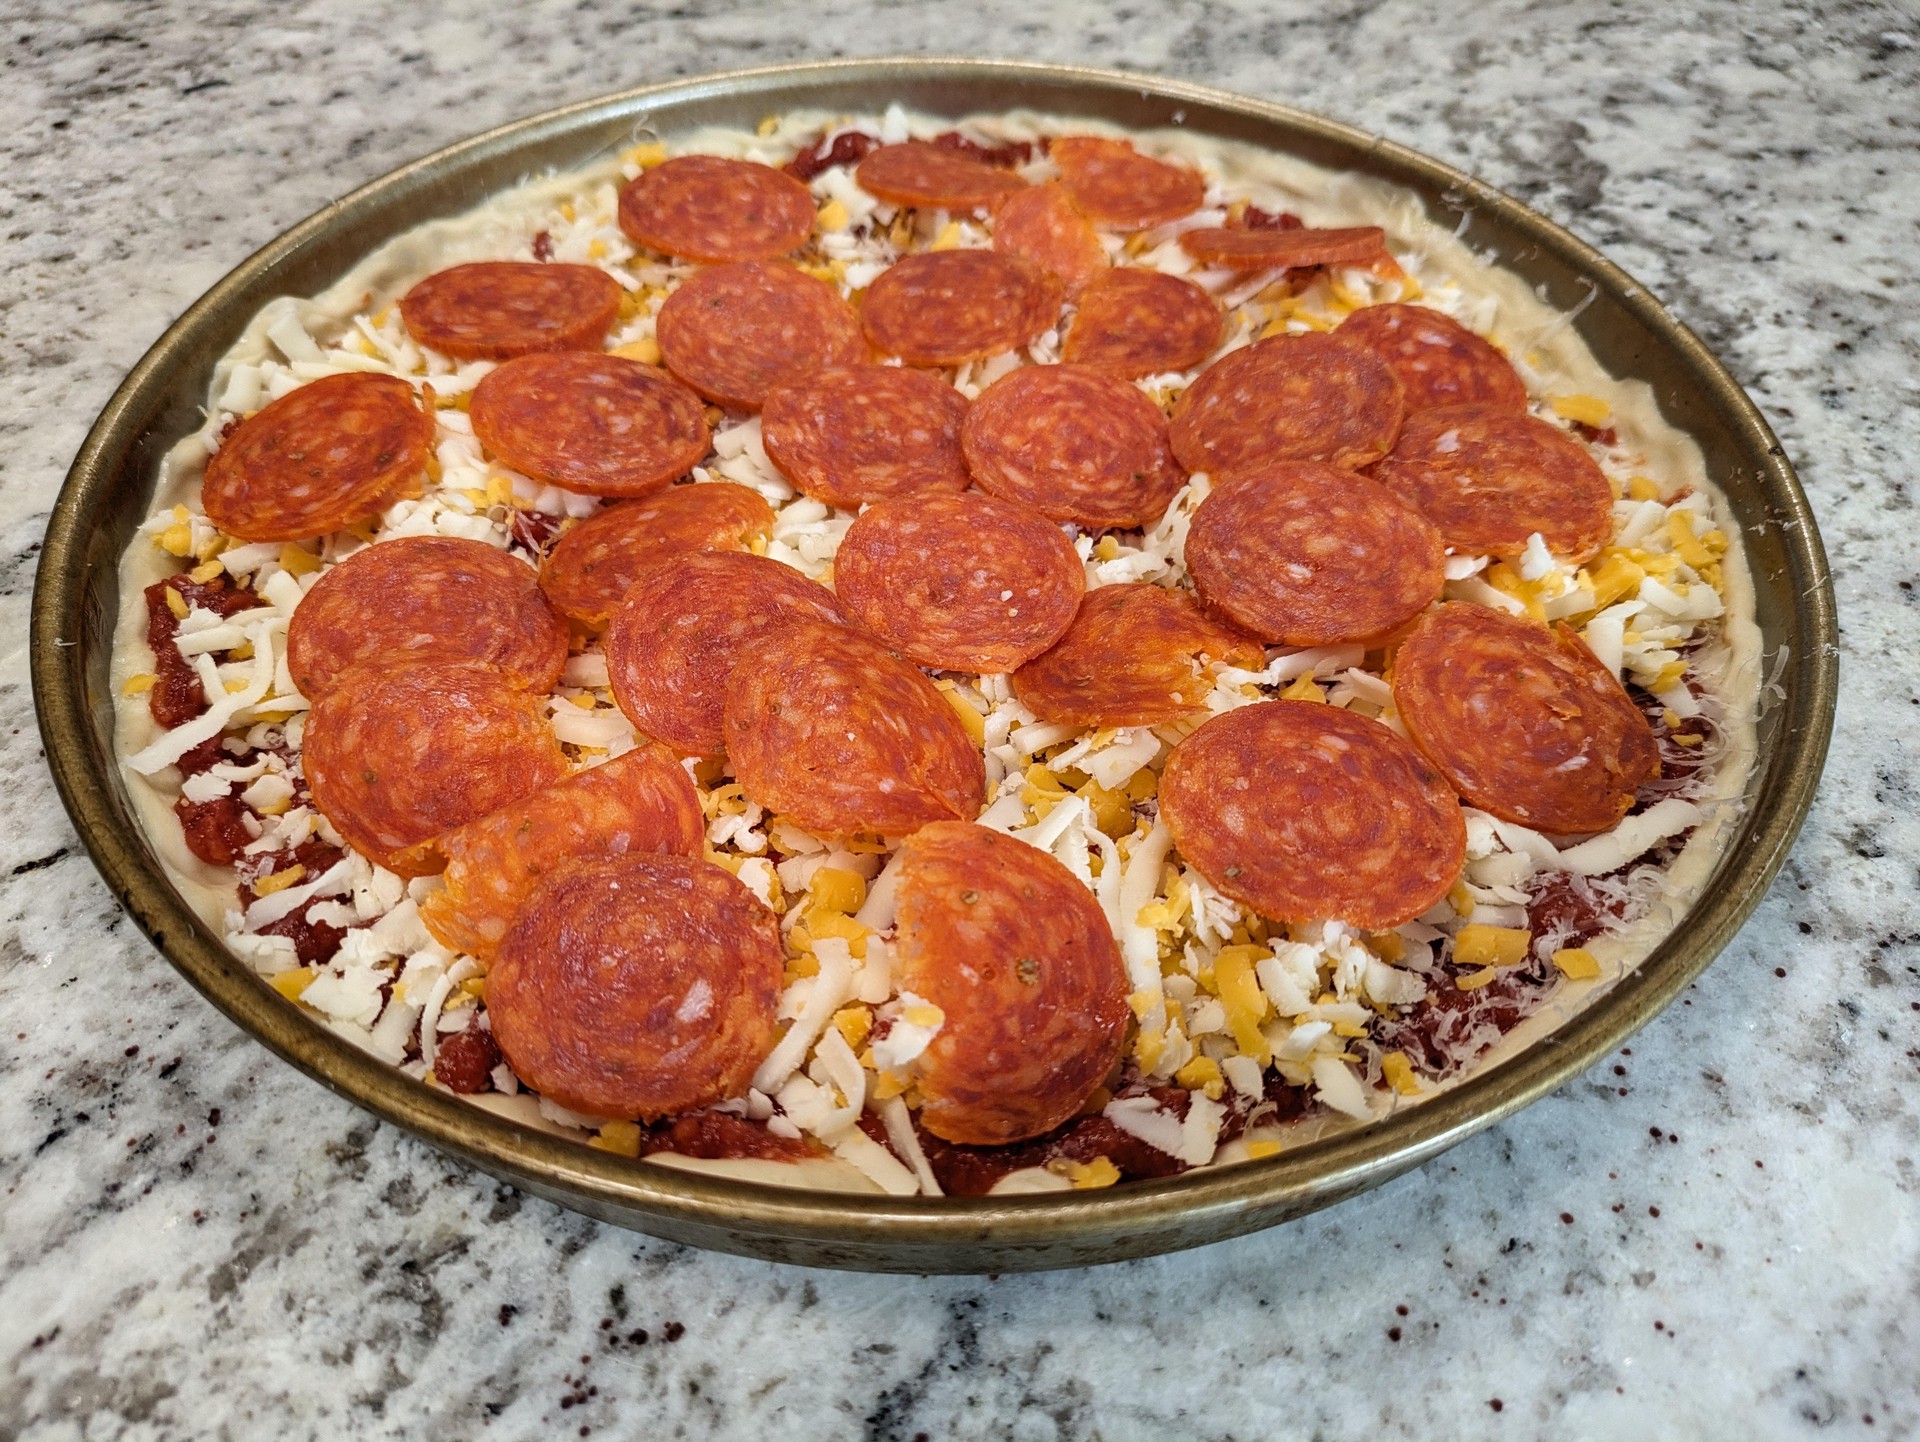
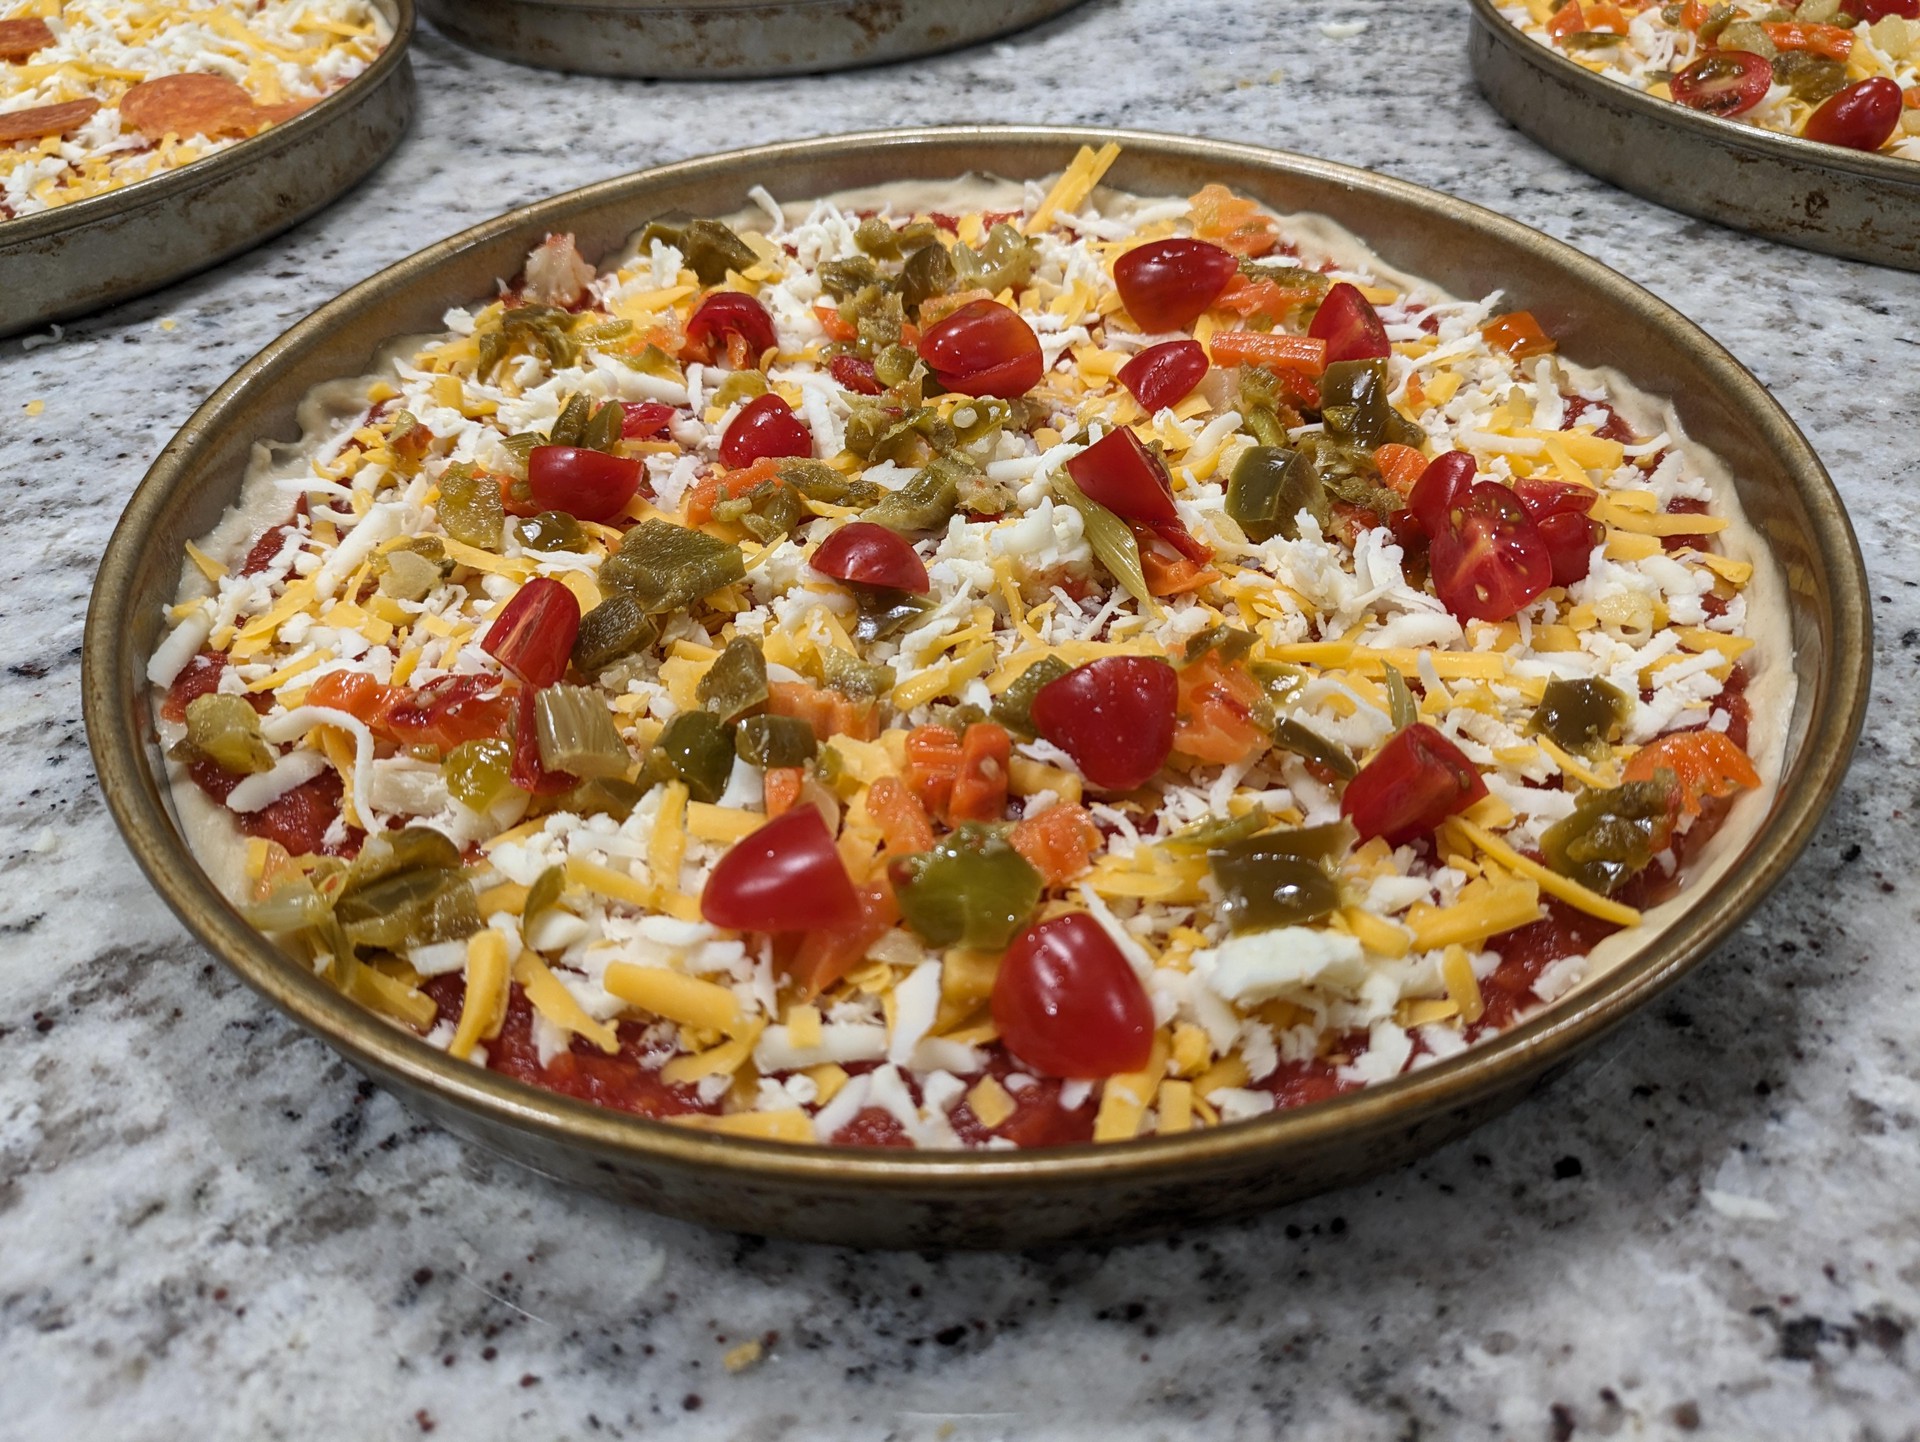
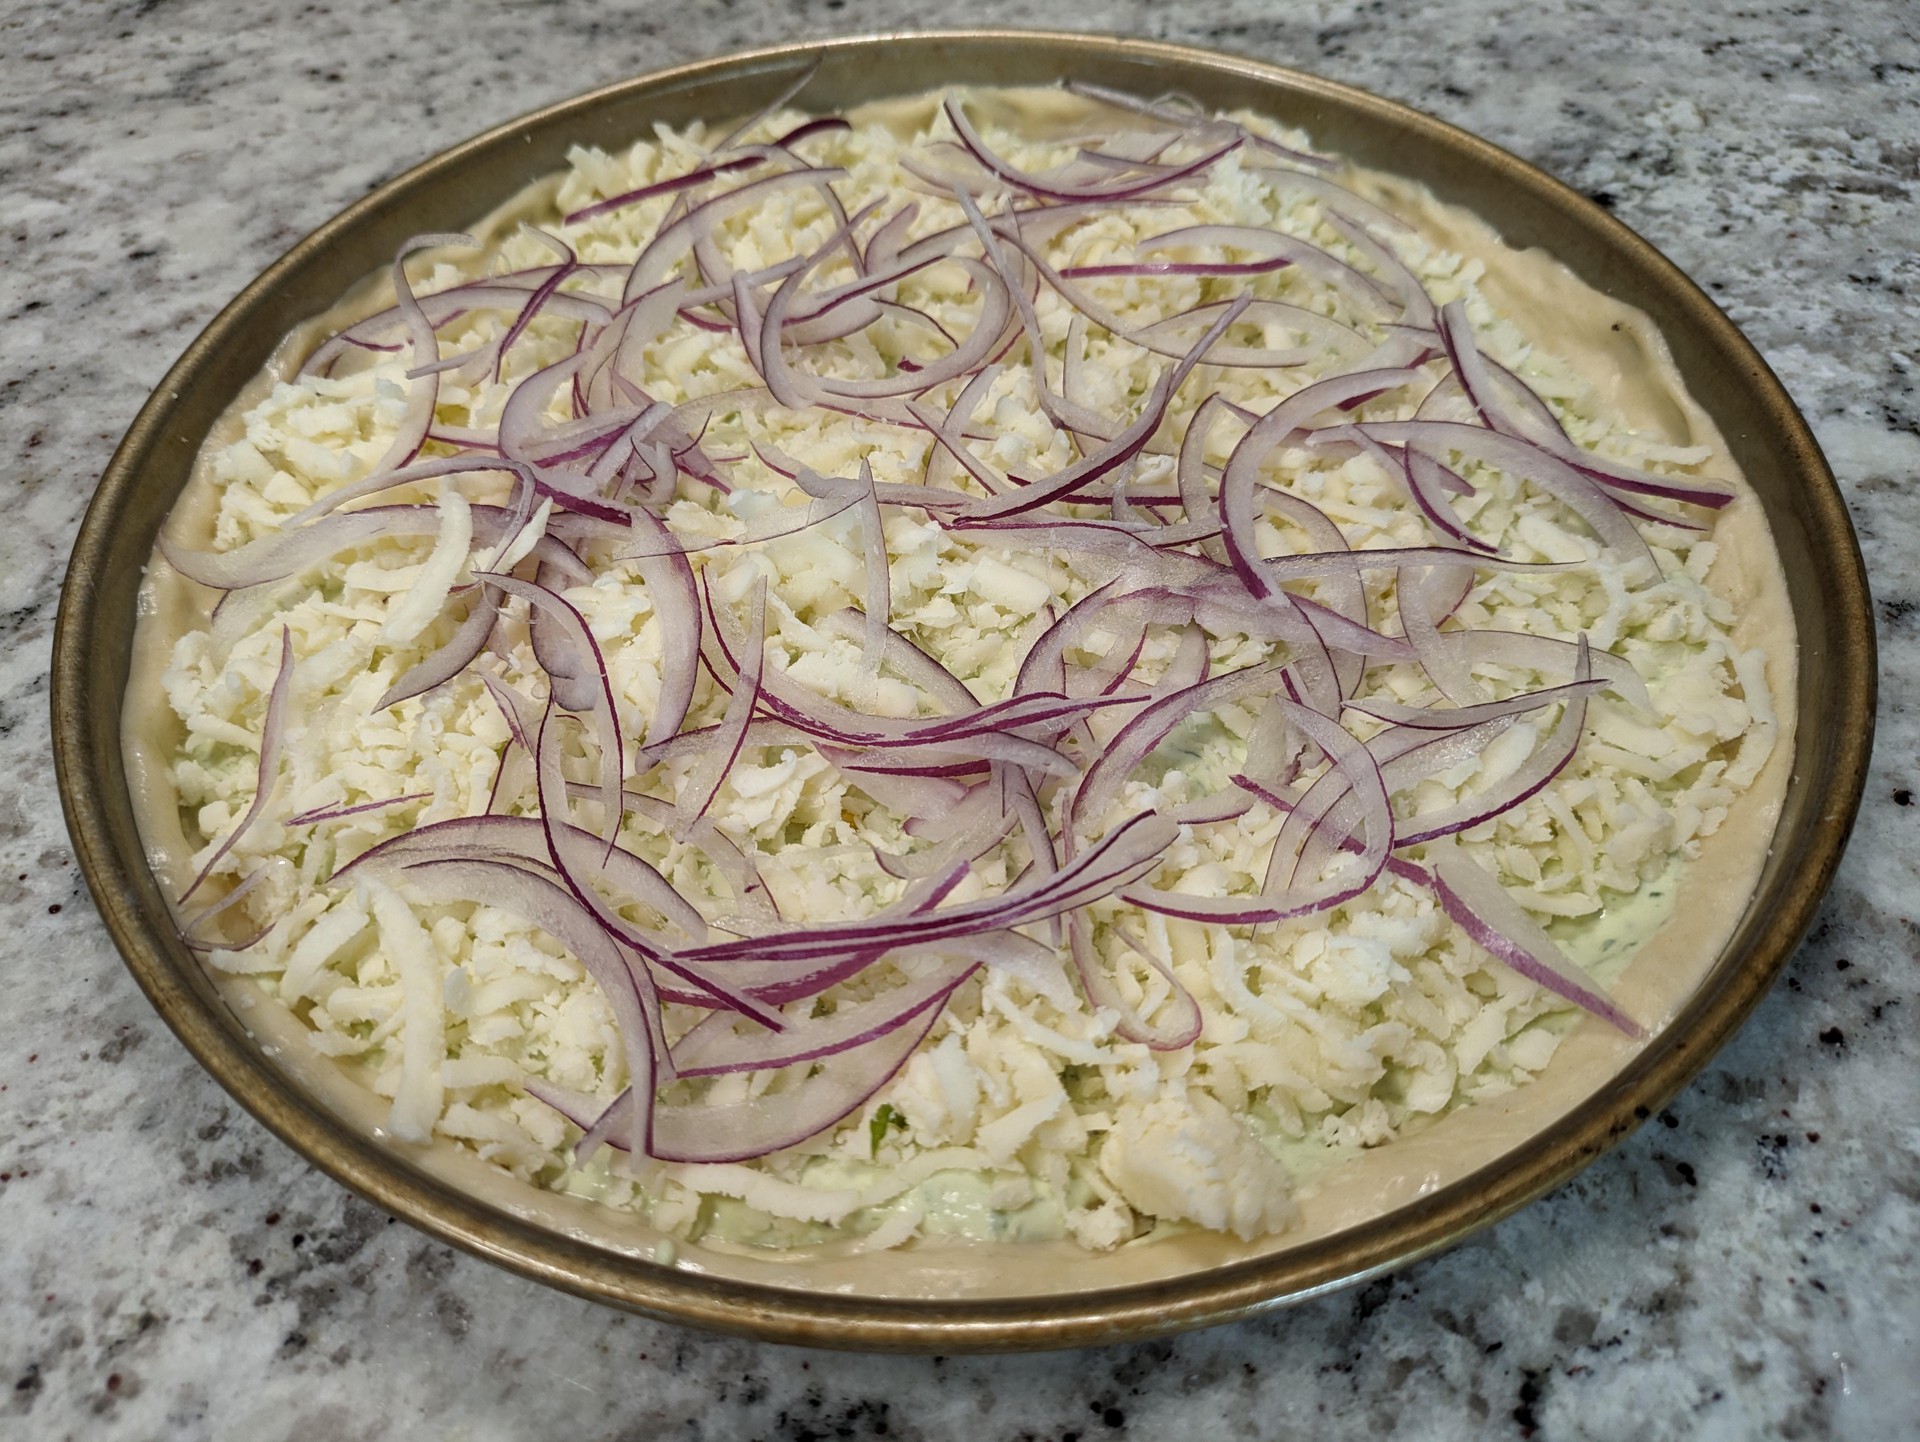
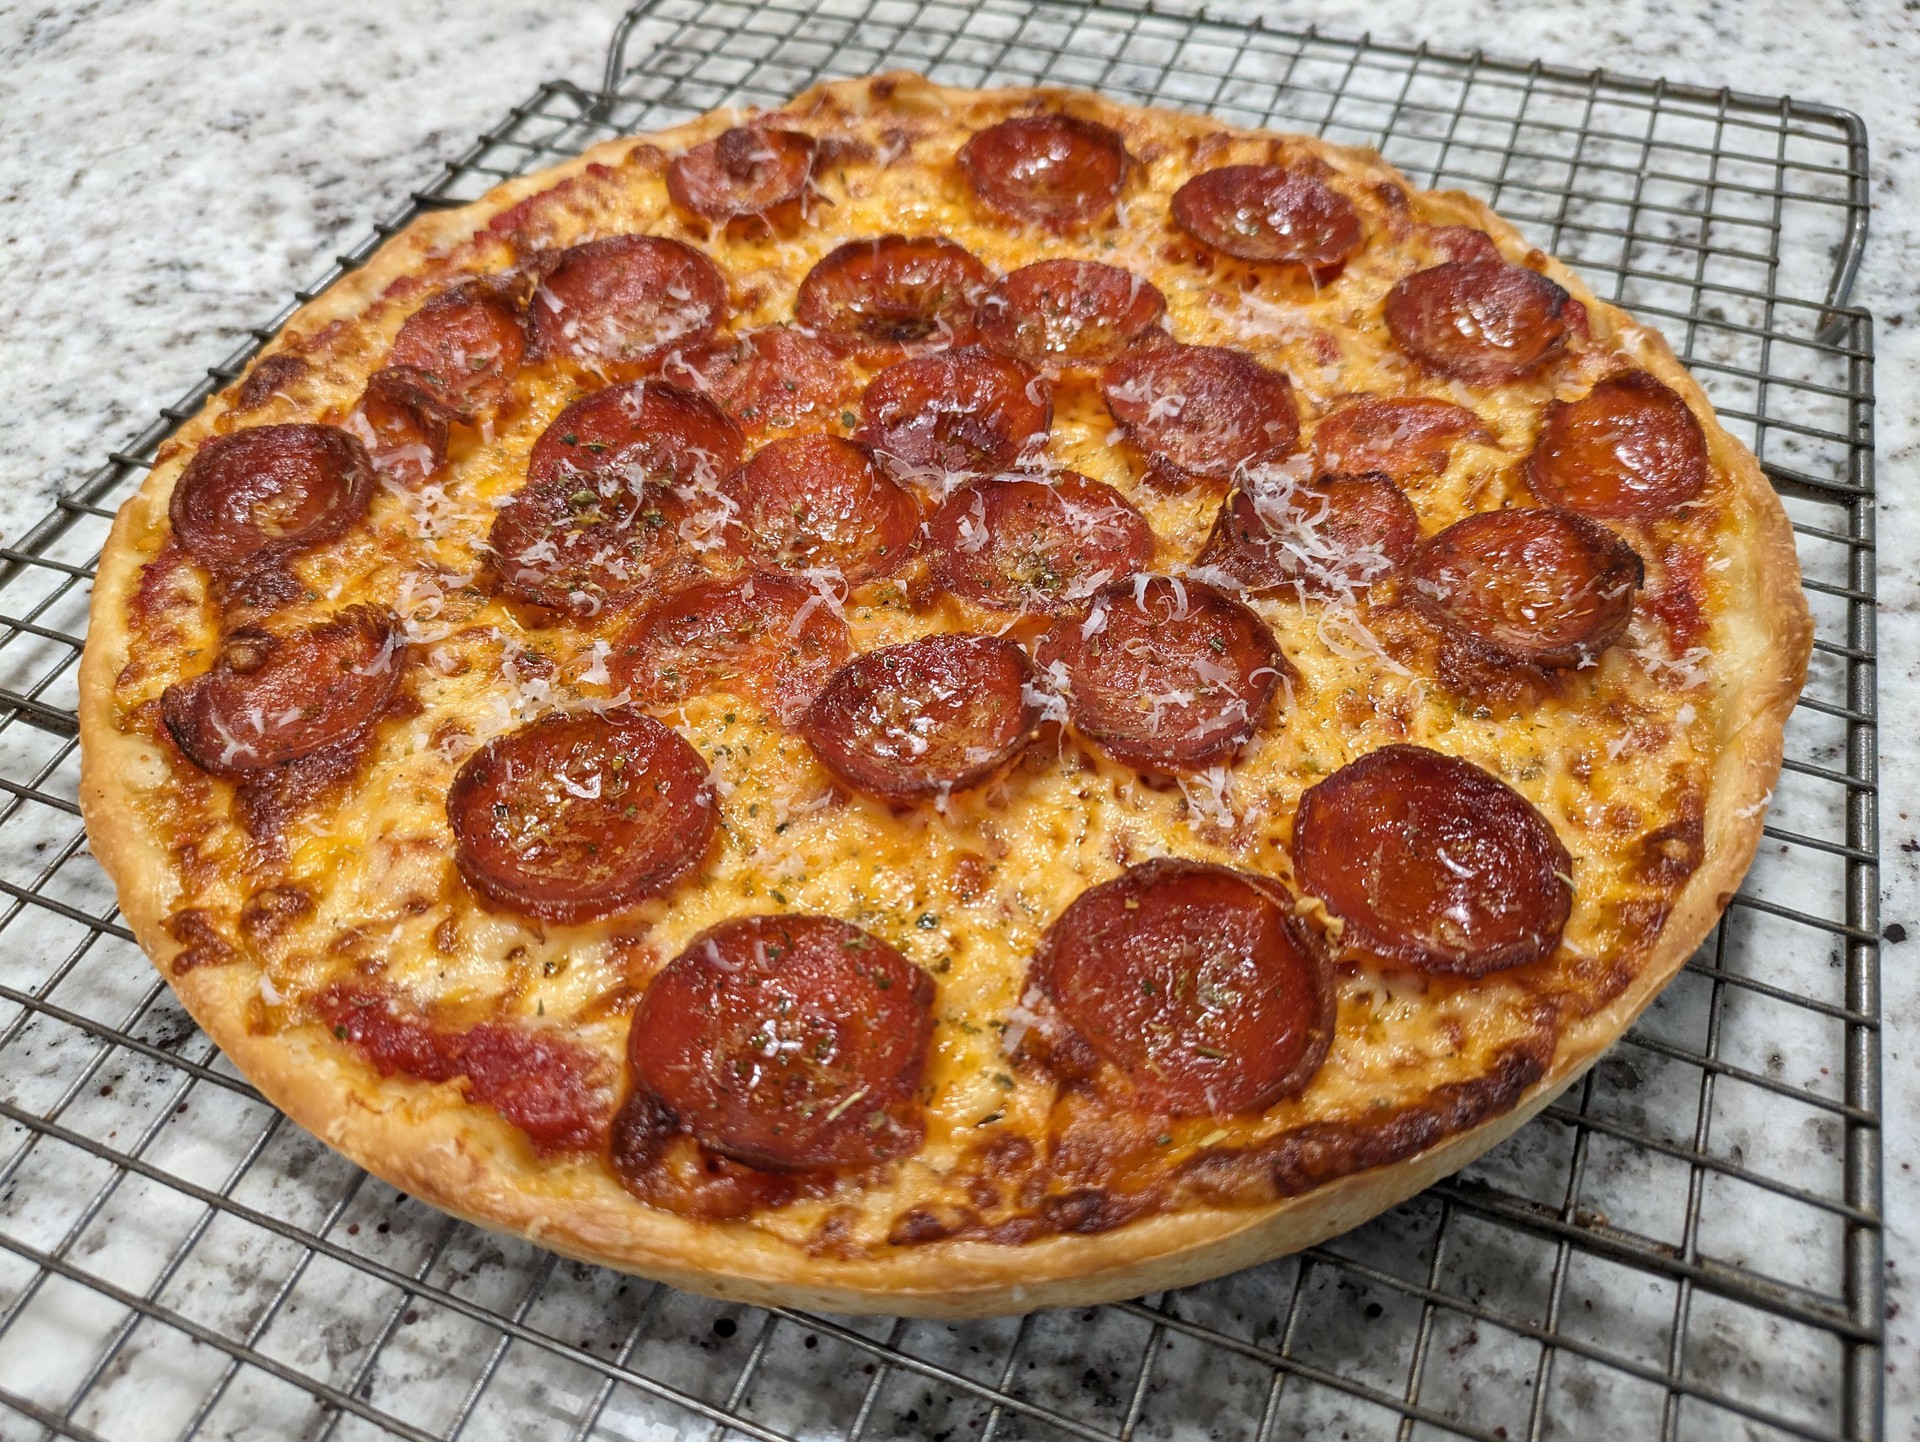
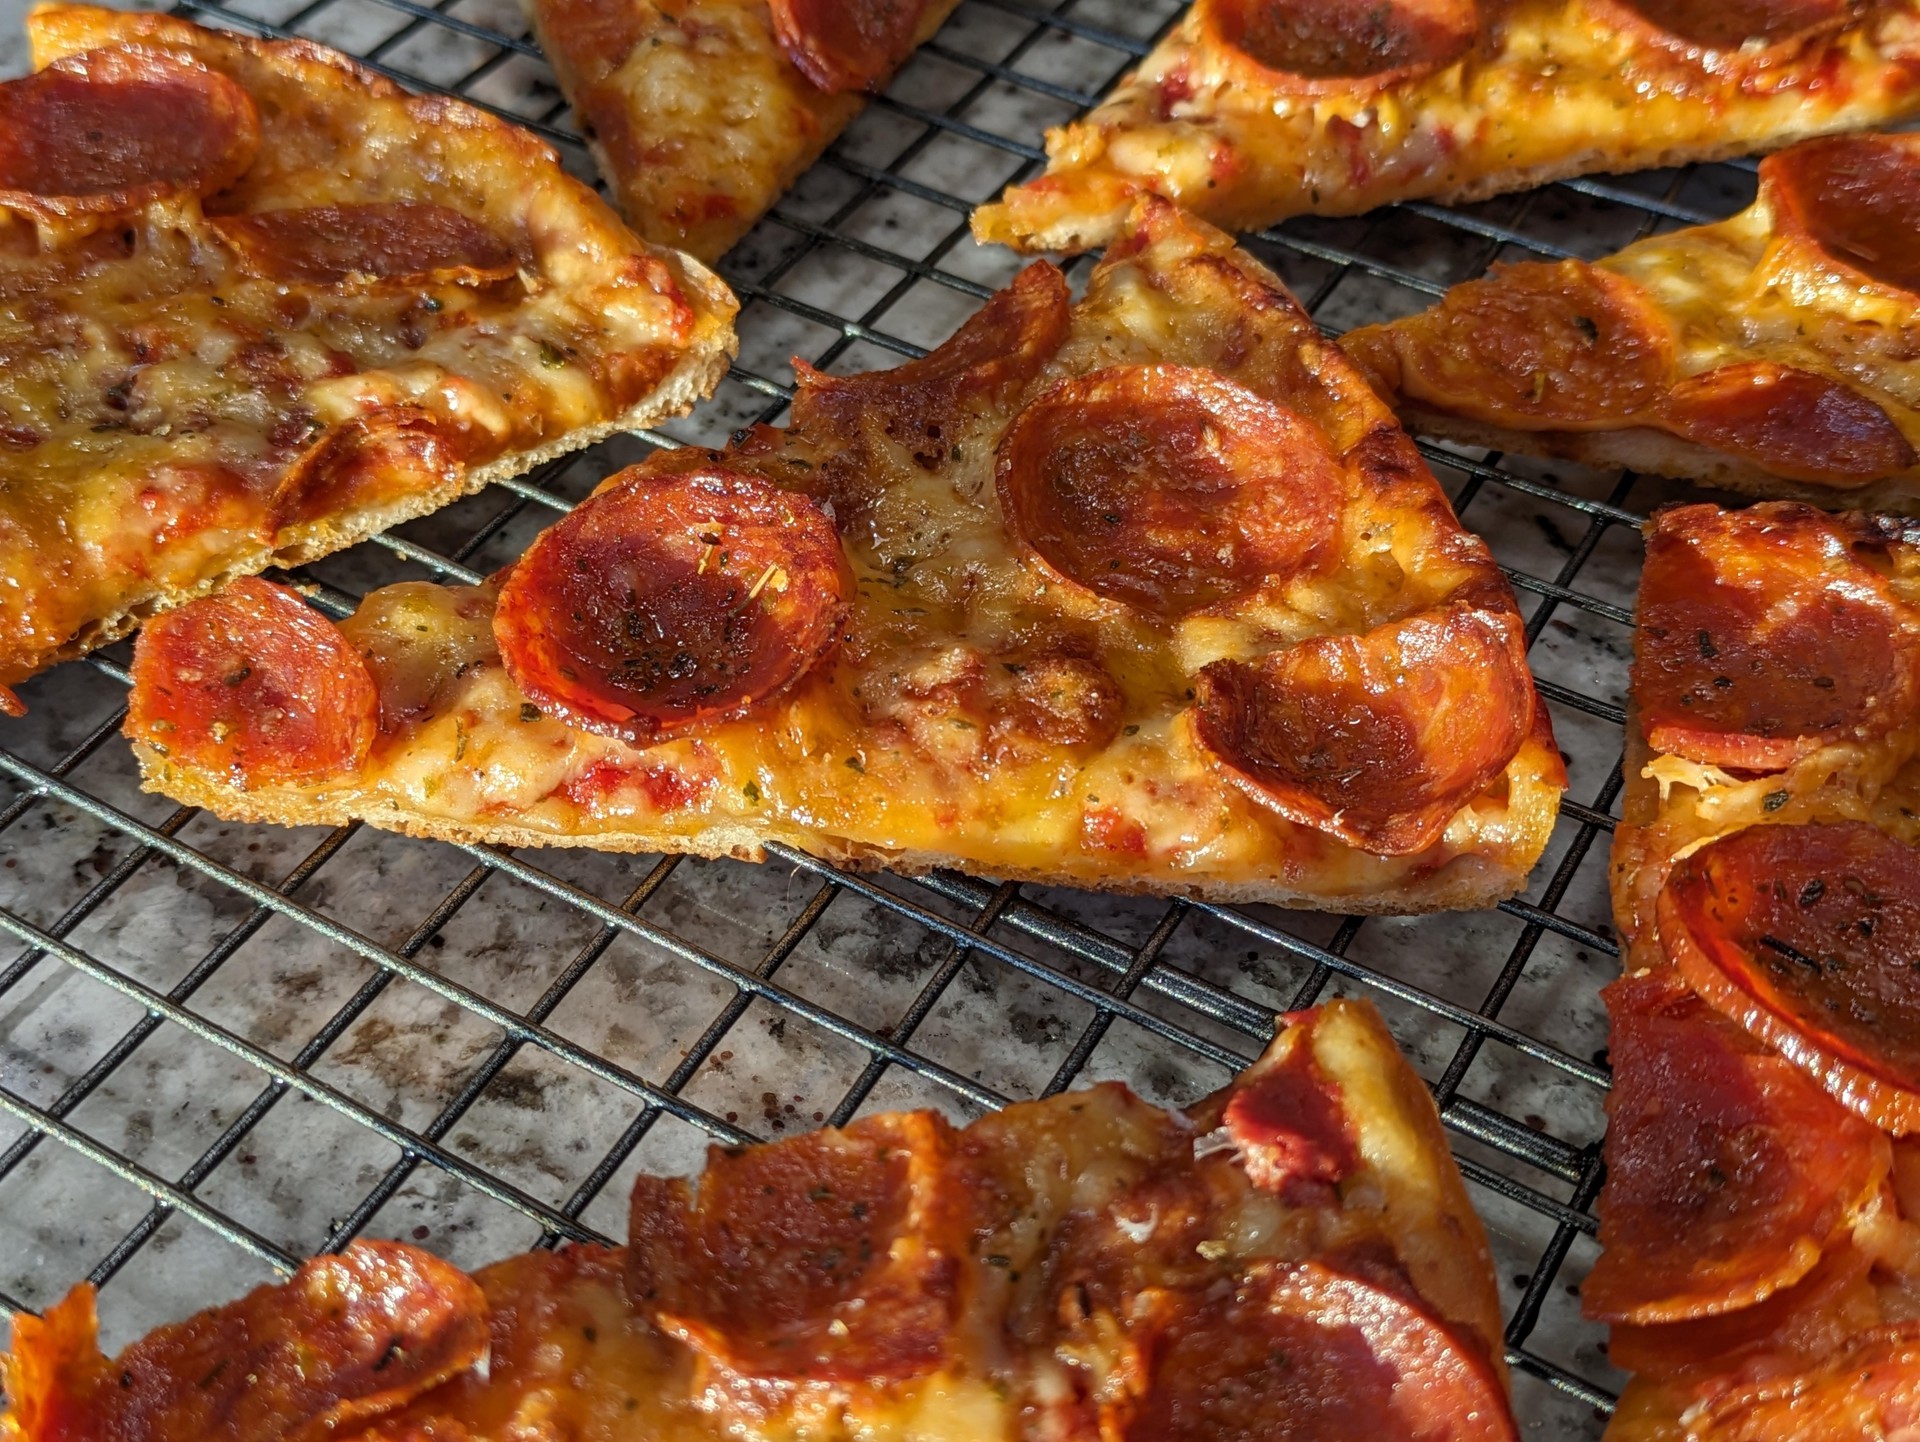
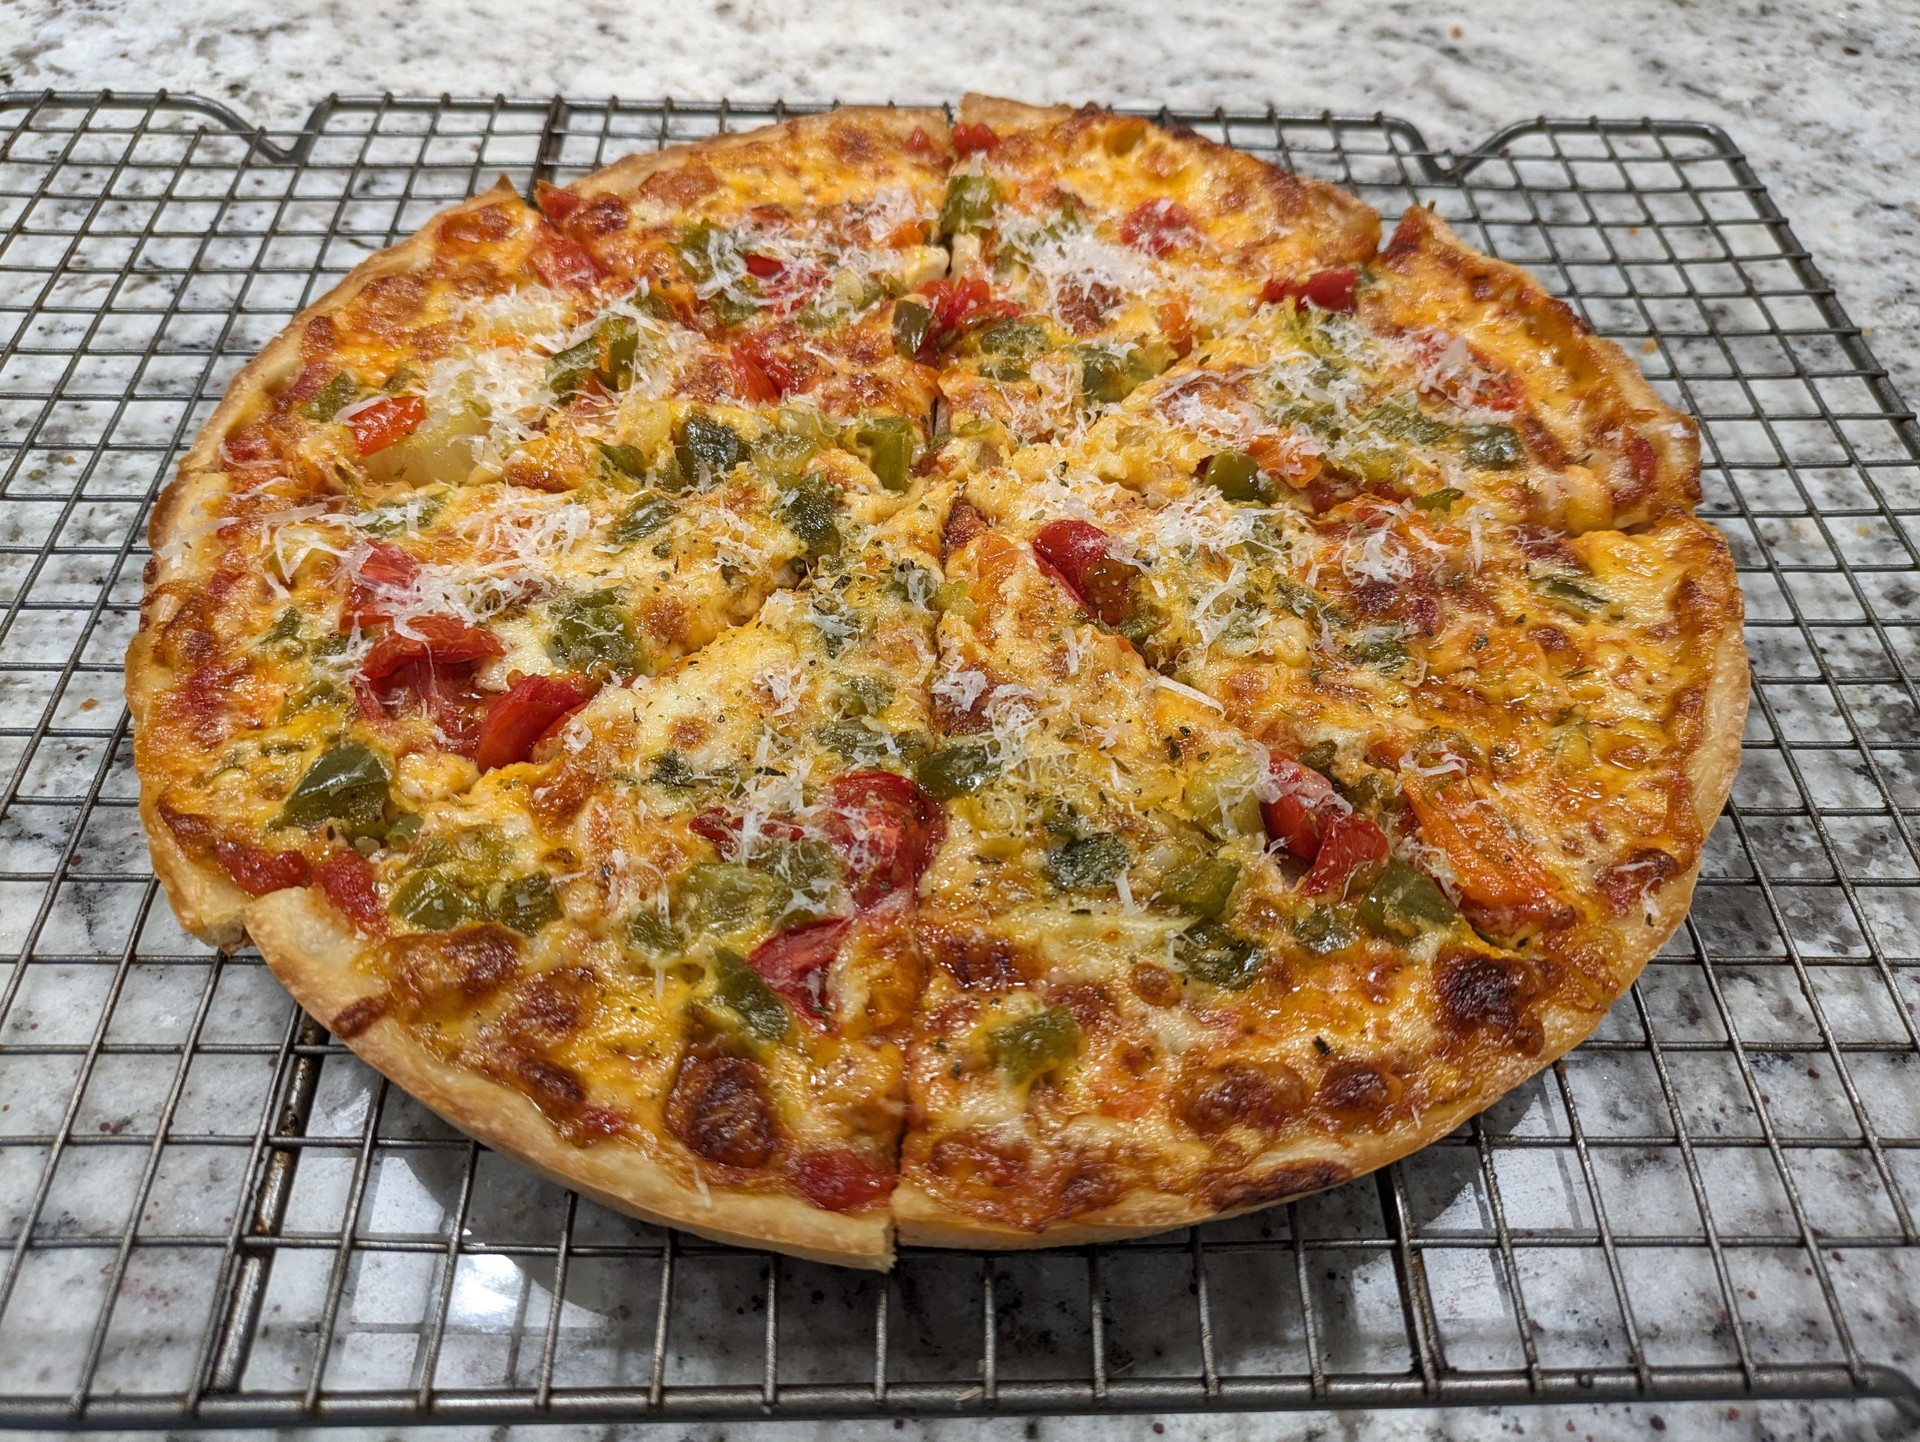
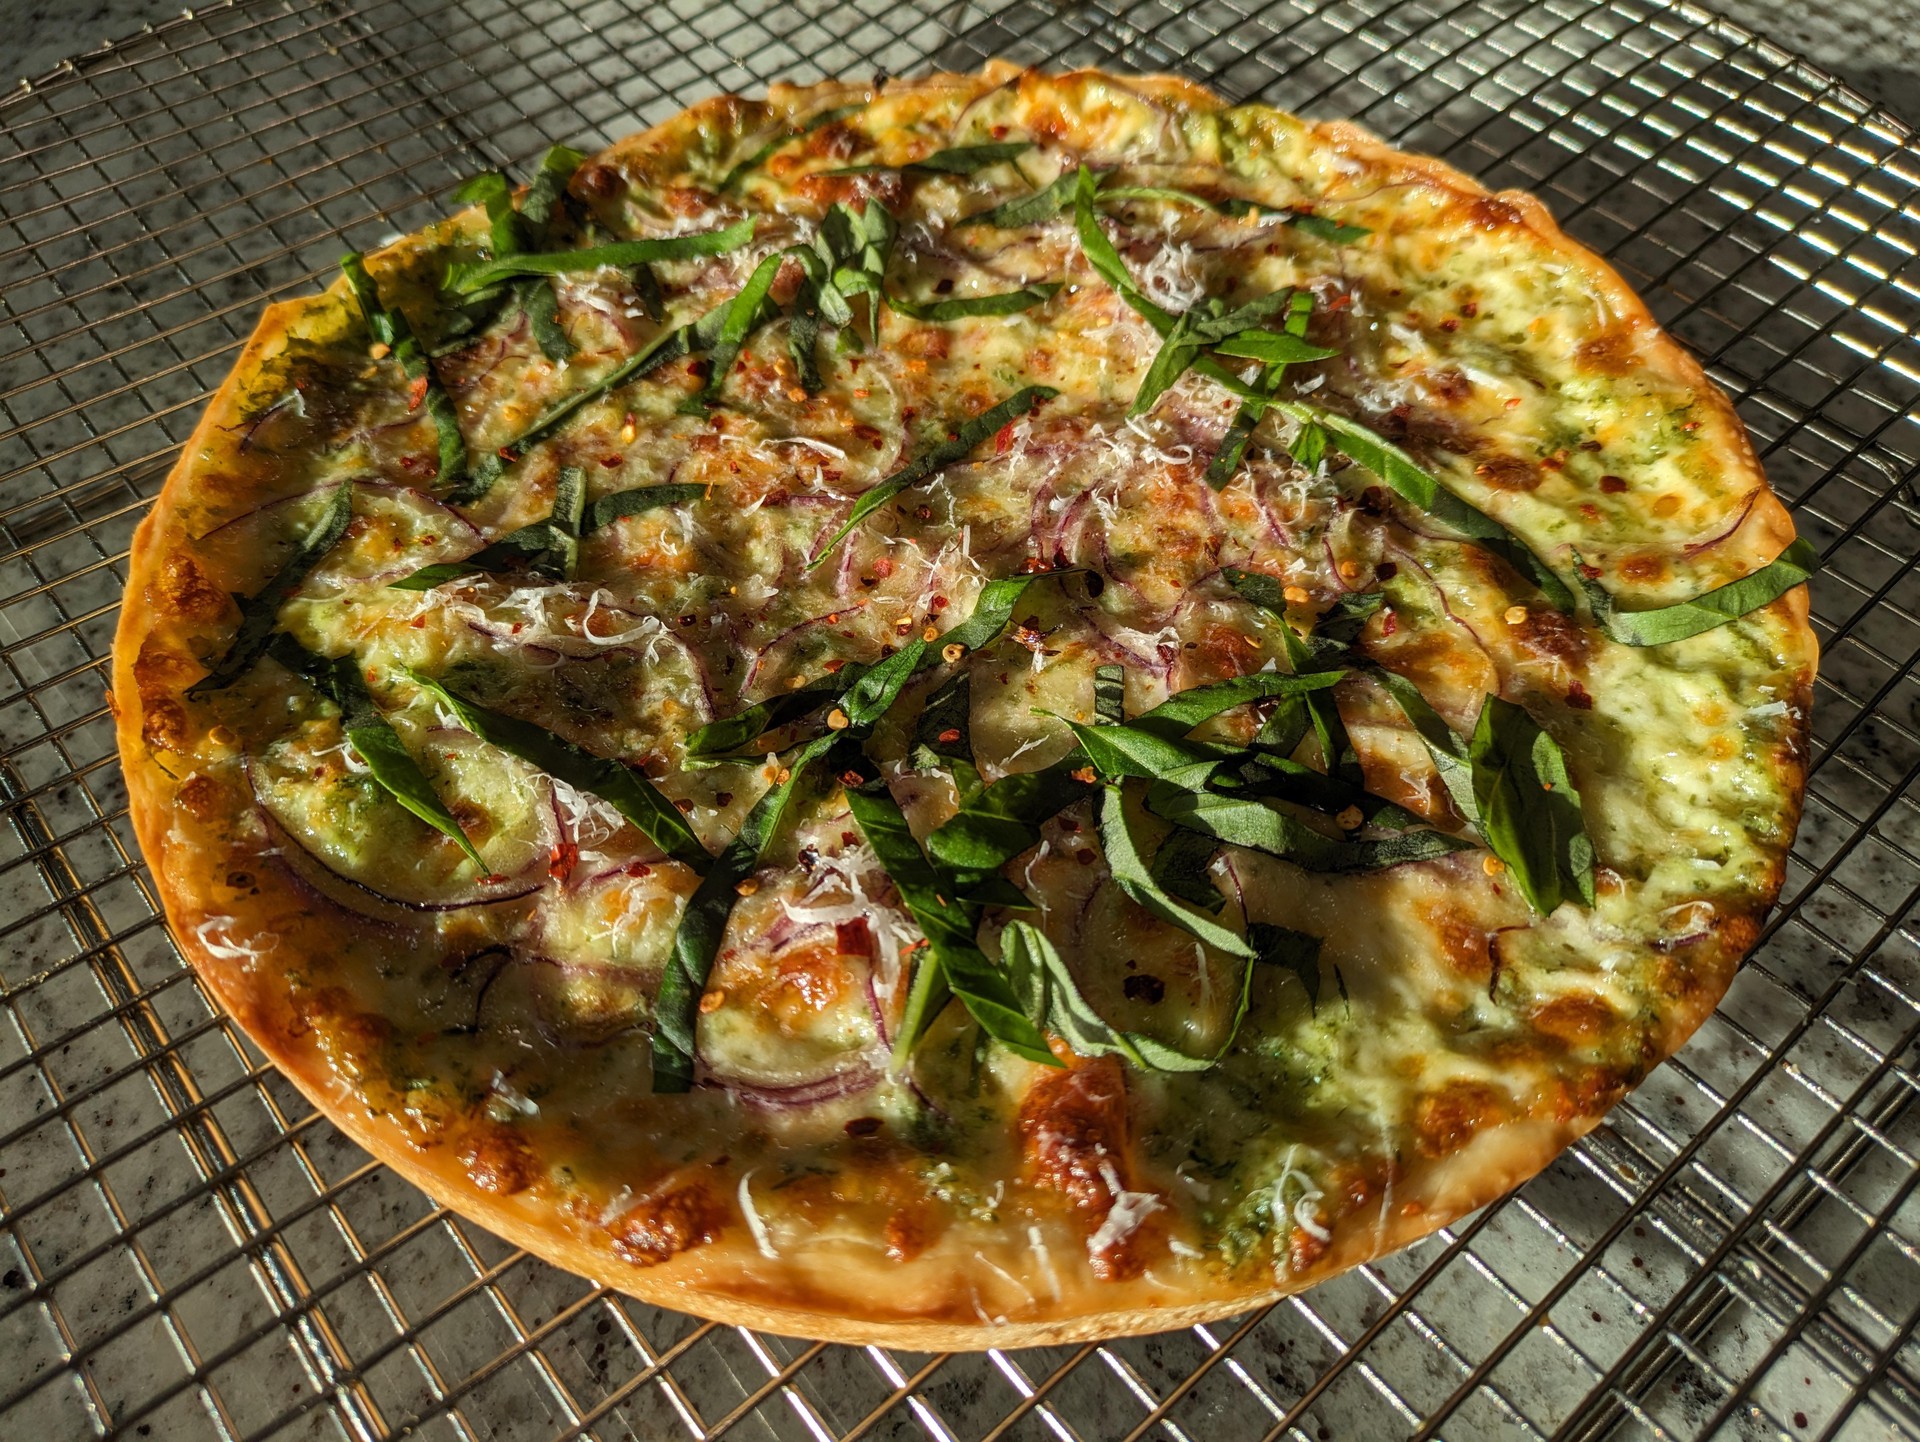
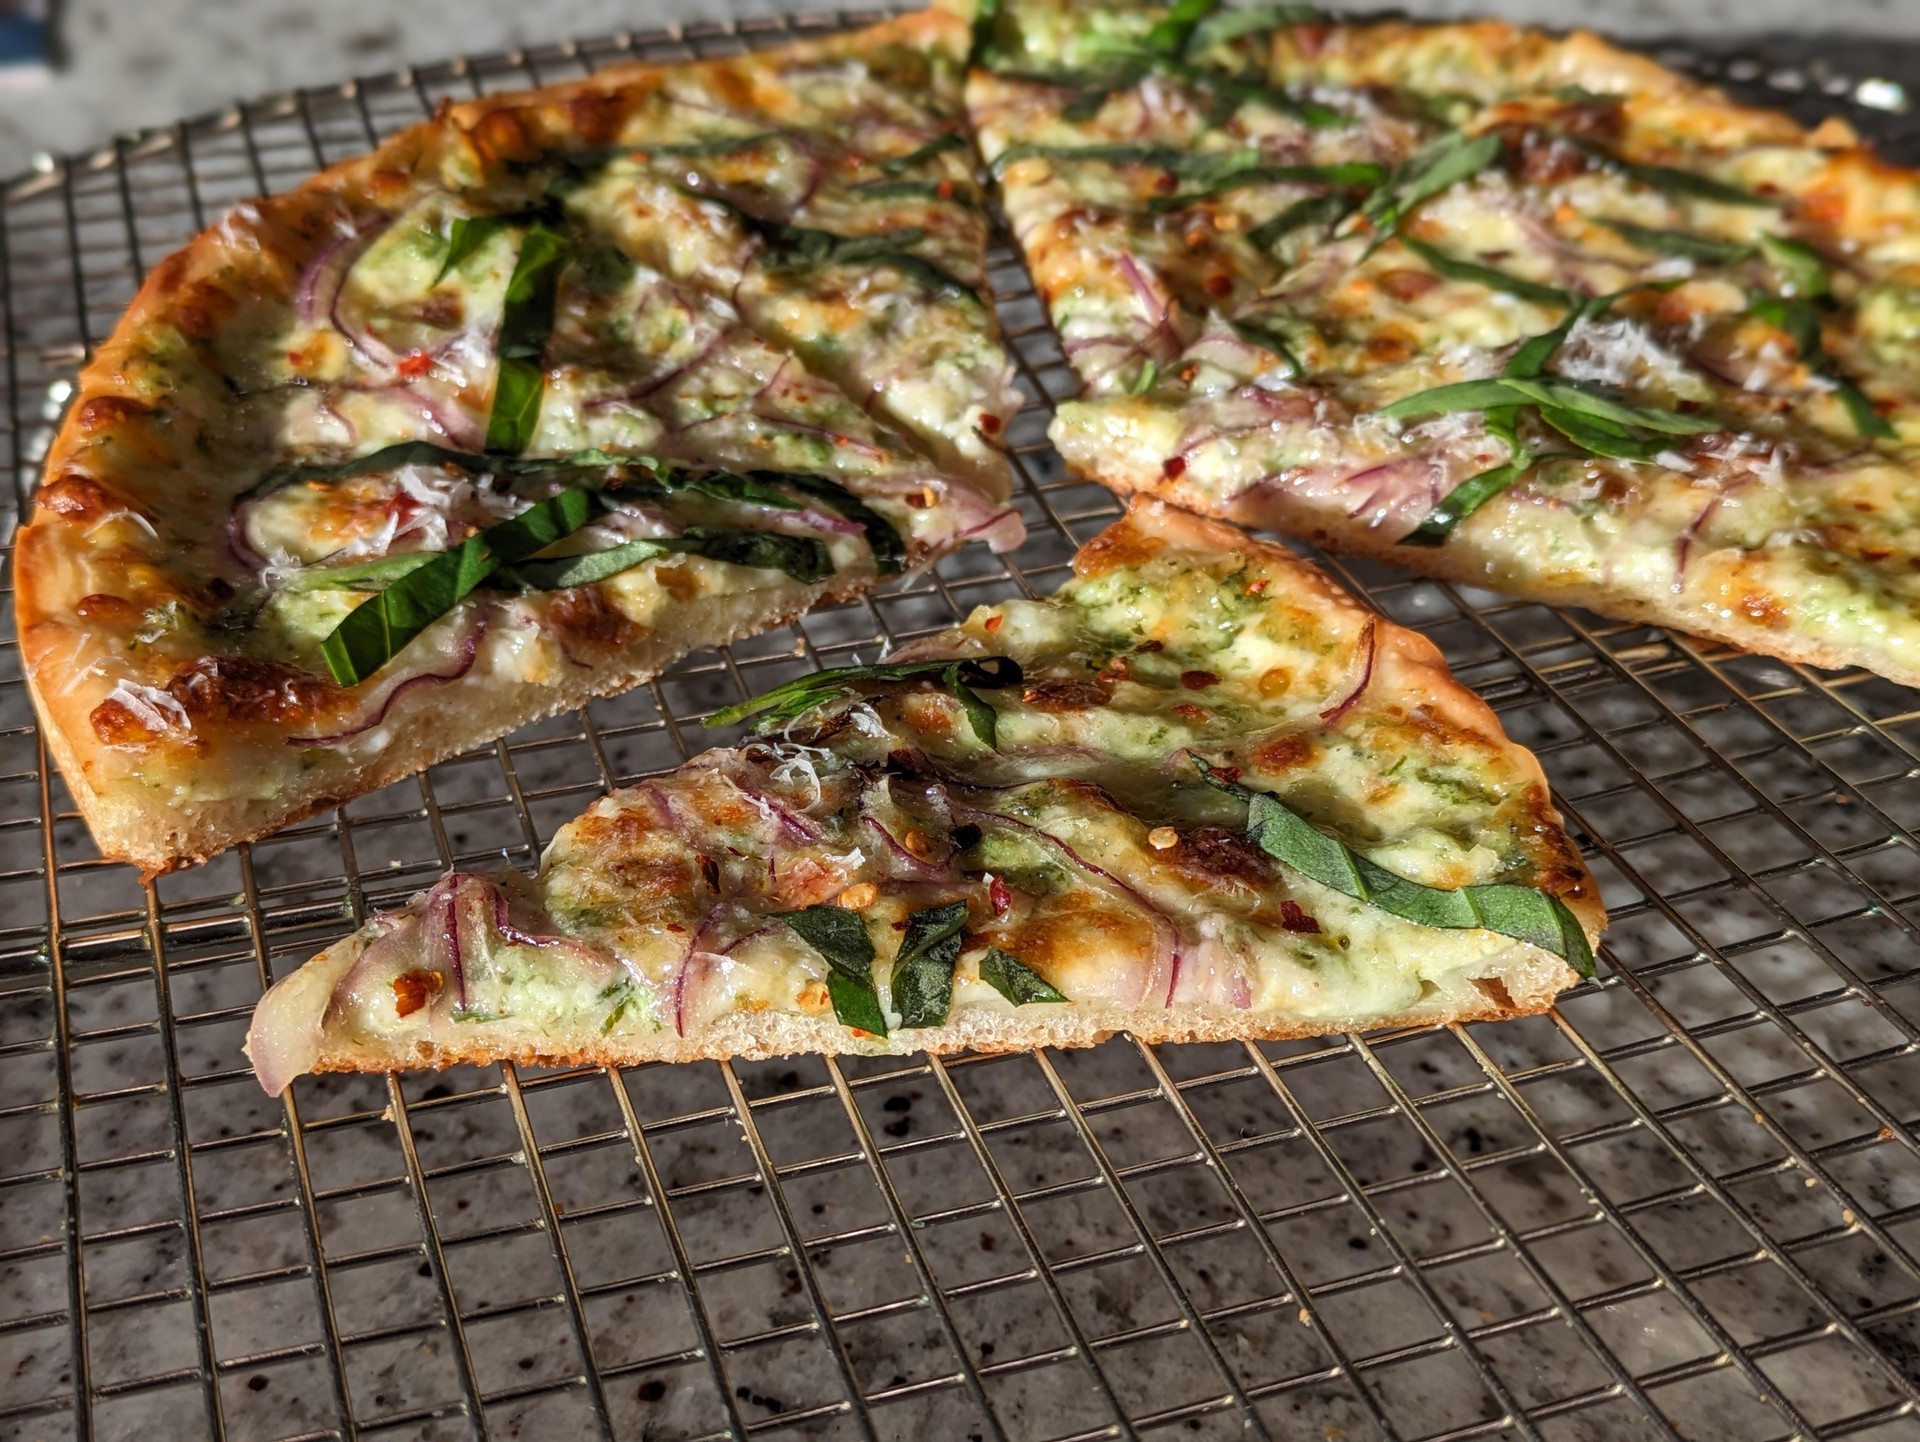
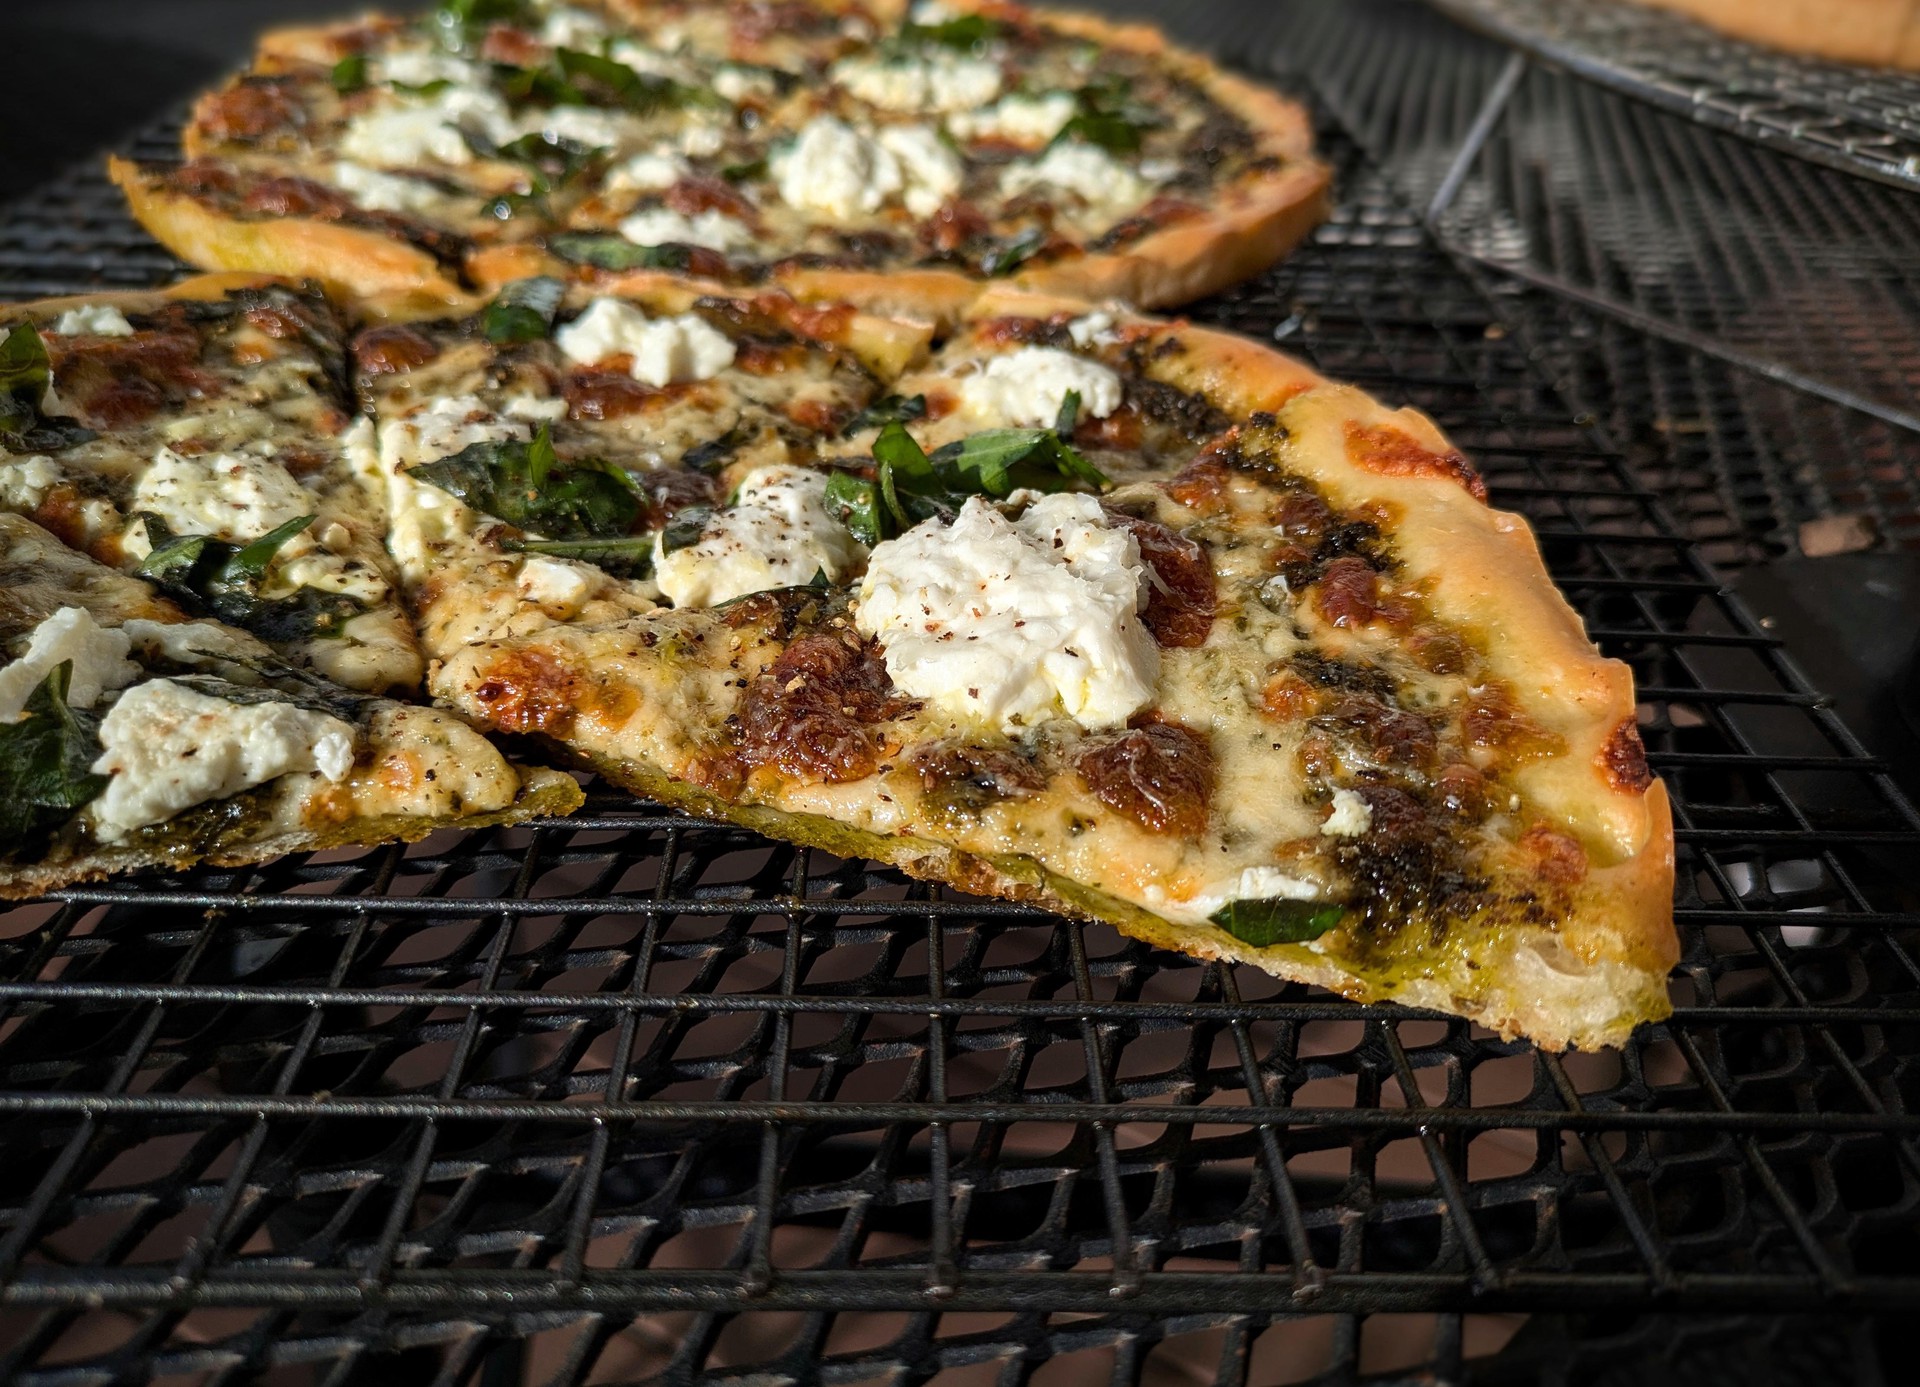
- Dimple and Dress => with greased fingers, dimple the dough by making a claw shape and then pressing down in columns up and down the pan. This helps prevent big air bubbles that screw up the bake. Pour 1/3 - 1/2 cup sauce into middle and spread to edges; it’s easiest with one hand spreading the sauce while the other spins the pan. Add layer of grated pecorino romano or parmesan reggiano, followed by relatively-light layer of cheese. You should be able to see the red sauce throughout. Top with pepperoni or whatever
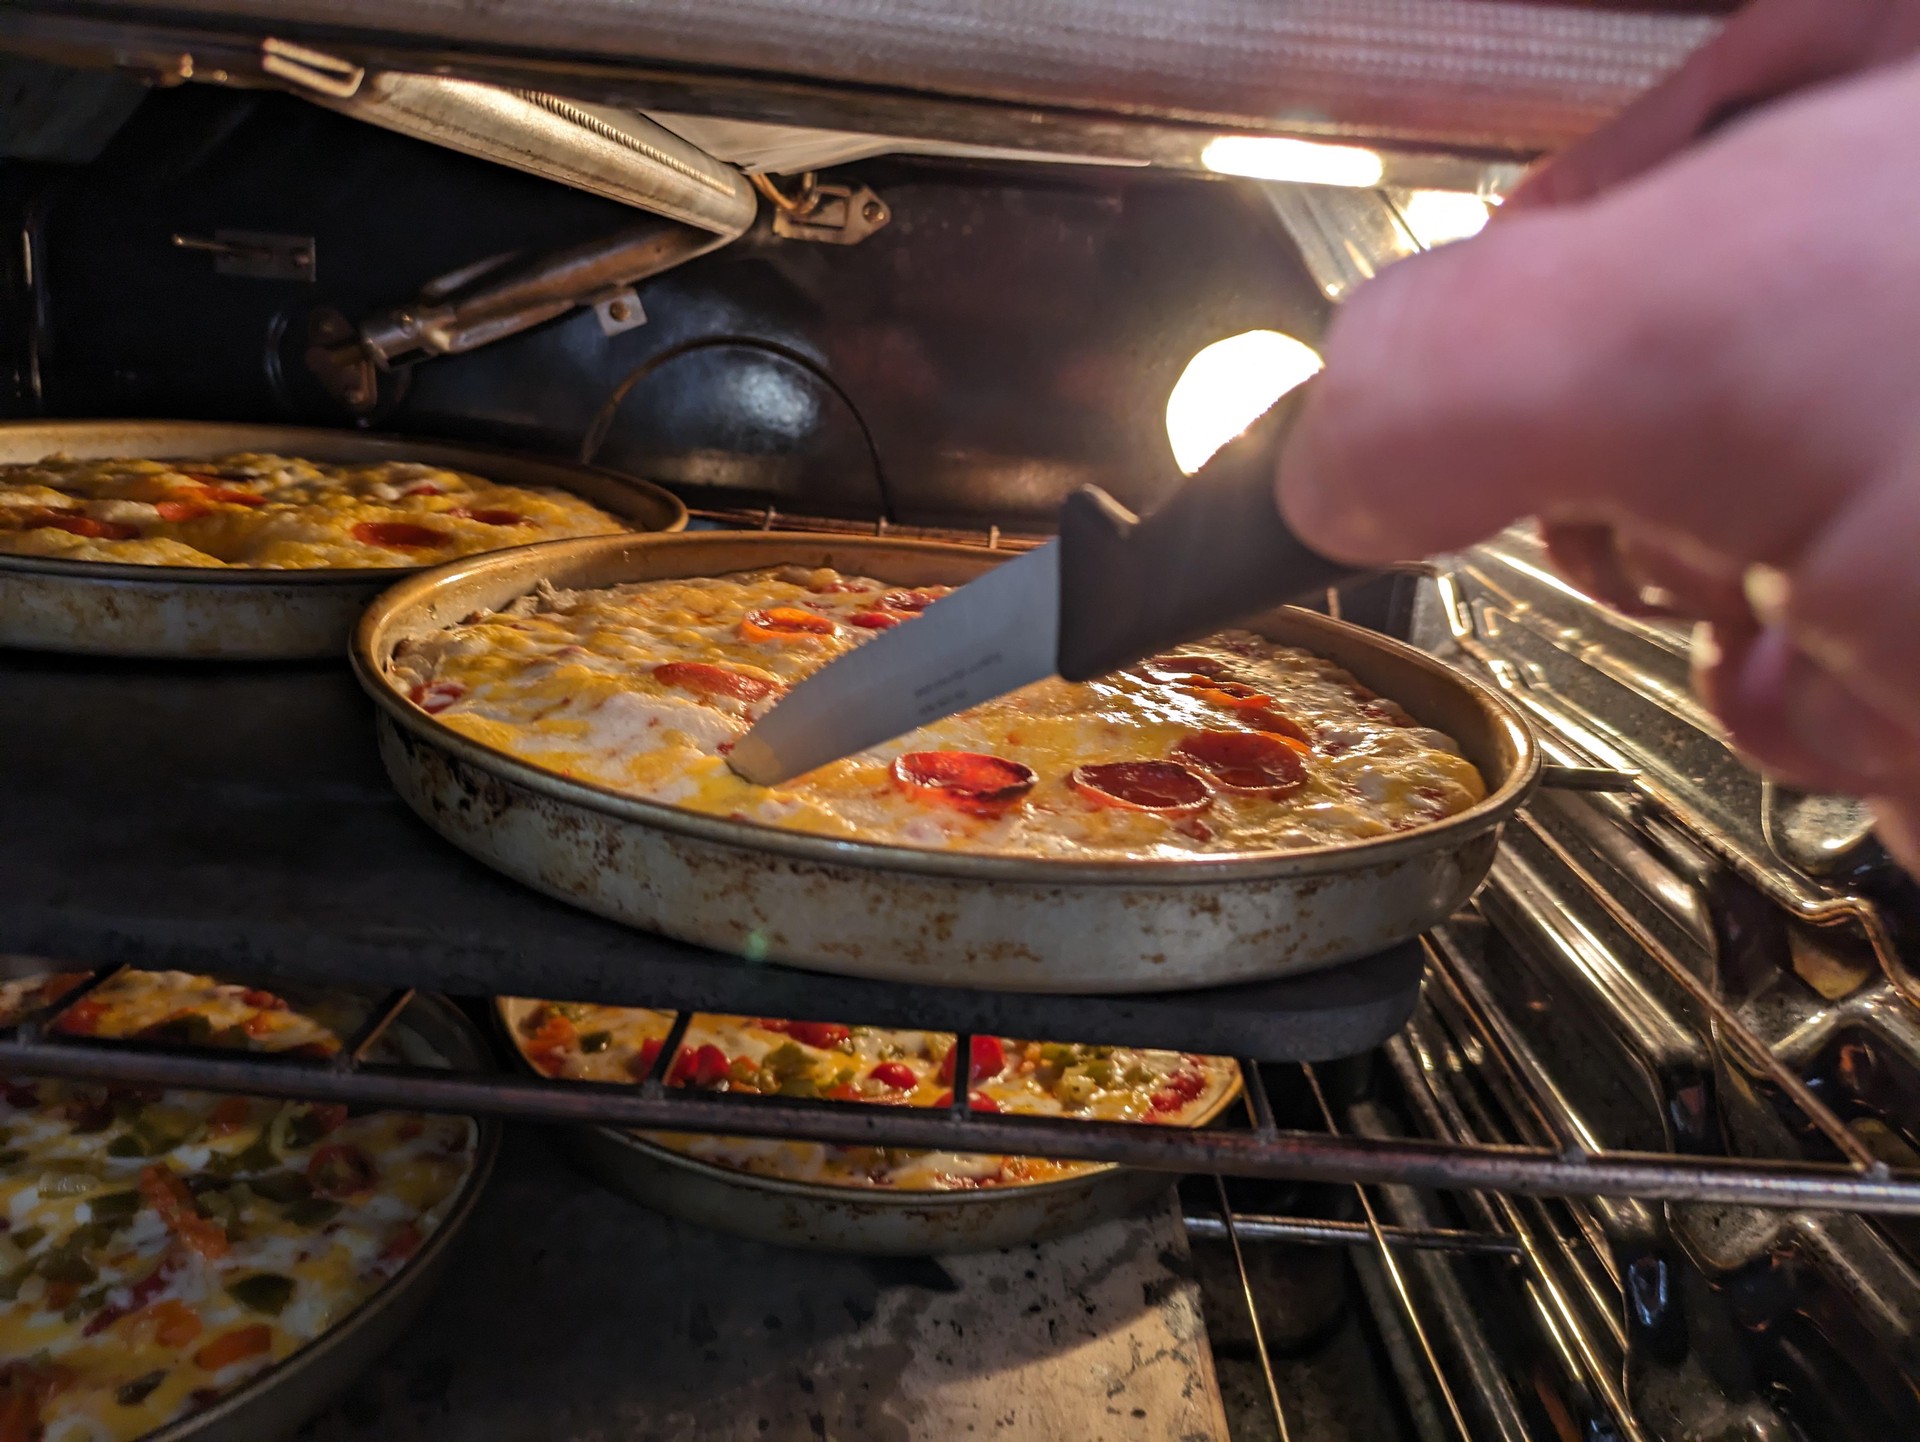
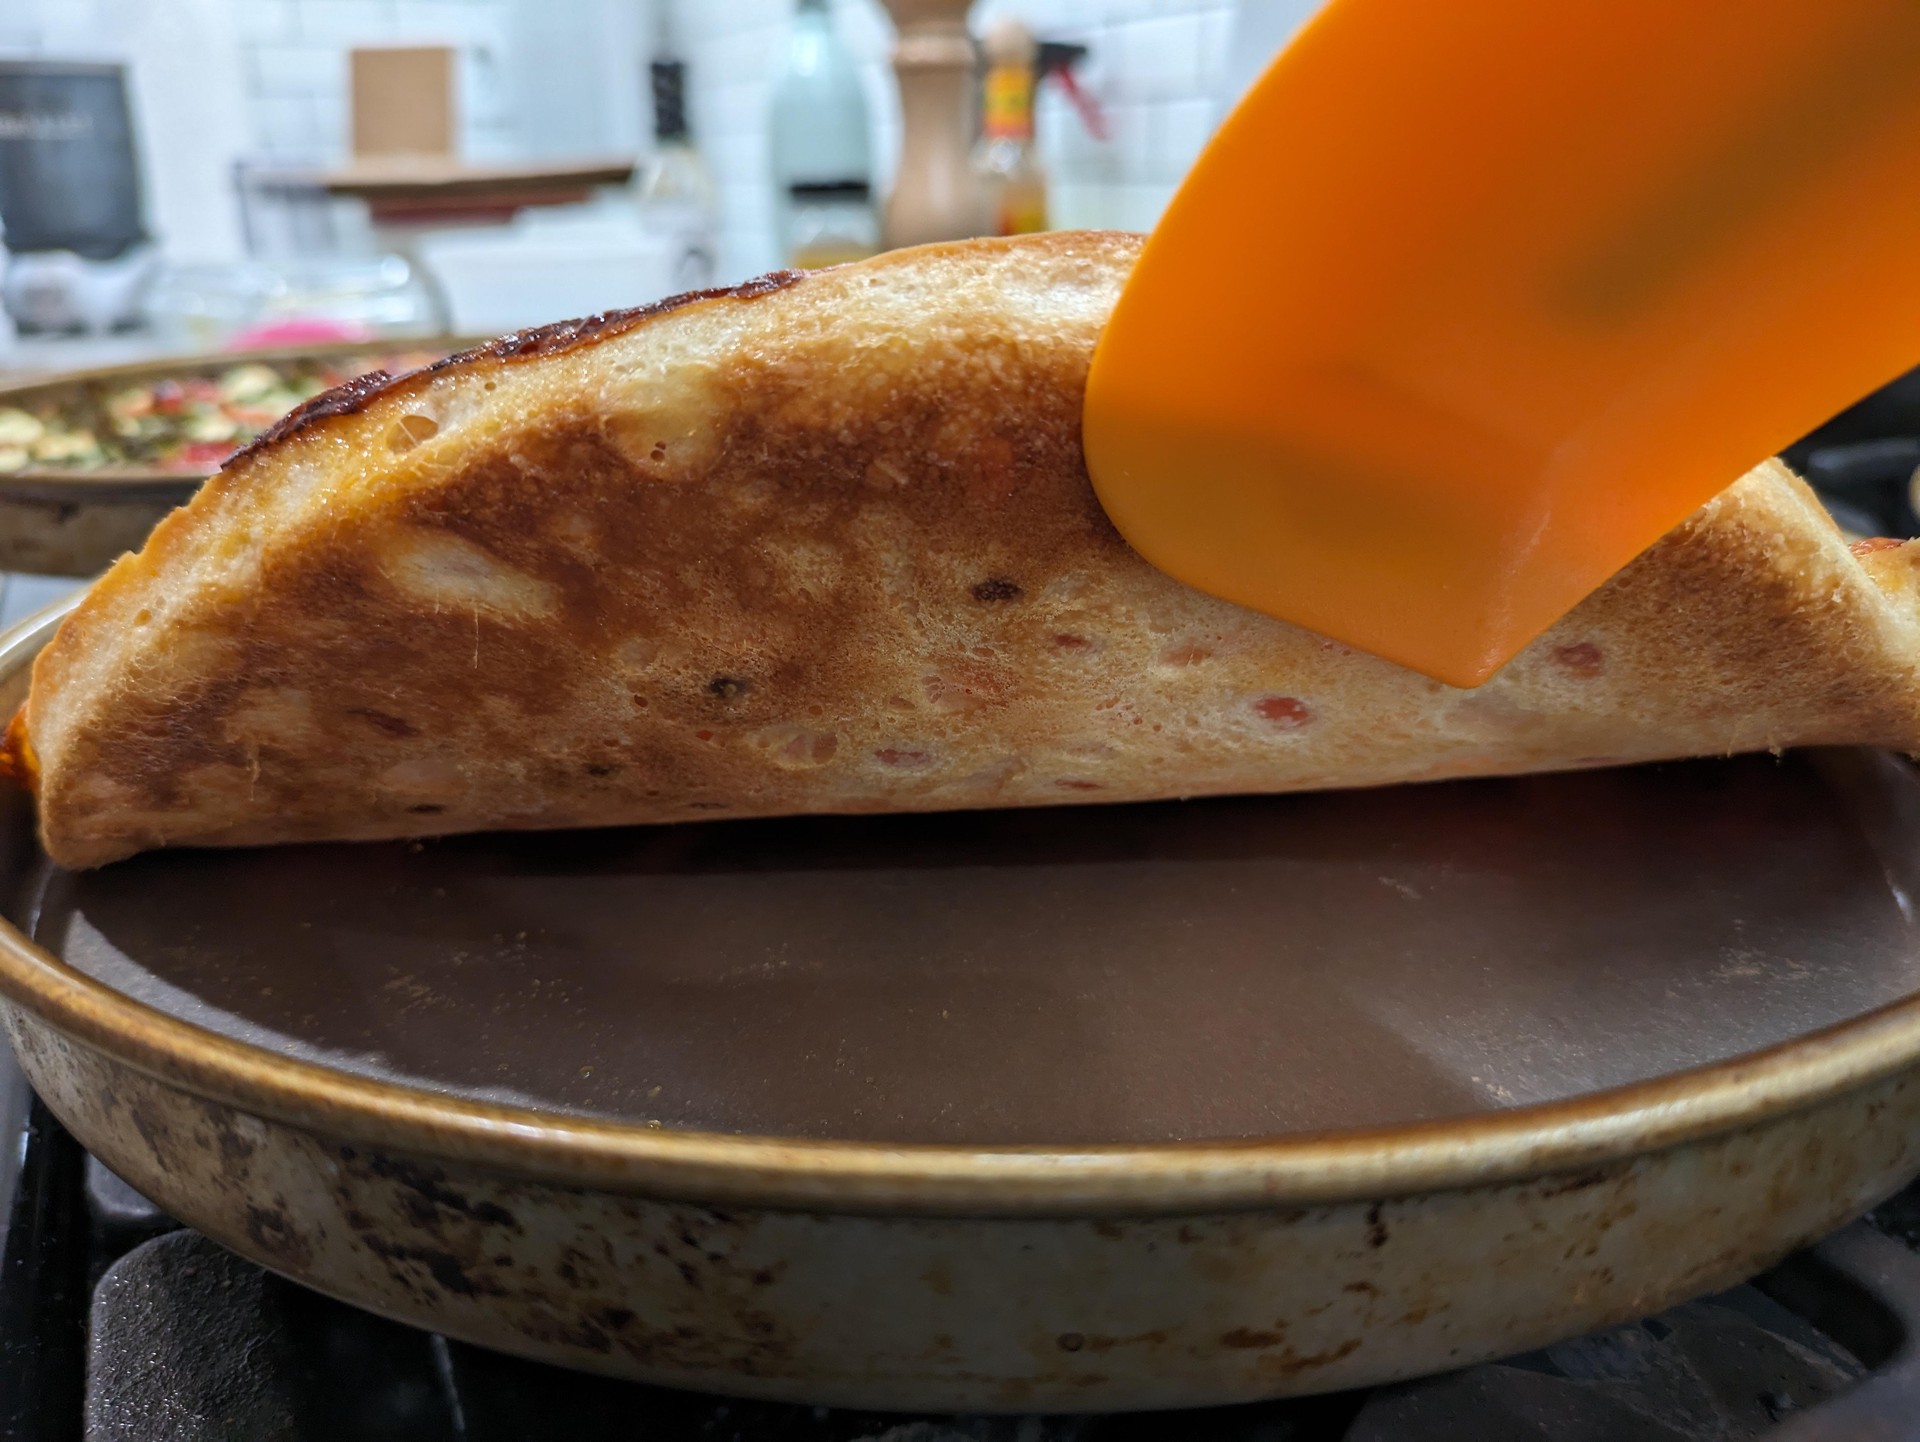
- Bake (~12-18 min) => Drop oven to 500°F and move pans to the stones or steels. Set timer for 5 minutes. Keep an eye out for any air bubbles and eliminate them with a steak knife. When the timer goes off, rotate the pans 180 degrees if the don’t fit on the steel or stone. White or lightly-topped pizzas may be done around the 10 minute mark. Heavily-sauced or topped ones will need 5 more minutes. When the tops look done, remove pans from oven and use spatula to peek at the the bottom. It should have some color. Slide onto peel and launch directly onto steel or stone. The goal is to get the bottom golden-brown and crispy, which may take a minute or three
- Finish => move pizzas to cooling racks. Top with grated parm/pecorino and oregano. Slice and serve hot

Notes
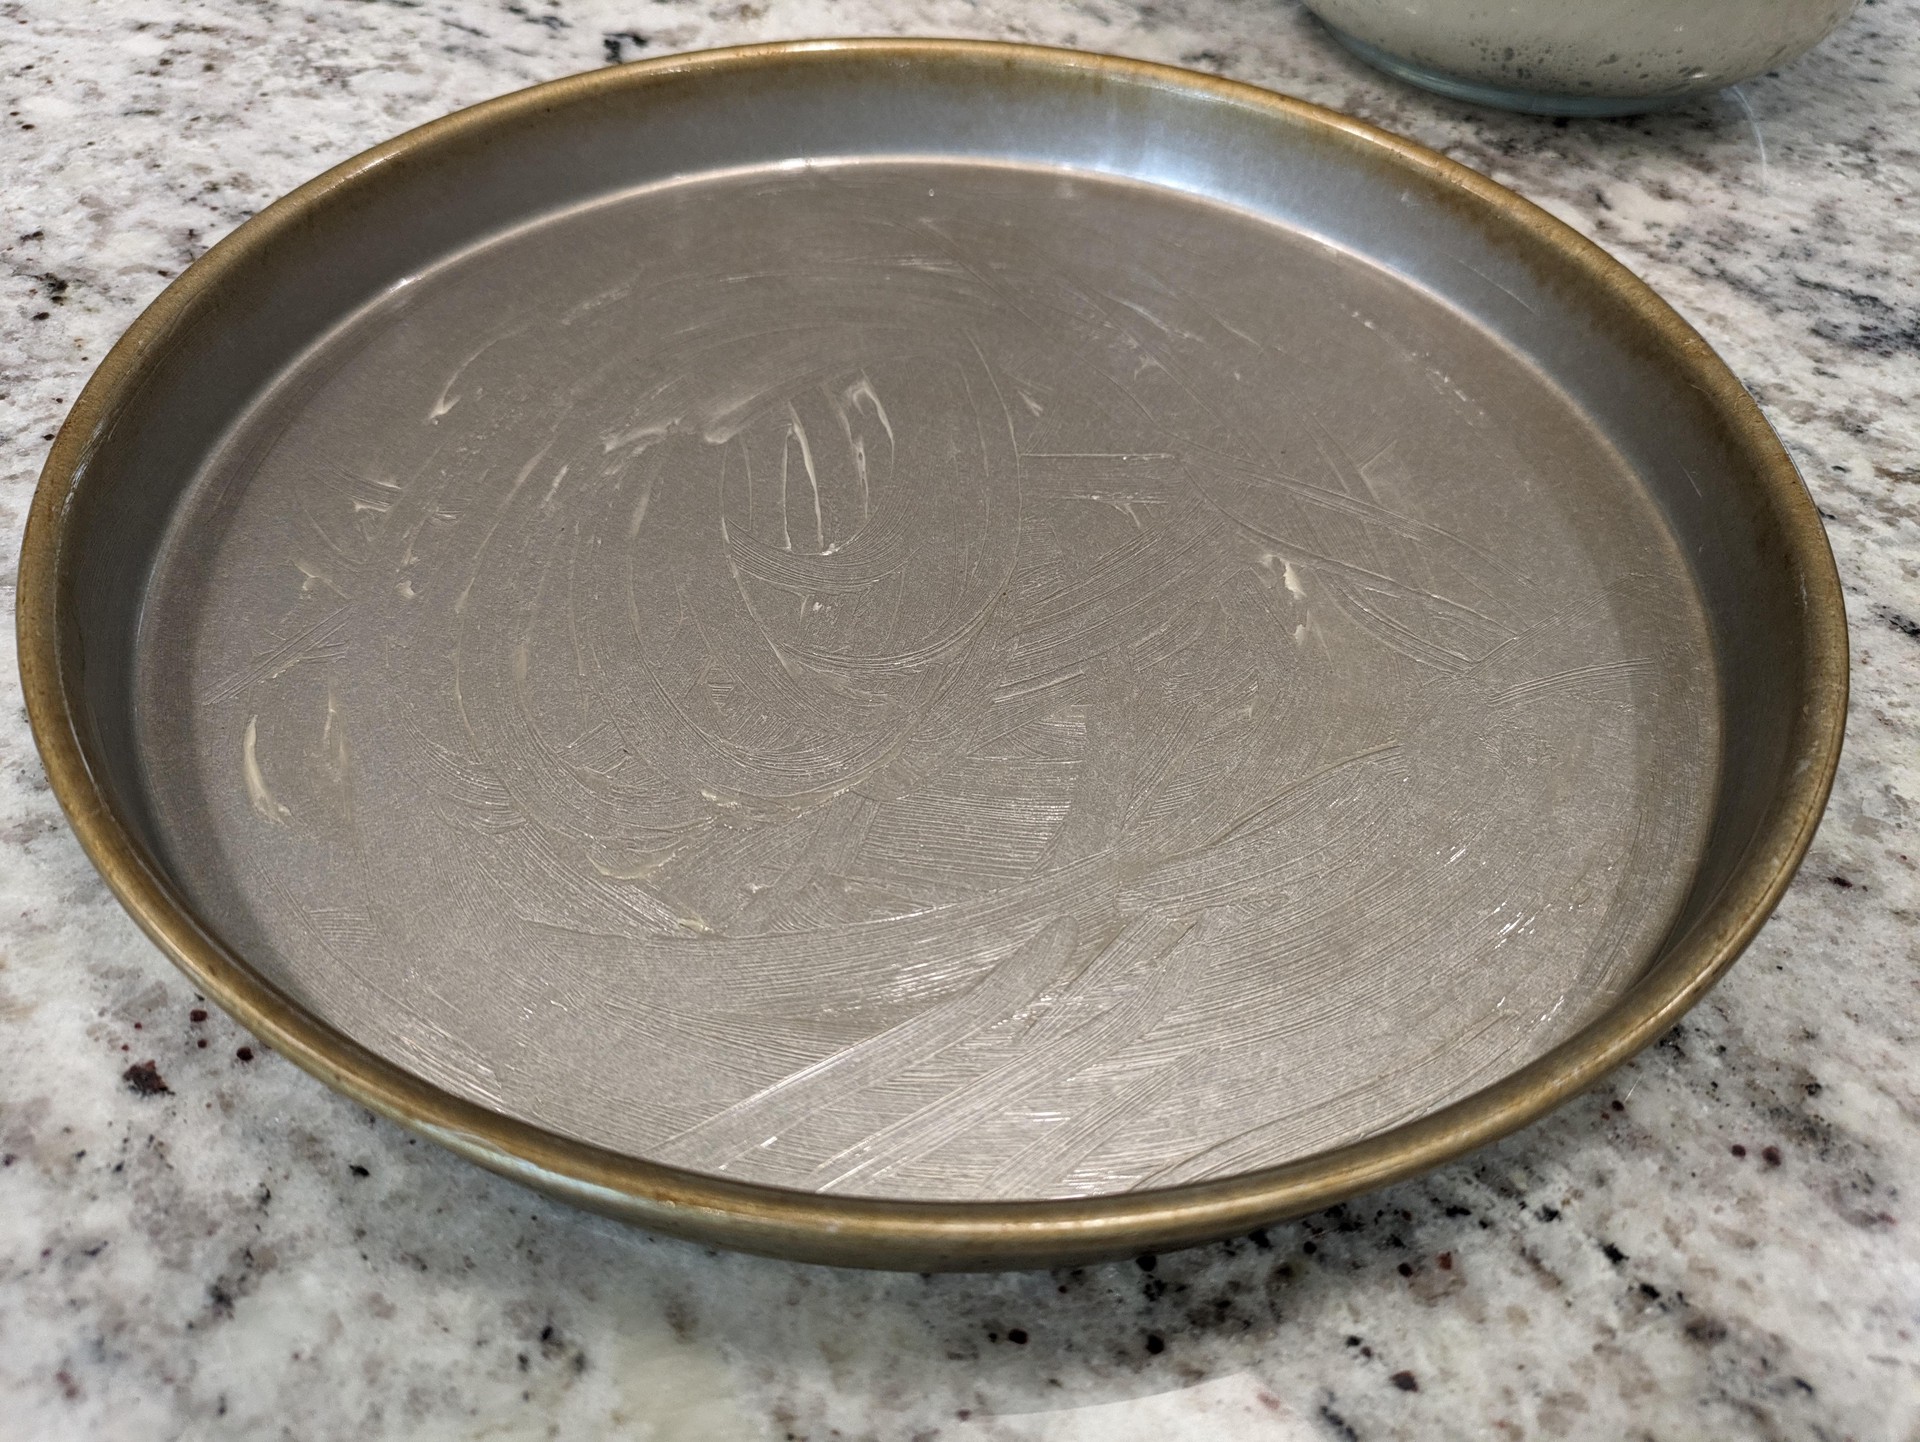
- Pans => my pans are the real deal from Bay State Restaurant Products Inc, in Brockton, MA. I ordered them over the phone from The Famous Bobby Owens, something like $80 for 4 pans including shipping. The pans are magic, they still have a mirror finish, and have never come anywhere close to sticking. That said, I’ve had decent results with cake pans, just use more Crisco for insurance
- Laced Edges => this refers to the burnt sauce and cheese that form on the edges since there’s no crust. Personal preference. I think the crust keeps things more intact and less messy to eat